


If you have multiple iOS devices within your family and your circle of friends then it is about time that you start using the iCloud Photo Sharing feature. This feature of iOS, which is fully integrated within the stock Photos app allows users to share select photos and videos with people of their choice. The best thing about having shared albums is that once you add a new photo to an album it is instantly shared with rest of the people on their iOS devices and Macs. Unlike many other photo sharing services iCloud’s Photo Sharing feature is completely free and the storage you use is not counted towards your limited iCloud storage, which is another reason why you should be using it.
Activating the iCloud Photo Sharing feature
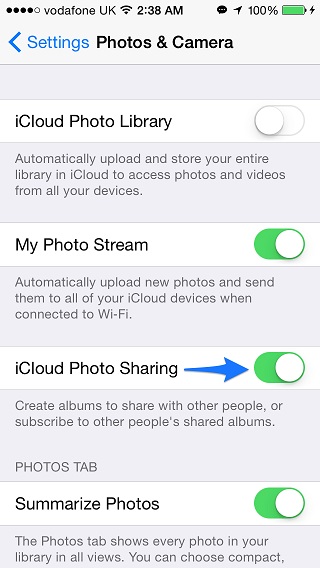
Before you can start using the Photo Sharing feature on your iOS device, you first have to activate it. To do so, open Settings and then tap on the Photos & Camera option. Inside this menu enable the ‘iCloud Photo Sharing’ option.
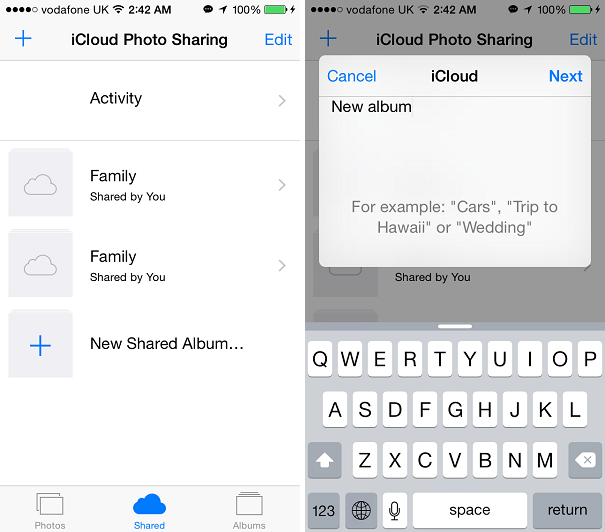
Now that Photo Sharing has been enabled on your iPhone, iPad or iPod touch it is now time to create your first shared album. To do so, open the Photos app and then tap on the ‘Shared’ tab from the button bar. Next hit the ‘New Shared Album’ and type the name. It is a good idea to name the album appropriately to reflect the kind of photos you are going to add in it. It will also make the life of people you share the album with easier. Try holidays, kids, trip to London etc.
Now tap on the ‘Next’ button and from the next screen add people you want to share your album with and hit ‘Create’.
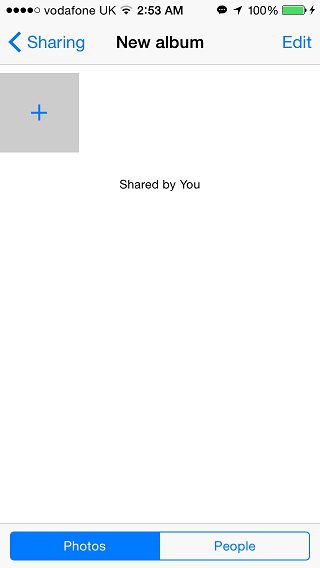
Once the album has been created open it and tap on the ‘+’ button to add photos to it. You have to tap on thumbnails of individual photos and videos in order to add them to your shared album.
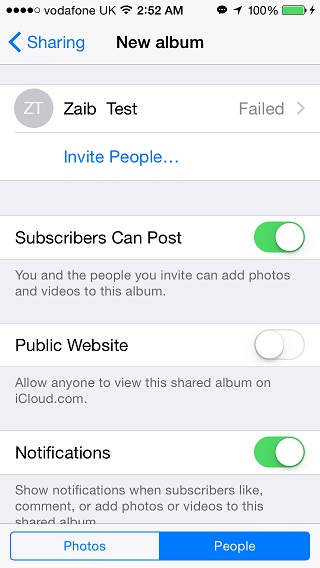
Even after a shared album has been created you can still add or remove people from it. Just tap on the album from the ‘Shared’ tab and then hit ‘Edit’. Next from the bottom bar tap on the ‘People’ tab. On this page you can remove subscribers and invite new people to your album. You can also enable the ‘Subscribers Can Post’ feature to allow people who are part of your album to share their photos with everyone.
Other options include ‘Public Website’, which when enabled will allow anyone to view your album from iCloud.com. The ‘Notifications’ option when enabled will send you alerts when someone likes, comments or add photos or videos to your album.
You can delete a shared album by going to the album and Edit > People > Delete Shared Album.


