


iOS 9.3 has brought an awesome new feature for all iOS devices, which allows users to add Touch ID protection to their notes. This means you can add password and Touch ID authorization requirement for certain notes in your Notes application. Anyone who wants to access your notes will need to either prove identity with a fingerprint scan or enter the password. This is a handy feature as many users have personal details saved in the Notes app, which is susceptible to people who gain access to your iPhone, iPad or iPod touch. Adding an extra layer of protection for Notes can prove to be invaluable for users.
If you have updated your device to iOS 9.3 and want to enable the Touch ID protection in the Notes app, and also on particular notes then we have got you covered. In this post we will share with you the instructions on how to enable this new feature and add protection to notes of your choice. So without any further ado lets get started.
Setting up password in Notes
Open the Settings app and go to ‘Notes’.
On the next page you will find the ‘Notes’ option, tap on it.
Now select a new password that you will remember, verify it by entering it again and then select a hint text.
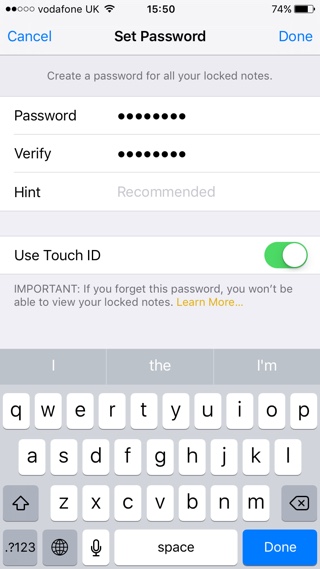
We also recommend that you enable the ‘Use Touch ID’ toggle for quicker access. Enabling this toggle will let you access locked notes by scanning your finger through home button.
Using the password protection in notes
Instead of adding the password to the whole Notes app, iOS allows users to enable password to particular notes. So after enabling the feature from Settings you need to open the Notes app and individually enable lock option for each note.
In order to add password and Touch ID protection to a note open it and then hit the ‘Share’ button from the top right corner.
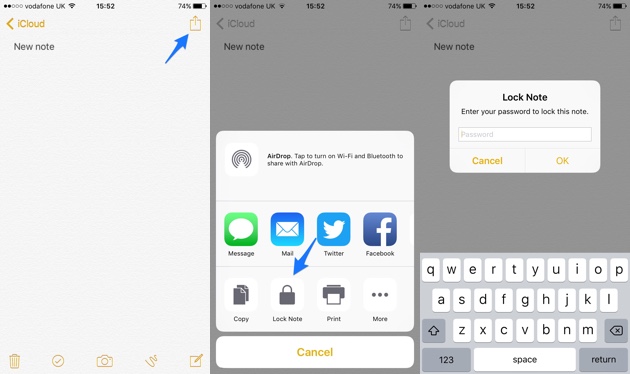
From the sharesheet tap on the ‘Lock Note’ button. iOS will now ask you to enter the password that you created in the setup process. Enter it to lock the note.
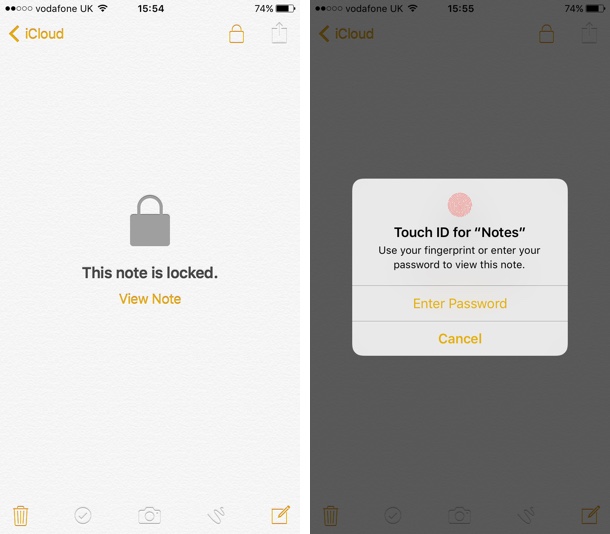
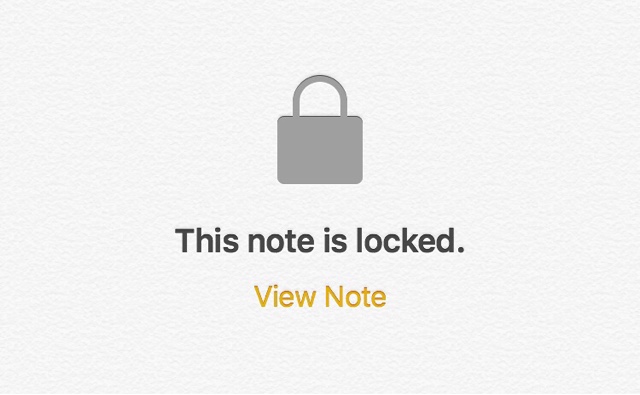
Once a particular note has been locked you will see a small lock glyph on the list page. To view the contents of the locked note simply open it, and then tap on the ‘View Note’ button. Now either scan your finger or enter the password in order to gain access to it.


