


So you have decided to upgrade your iPhone, iPad or iPod touch. Of course when you move from one device to another, you either give it away to someone or sell it. But before you get caught up in the excitement of getting a new iOS device, it is important that you make sure you have properly removed your personal information including photos, documents, calendars, contacts etc from the older device. In this post we will tell you how to properly remove your personal data from iPhone or iPad before selling or giving it away. These are the things you should do before selling iPhone or iPad.
After you have followed the steps below Find My iPhone, Passcode, Activation Lock and Restrictions will also get removed from your device. This is great since you have to remove all of these settings from your device anyway for it to be useable for the next person who owns it.
Things You Should Do Before Selling iPhone, iPad or iPod touch
Step 1: First of all make sure you properly back up your iPhone, iPad or iPod touch. You can do so by connecting it to iTunes or via iCloud.
Step 2: Once back up is complete on your iOS device open Settings > iCloud. Scroll down and tap on the ‘Sign Out‘ button.
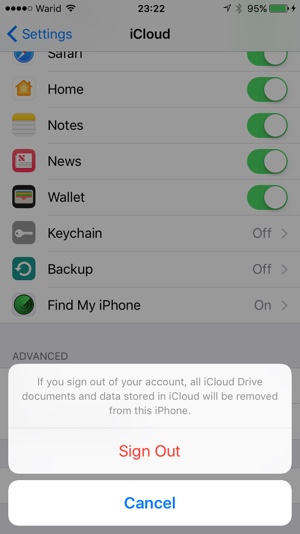
Step 3: Now tap on the Sign Out button again, and then tap ‘Delete from My iPhone‘ button. Now you will be asked to enter your iCloud password, enter it.
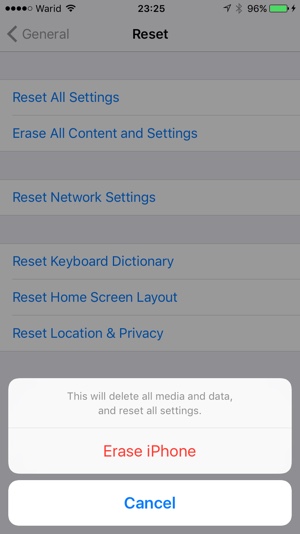
Step 4: Once you have signed out of iCloud from the device, Go to Settings > General > Reset > Erase All Content and Settings.
Note: If Find My iPhone is enabled, you will be asked to enter your Apple ID details. Passcode or Restrictions Passcode might also be required depending on your device’s settings.
Step 5: After entering the required information simply tap on the ‘Erase‘ button.
Your iPhone will reboot and set up screen will appear. These are the things you should do before selling iPhone, iPad or iPod touch. If you have anything to add to this post, then feel free to use the comments section below. We are listening!


