


So you have got an external drive and want to partition it to keep Mac and Windows data separately. If that’s the case then you have come to the right place. We will guide you through the whole process of partitioning your external drive to HFS+ (Mac OS Extended) and NTFS formats. It will allow you to use your drive with both Windows and Mac with maximum performance. Now you might be thinking why not FAT32? Yes, you can format Windows partition in FAT32 too but it has some limitations like file size cannot be larger than 4GB. However FAT32 has an edge over NTFS as well, which is you can read/write both from Windows and Mac into a partition with this format. If you want maximum performance without size limitations then go for NTFS.
There’s yet another format that is fully supported by both Mac and Windows. It’s called ExFAT, but again when it comes to larger data NTFS beats both FAT32 and exFAT.
How to partition an external drive to use separately with Windows and Mac
![]()
1. Open Disk Utility on your Mac.
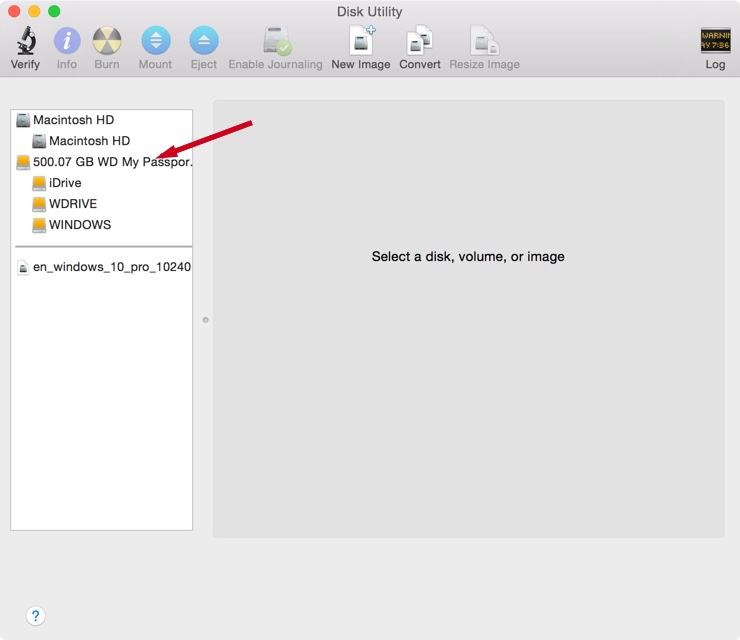
2. Once the Disk Utility window appears, select your external hard drive from the left pane.
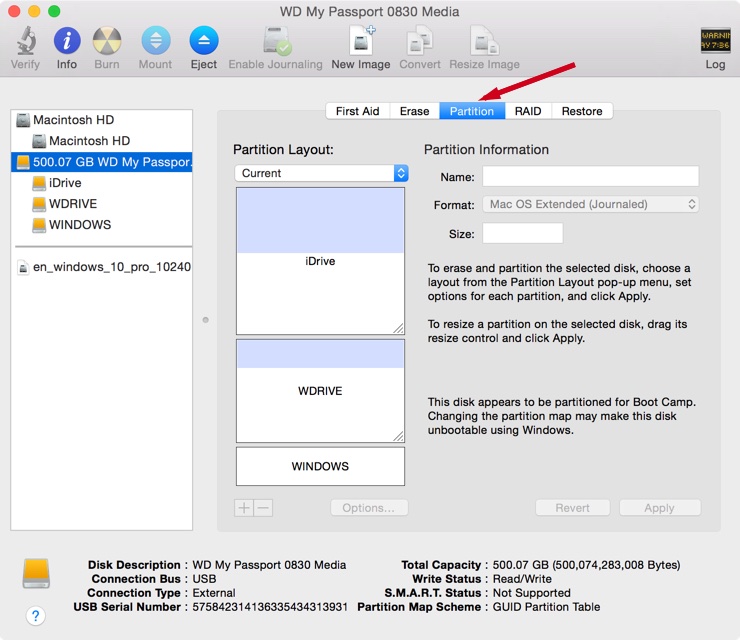
3. Select the partition tab as shown above.
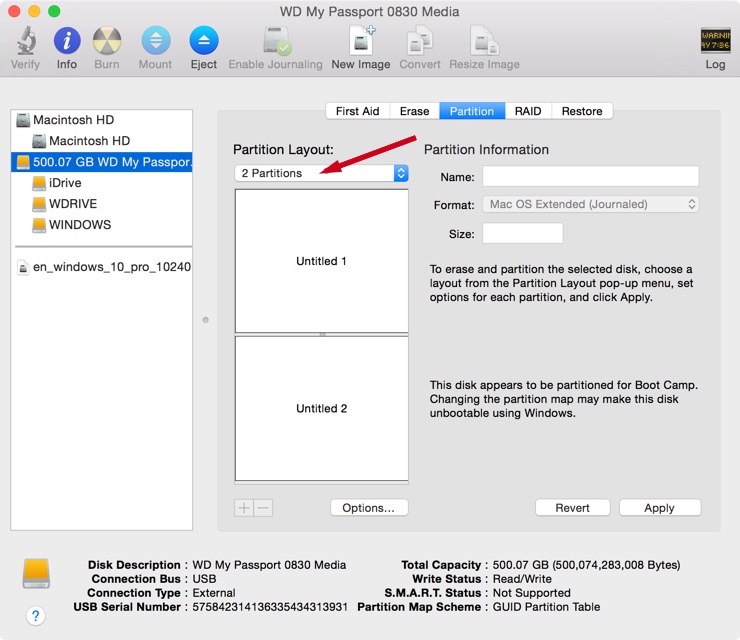
4. Now select the number of partitions according to your needs from the “Partition Layout” dropdown menu. (We have selected two for this tutorial.)
5. Now you can adjust the sizes of both partitions either by manually entering it in the “Size” box or by dragging the separator up and down.
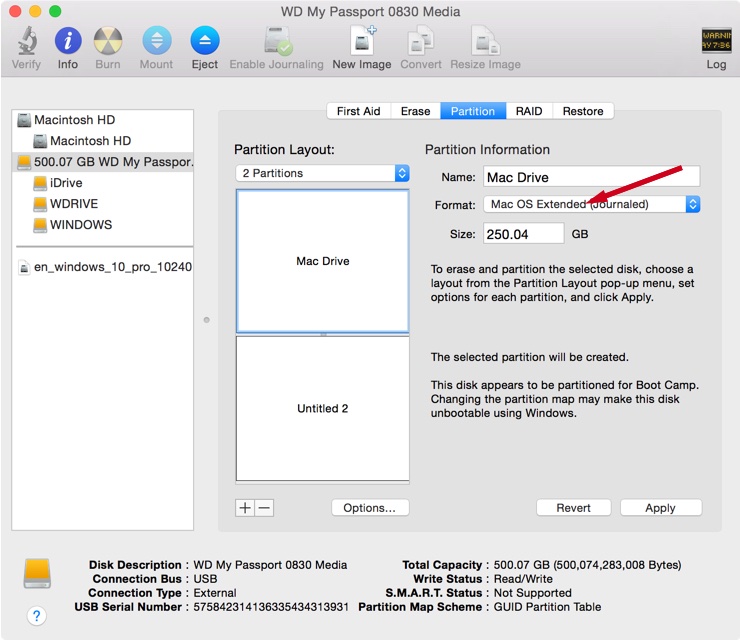
6. Now’s the real deal. Name the first partition as “Mac Drive” or any other name just to identify it easily. For the first partition select the “Mac OS Extended (Journaled)” format.
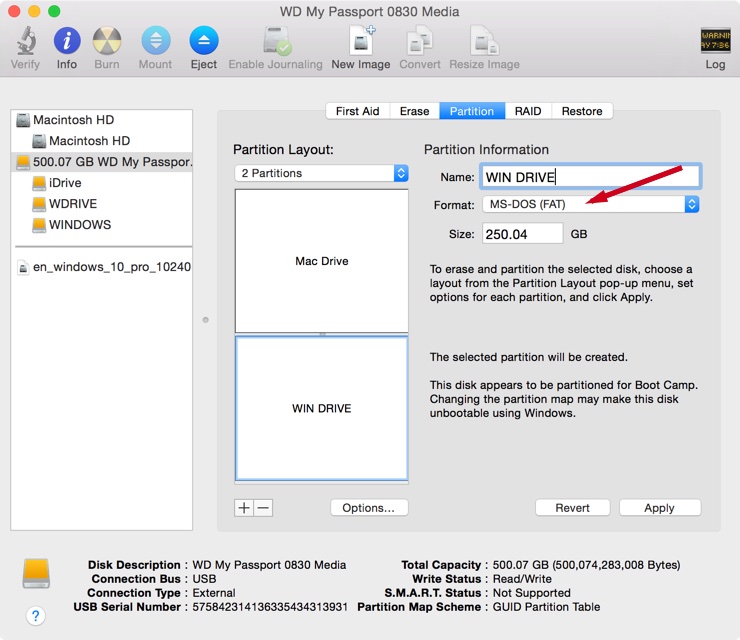
7. Now select the second partition, name it “WIN DRIVE” (or any other name you want) and change the format to “FAT32”.
8. Finally click “Apply”.
9. It will warn you that you’ll lose all your data. If you’re ready click the partition button.
10. You’re done with partitioning. Now next step is to eject it from your Mac and connect to Windows machine.

11. Once connected, right click the partition titled “WIN DRIVE” (or whatever you named it in step 7), and click “Format”.
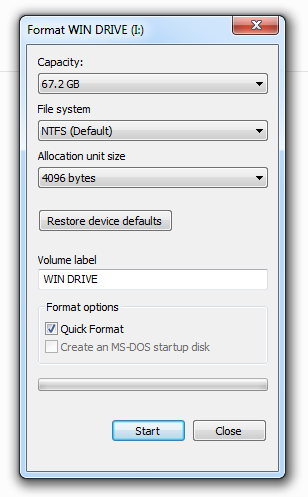
12. A little window will appear, change the format to NTFS, and click the “Start” button.
You’re done.


Just keep it ntfs and just install utility in Mac so it can read it too.