


iPhone has a really cool feature that allows Mac users to use their iPhone as their Mac’s microphone. This feature is part of iOS’s Continuity set of features that also allow users to use their iPhone’s camera as a Mac’s webcam.
Using iPhone as a Mac’s microphone is super easy and takes just a few clicks. In this guide, we will show you exactly how you can use this feature and make audio calls and voiceovers more convenient.
Before you begin, make sure your iPhone is running iOS 16 or later and your Mac is running macOS 13 Ventura or later.
Bluetooth needs to be enabled on both the iPhone and Mac. Both devices also need to be near each other.
Use iPhone as Mac’s microphone
- On your Mac, click on the Apple logo from the top menu bar.
- From the drop-down menu, click on System Settings.
- From the System Settings app, click on the Sound option from the side pane.
- Under the Output & Input heading, look for the Input tab and click on it.
- From the list of devices, click on your iPhone’s name.

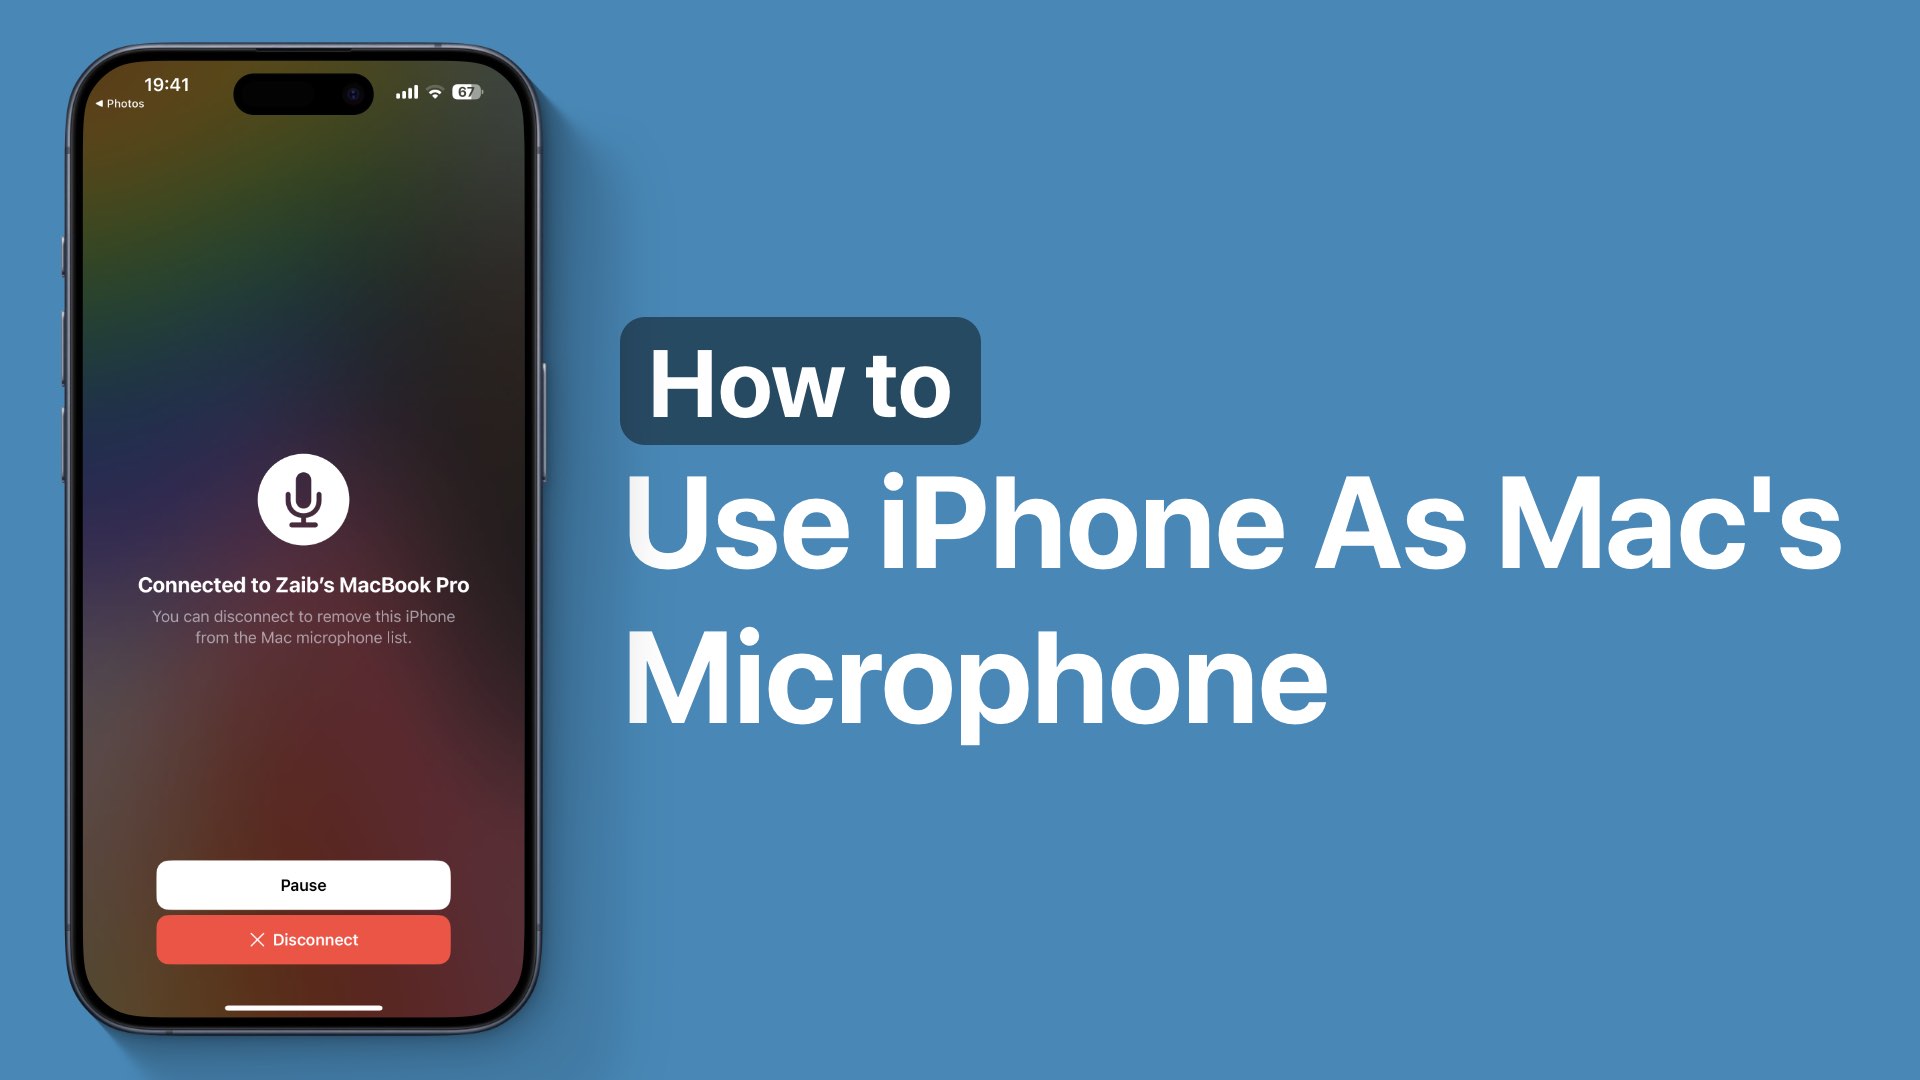
As soon as you click on the iPhone’s name, you will get notified on your iPhone that it is being used as the Mac’s microphone. You can tap on the Pause button to temporarily pause using it as the microphone or hit the Disconnect button to discontinue the connection.
That’s it, this is how you can use your iPhone as your Mac’s microphone and make phone calls, voiceovers, and voice recordings more conveniently.

