


How do I recover overwritten files on Mac and is it possible to retrieve them? If you’re furiously typing these queries in Google search stop right there. If you’ve accidentally replaced file and don’t know how to recover it on Mac, don’t think yourself a goner. You’ve landed on right page.
This article explains why files get overwritten on Mac and provides five methods to recover them. Besides, you’ll find useful tips for preventing file loss on your Mac due to overwriting. So, stick till the end!
Part 1: Is It Possible to Recover Overwritten Files on Mac?
Yes, it’s possible to retrieve overwritten files if you’ve accidentally replaced file and want to learn how to recover them on Mac. Restore from a backup like iCloud or Time machine, or automatically with help of a third-party data recovery software. You can also recover replaced file on Mac with in-built restoration features of apps. In extreme cases, you may need professional data recovery services to recover overwritten files on Mac.
Part 2: How to Recover Overwritten/Replaced Files on Mac?
Here are five manual and automatic methods for Mac replaced file recovery depending on various scenarios. Each method’s success will depend on different conditions, so try them out according to situation in which your data was overwritten/replaced:
Method 1: Use 4DDiG to Recover Replaced Files on Mac
The best way to recover overwritten files on Mac is via a third-party tool like 4DDiG Mac Data Recovery. It can retrieve data from various data loss scenarios like overwriting, formatting, corruption, permanent deletion, etc with high success. Explore more of this tool’s features:
- Recover data lost due to crashed systems, CPU failure, emptied trash bin, software errors, lost partitions, virus attacks, etc.
- Restores 2000+ file types to Mac-based internal/external storage devices such as hard disks, SD cards, USBs, digital cameras, etc.
- No need to disable System Integrity Protection.
- Offers free preview of files after restoration.
- Provides both Quick and Deep scanning modes.
- Compatible with old and latest macOS versions such as Sonoma, Ventura, etc.
Here’s how to recover overwritten files on Mac with help of this tool:
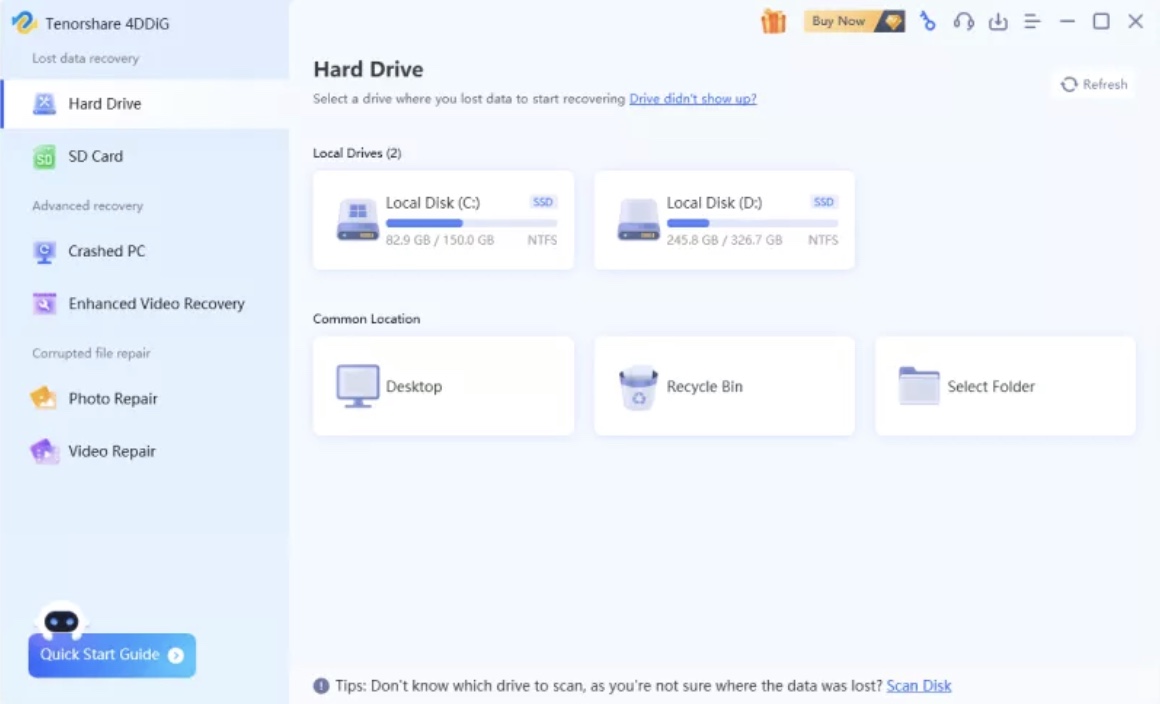
Step 1: Install 4DDiG-Mac on your Mac PC and choose a storage where you’re files were overwritten/replaced.
Step 2: Hover mouse over desired location and click Scan option that pops up in right corner to initiate search for lost files.
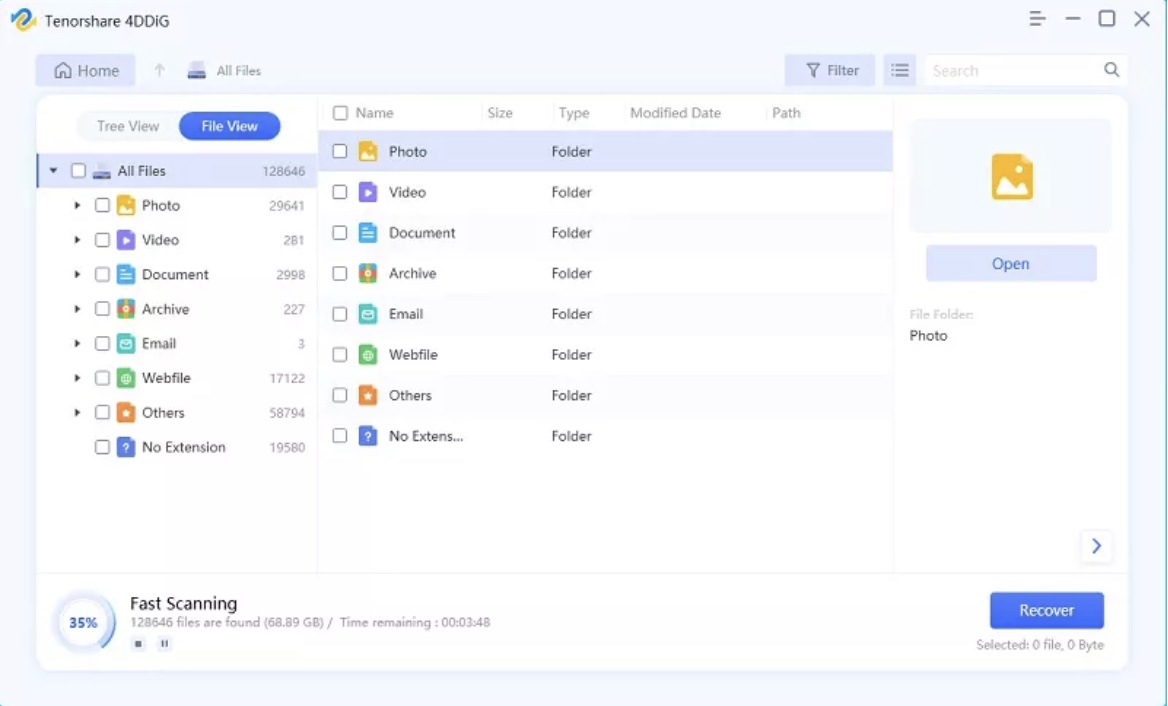
Step 3: The scan will take some time. Once done, preview file types such as “Documents,” “Photo”, “Video.” Or look for categories like “Lost Location,” “Existing Files” in “Tree View.”
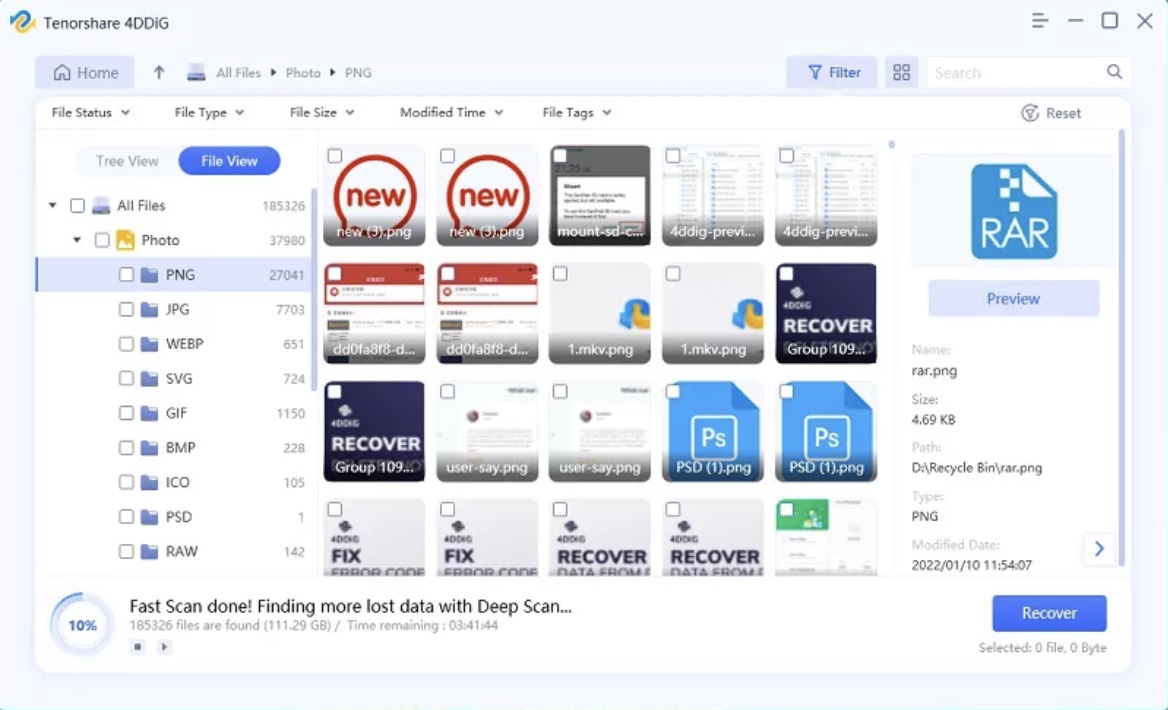
Step 4: Click “Recover,” choose a location to save found files, and avoid saving them to partition where you lost them to prevent overwriting again.
Method 2: Utilize Time Machine Backup
You can also recover replaced file on Mac if you’ve activated Time Machine before you accidentally replaced file. Unlike real-time syncing in cloud storage, Time Machine functions as a built-in backup tool, enabling Mac replaced file recovery from previous versions of files. Here’s how to recover overwritten files on Mac with Time Machine:
Step 1: Open “Finder” and look for folder containing replaced file.
Step 2: From top-right corner choose “Time Machine” and then select “Enter Time Machine.”
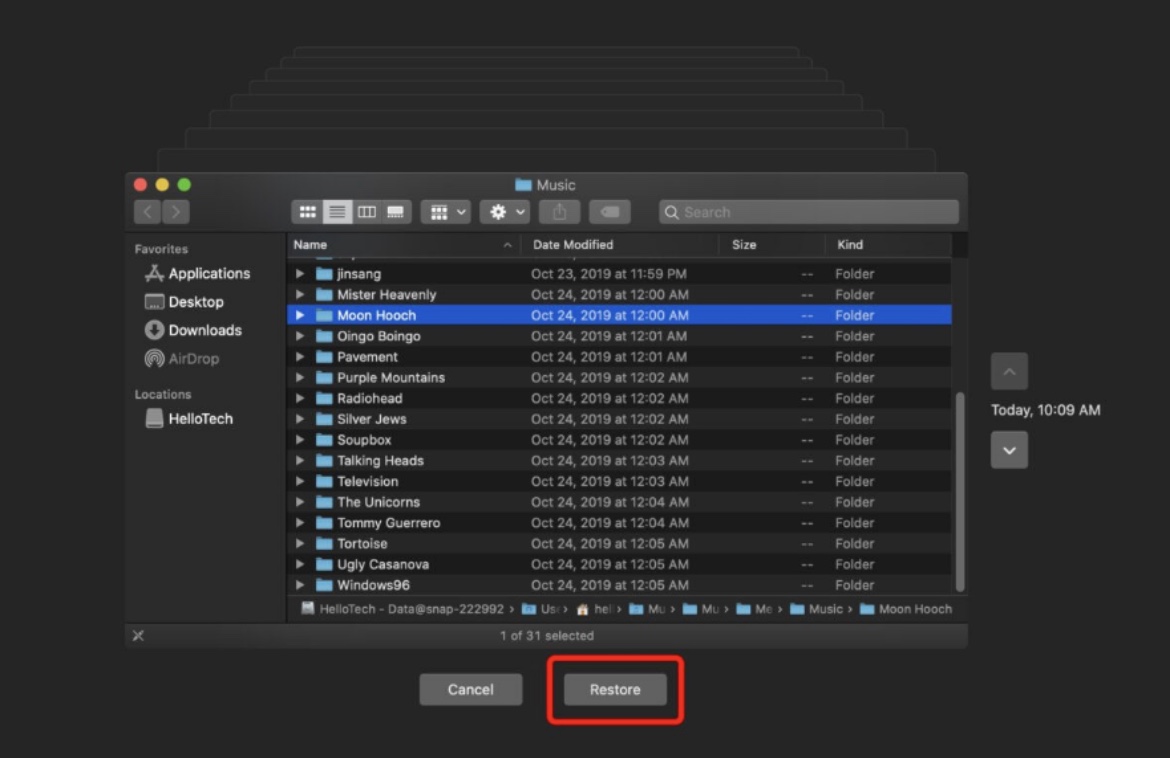
Step 3: Navigate back to point when original file was there by using up arrow.
Step 4: Choose “Restore” and decide whether you want to keep previous file, current one, or both.
Method 3: Use the Built-In Restore Feature
Modern applications like MS office often come equipped with restore functionalities. Thus if you’ve accidentally overwritten a file in an app, see if it provides any restoration option to recover replaced file on Mac. Follow steps below:
Step 1: Open respective app and check if it has a restoration feature from its top navigation bar.
Step 2: If there is, click “File” and select “Revert to” or a similar option to access version history of replaced file.
Step 3: Then choose “Browse All Versions” to look through previous versions and restore your overwritten file in version you want.
Method 4: Recover replaced files on Mac via iCloud
If you haven’t activated Time Machine backup before you replaced files another way to recover overwritten files Mac is via a cloud backup. iCloud, a widely used backup and recovery tool for Apple devices like Macs, stores files on a remote server and keeps your deleted or overwritten files in a recovery folder for 30 days.
So, you can restore them any time. However, you must have backed up your Mac data on cloud before files were overwritten for the method to be successful. Here’s how to recover overwritten files Mac with iCloud:
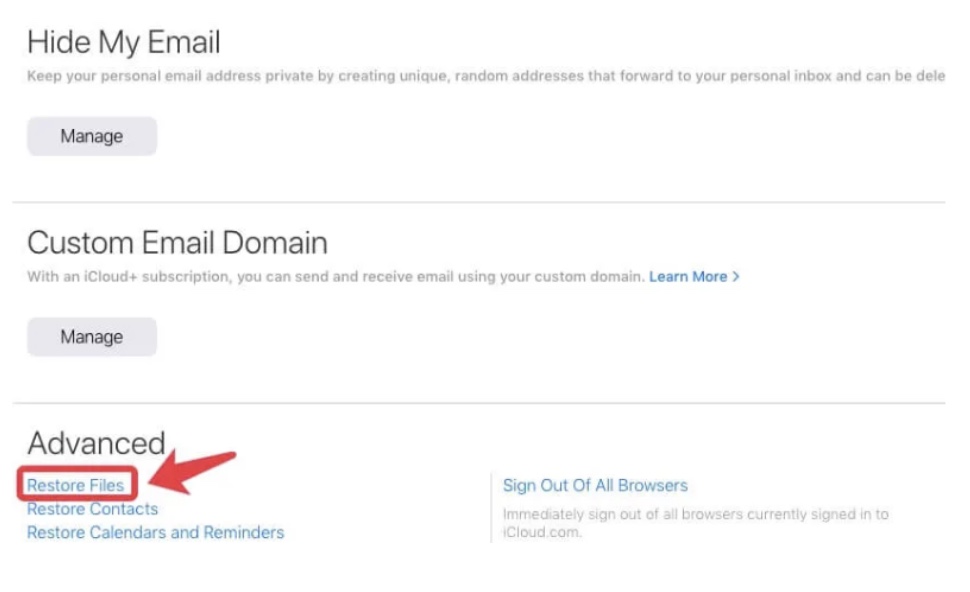
Step 1: Visit iCloud’s official site, sign in with your Apple ID, and press “Account Settings.”
Step 2: Click “Restore Files” at bottom and view previous versions of replaced files. Choose and restore specific overwritten files.
Method 5: Hire Professional Data Recovery Services
Are you still pondering over “How do I recover overwritten files on Mac” query? If all else fails to restore your replaced/overwritten files, look for professional Mac overwritten/ replaced data recovery services. They use advanced software and methods that surpass typical recovery approaches for individuals.
These tools can retrieve data from seriously damaged storage devices or even recover overwritten files in certain cases. Moreover, experts can perform a thorough restoration, analyzing cause of data loss, assessing damage extent, and selecting best recovery method tailored to your situation.
Part 3: Why Are Files Overwritten on Mac?
Your files may get overwritten due to various reasons, and whether you can recover overwritten files on Mac depends on circumstances. Here are a few causes of replaced/overwritten files on Mac:
Human Mistakes
Files don’t overwrite on their own. Some common blunders include mistakenly saving a new file over an existing one, choosing wrong file to overwrite, or unintentionally saving changes to a file.
File Deletion and Storage Overwriting
Apart from manual file-saving errors, overwriting can also refer to replacement of storage space. When a file is deleted, it’s not immediately removed from hard drive. Instead, it’s space is now marked as available for overwriting. If new data is stored in same location, recovering original files becomes much more challenging.
Part 4: Useful Tips to Prevent File Loss on Mac
If you’ve accidentally replaced file, other than knowing how to recover it in Mac, try some tips to prevent this from happening in future:
- Backup Regularly – Make sure you’ve got a backup. Use Time Machine or other tools to back up your files consistently, making it easy to recover older versions if needed.
- App Versions – Make most of version feature in apps that support it. Apps like Microsoft Word and Apple’s Pages often keep track of document history, allowing you to go back to previous versions.
- Double-Check Saves – Take a moment to double-check before saving changes or creating a new file. Confirm that you’re working on right file to prevent accidental overwrites.
- Cloud Storage Versions – Safeguard important files in cloud services with version history. iCloud and Dropbox are examples offering this feature, enabling retrieval of earlier file versions.
Final Words
So, there you have it, the answer to your query, “How do I recover overwritten files on Mac, and whether it’s possible to retrieve them?” We’ve shared five solutions in this post to recover overwritten files on Mac depending on various situations.
However, a tool like 4DDiG Mac Data Recovery can retrieve files, regardless of any situation. Whether files are overwritten, replaced, lost, hidden, deleted, formatted, corrupted, etc it offers a high success rate and doesn’t require any manual steps.

