


iCloud Drive provides an effective way for Apple users to store their files, media and documents in the cloud. What makes iCloud Drive convenient is that it is available on all Apple devices and the web. So no matter if you are on your iPhone, iPad, Mac or using a web browser, you can get a quick access to your data no matter where you are.
With iCloud Drive Mac users can store their Mac’s Desktop and Documents folders to the cloud. When they have done so they can easily access files in these folders on other devices. You can even start a document on your desktop and later access it on your iPad even when you are nowhere close to your Mac.
When you enable Desktop and Documents Folders for iCloud Drive all of your files are moved to iCloud. New files that you add to these folders are also automatically uploaded to iCloud Drive and become accessible on all of your devices.
In this guide we will show you how you can enable Desktop and Documents Folders feature for iCloud Drive and access your Mac’s desktop and documents folder files on iPhone and iPad.
Set up iCloud Drive on iPhone, iPad or Mac
Before you begin it is important that you set up and enable iCloud Drive on your iPhone, iPad and Mac. You can find the steps for these below.
If iCloud Drive is already set up and running on your devices, then you can proceed to the next section of this article.
Set up iCloud Drive on your iPhone and iPad
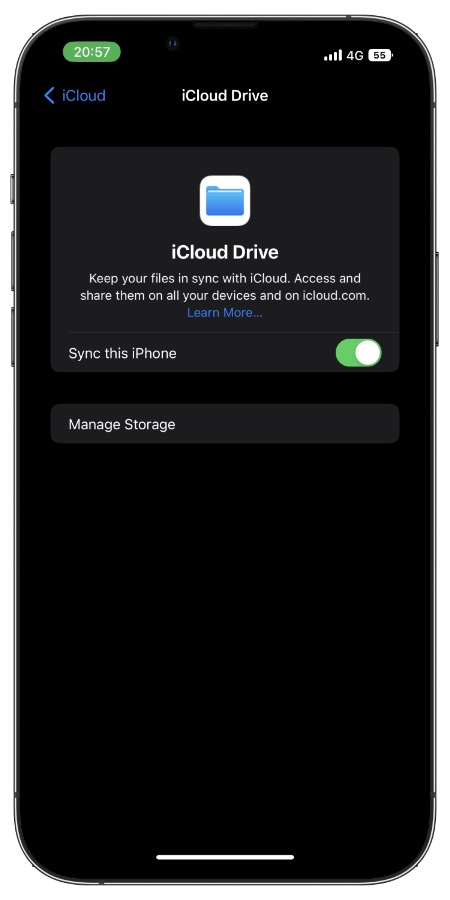
- On your iPhone or iPad open Settings and tap on your name from the top.
- On the next screen tap on iCloud option.
- Then turn on the features that you want to use. Make sure iCloud Drive is enabled by tapping on it and then enabling the ‘Sync this iPhone‘ toggle.
Set up iCloud Drive on your Mac
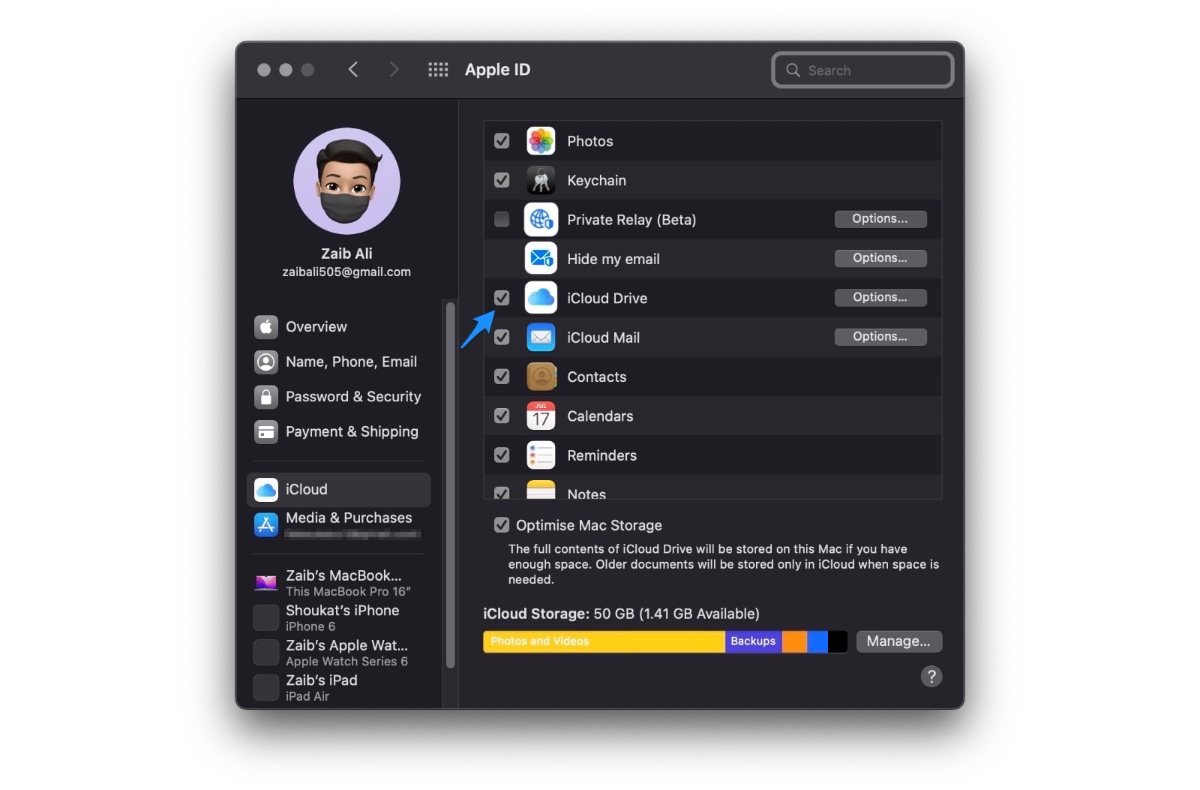
- On your Mac click on the Apple logo from the top menu and then click on System Preferences.
- Next click on Apple ID and then on iCloud.
- Now make sure you select the iCloud Drive by clicking on the checkmark button next to it.
Enable Desktop and Documents Folders for iCloud Drive
You can follow the steps below in order to turn on Desktop and Documents for iCloud Drive and make these folders accessible on all Apple devices.
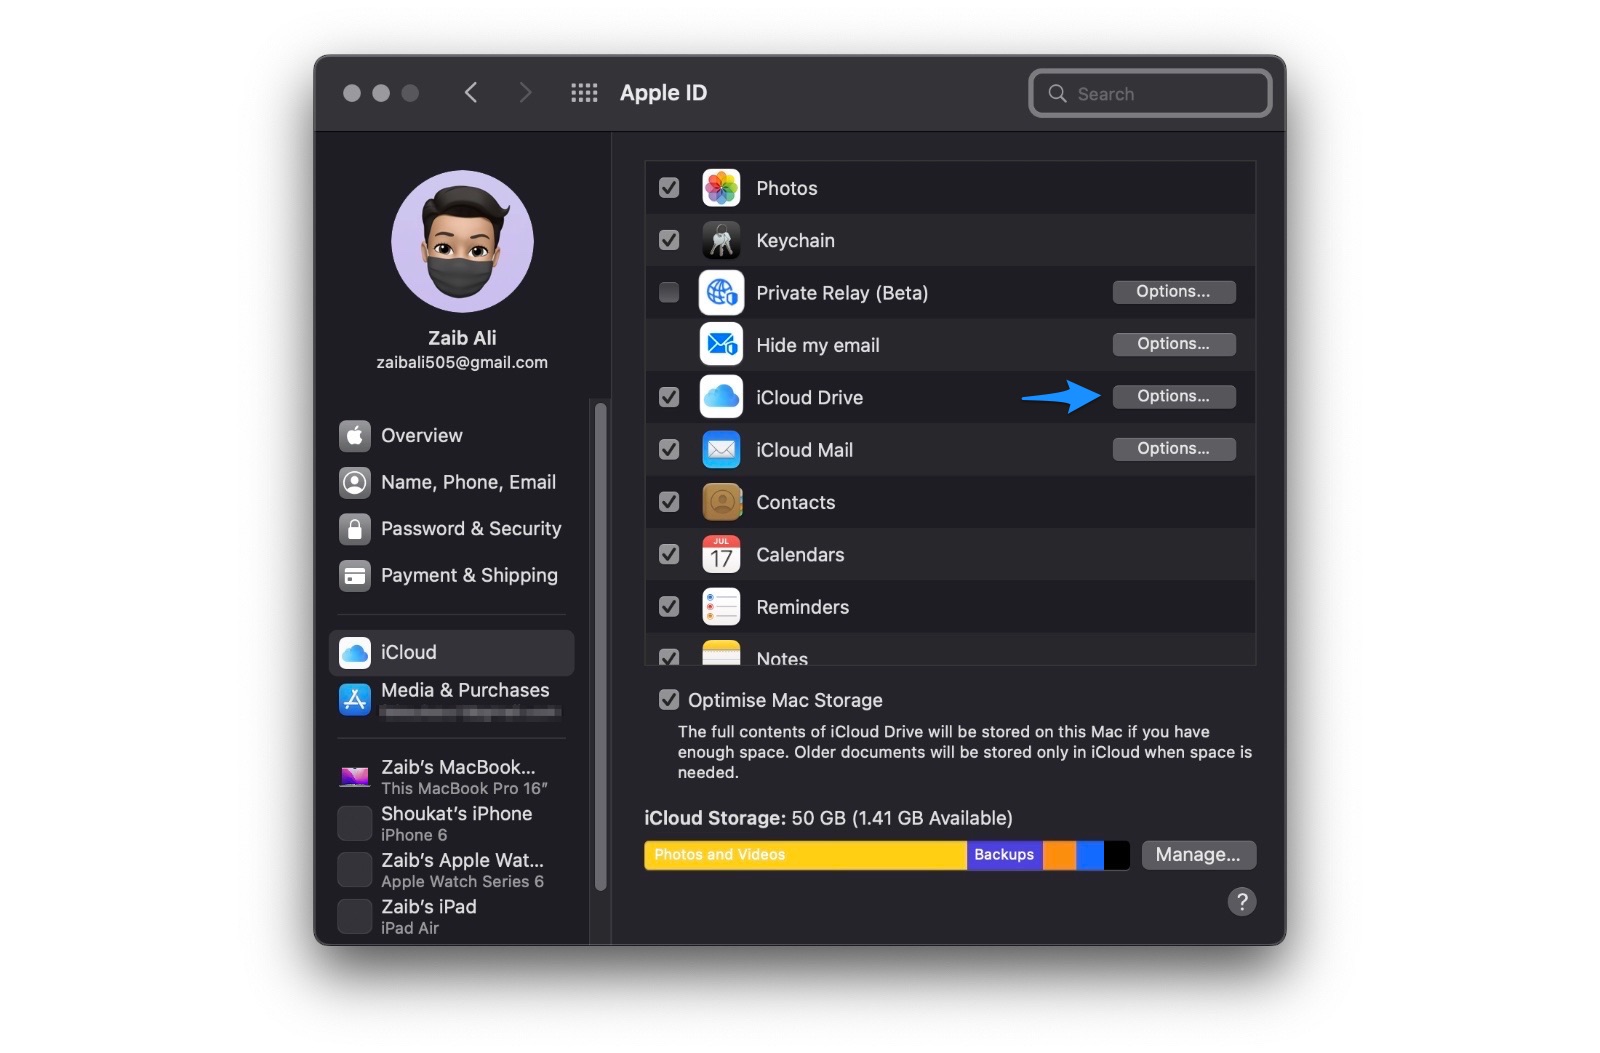
- On your Mac click the Apple logo from the top and then click on System Preferences.
- Now click on Apple ID and then on iCloud.
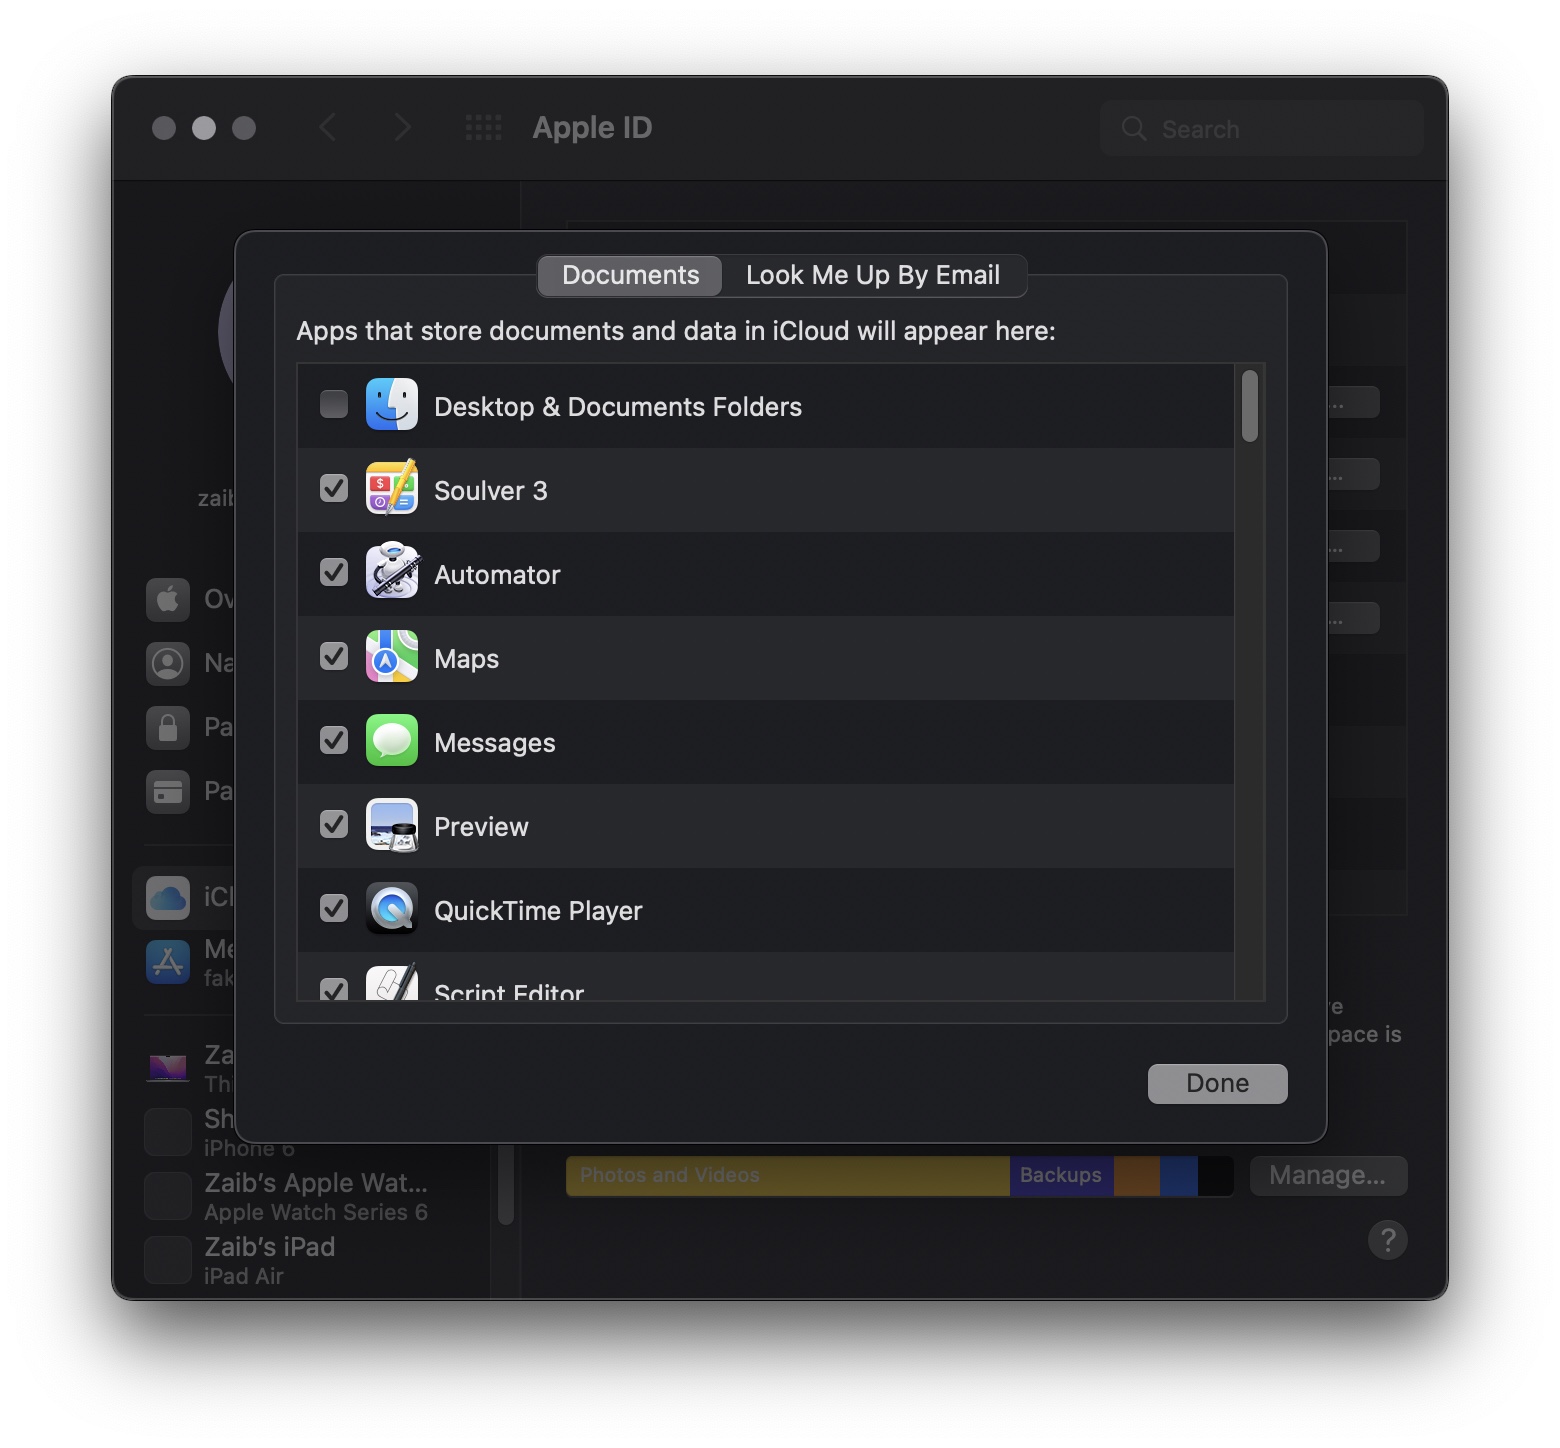
- Make sure iCloud Drive is enabled and then click on ‘Options‘ button.
- Next select Desktop & Documents Folders by clicking on the checkmark button next to it.
- Finally click on the Done button.
Access Desktop and Documents Folders over iCloud Drive
After sharing your Desktop and Documents folders on iCloud Drive, you can access these folders on other Macs, iPhone, iPad and iCloud.com.
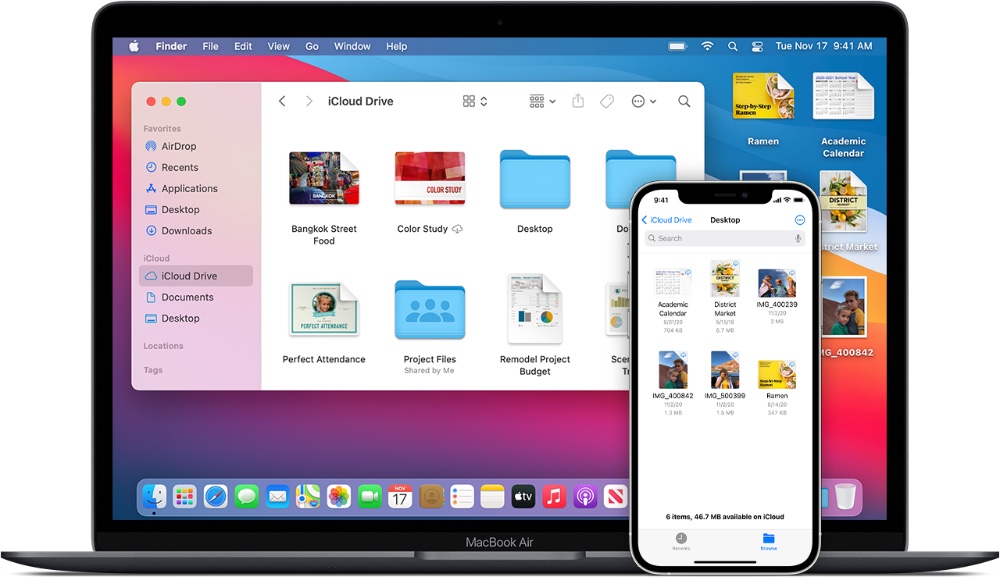
On Mac: These folders can be accessed under iCloud section of the Finder sidebar.
On iPhone and iPad: On these devices you can find Desktop and Documents folders by opening the Files app.
On the web: On the web you can access Desktop and Documents folders by going to iCloud.com website from any web browser and then clicking on iCloud Drive option. Then double click on the Desktop or Documents folder.
Turn Off Desktop and Documents Folders on iCloud Drive
You can quickly disable your Mac’s Desktop and Documents folders on iCloud Drive by following these steps.
- On Mac open System Preferences and click on Apple ID.
- On the next screen click on the Options button located next to iCloud Drive.
- Uncheck the button located next to Desktop & Documents Folders option.
- Click on the Done button.
When you turn off Desktop and Documents Folders for iCloud Drive, the files that are already stored on iCloud Drive will remain on the drive and remain accessible on all devices.
On your Mac new folders for Desktop and Documents will be created in the home folder. You can then manually move files from iCloud Drive to the new Desktop and Documents folders if you like.
Same thing happens when you turn off the iCloud Drive feature or sign out of your iCloud account from your Mac.

