


Are you tired of calls, messages, and notifications interrupting you while you sleep, work, or when you just need some sleep? In this guide, we will show you how you can activate Do Not Disturb mode on your device and take advantage of it on your iPhone 17.
Here you will learn how to turn Do Not Disturb mode on or off on your iPhone, and a quick tip to control it even faster. We will also show you how you can configure this feature and create an automation schedule for Do Not Disturb mode.
Enable or disable Do Not Disturb from Control Center

The quickest and easiest way to enable or disable Do Not Disturb mode on iPhone is through the Control Center. Here’s how you can do this.
- First, unlock your iPhone.
- Swipe down from the top right corner of the screen to access Control Center.
- Look for the Focus button and tap on it.
- From the list, tap on the Do Not Disturb option to enable this mode.
You can follow the same steps and tap on the Do Not Disturb button to disable the mode.
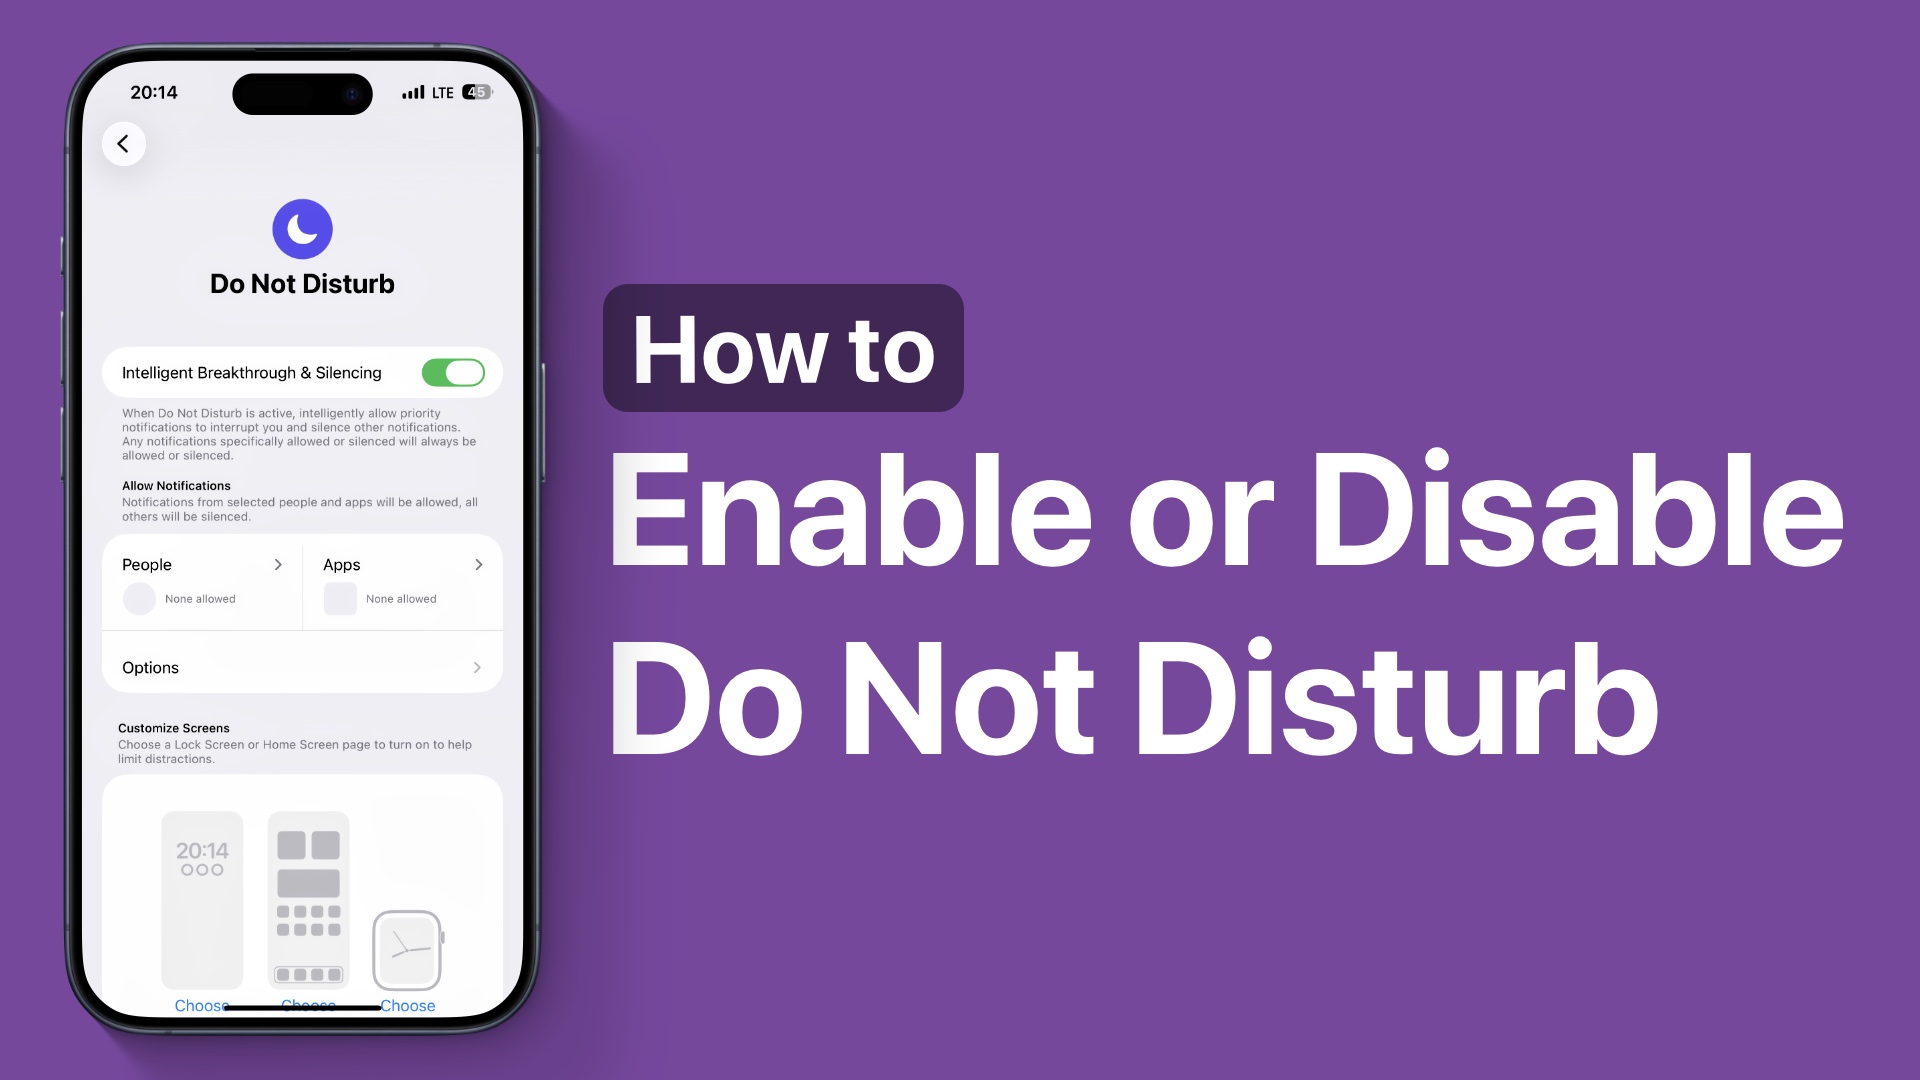
Configure Do Not Disturb from Settings

The Settings app lets you configure Do Not Disturb mode and change its behaviour. Here’s how you can do it.
- Launch the Settings app.
- Go to Focus.
- Here, tap on the Do Not Disturb option.
- On the next page, you can configure things like allowed notifications, create schedules for enabling and disabling Do Not Disturb mode, add filters, and more.
Add a schedule to automate Do Not Disturb mode

You can create a schedule to automate Do Not Disturb mode on your iPhone.
- Open the Settings app and tap on Focus.
- Next, tap on the Do Not Disturb option.
- Scroll down and tap on Add Schedule.
- Tap on Time and select the time you wish to enable and the time you wish to disable Do Not Disturb mode.
That’s it, this is how you can enable or disable Do Not Disturb mode, automate it, and create an automation schedule for Do Not Disturb mode.

