iPhones have had eSIM feature for a while now, however the feature truly got into spotlight when Apple removed the SIM card slot for iPhones in the US with the release of iPhone 14.
In this article, we will guide you on how to remove eSIM from iPhone. Before you begin make sure you have transferred your eSIM to your new iPhone before performing these steps. The process of eSIM removal from iPhone is permanent.
It might be a smart idea to remove the eSIM from your iPhone. Having an eSIM does not pose any disadvantages, so there is no need to delete it.
However, in the following cases, erasing your eSIM may be necessary:
- Your eSIM’s number was transferred to another iPhone.
- You are planning to sell, trade-in, or give away your device
As a troubleshooting step, do not erase your eSIM unless instructed to do so by your network provider.
If you remove eSIM from iPhone, you will need to contact your network provider for a new one. You will then need to set up your new eSIM.
To Erase eSIM from iPhone
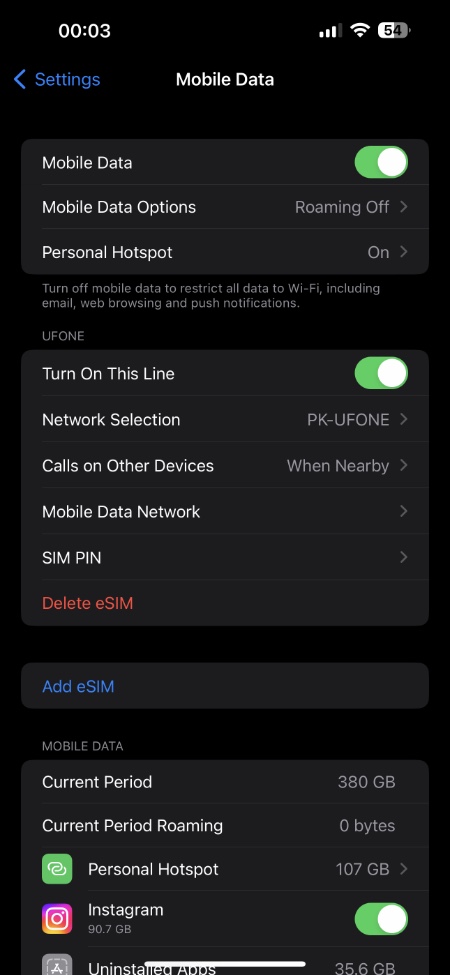
Step 1. Go to Settings app.
Step 2. Select either Cellular or Mobile Data.
Step 3. Tap on the plan you wish to delete.
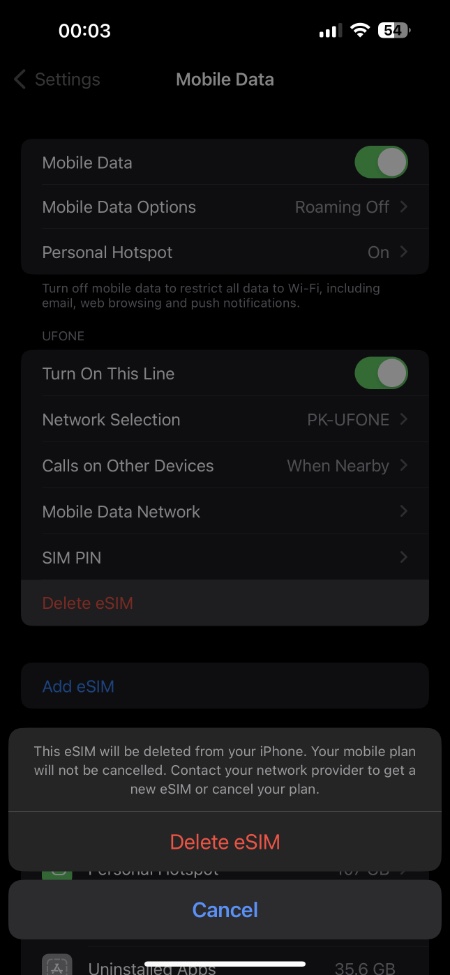
Step 4. Finally, tap Delete eSIM.
Step 5. Confirm by tapping on Delete eSIM once again.
You can choose to delete eSIM from iPhone using the steps above. eSIM is also removed from the iPhone when you Erase Content and Settings from your iPhone.
Deleting an eSIM from iPhone does not cancel your mobile data plan. In order to cancel your mobile data plan, you must contact your network provider.
That’s All Folks
As long as you follow the above step-by-step guide, you will be able to successfully remove your selected eSIM card from your iPhone. To transfer your eSIM plan to another iPhone, you will need to install it on another device before removing it from your existing one.
Feel free to leave your queries in the comment box below.


