Looking for help to transfer from Android to iOS? In this article, we will walk you through how to use the Move to iOS app to switch from your Android smartphone to your new iPhone, iPad, or iPod touch.
Table of Contents
- What You Need to Do Before You Begin…
- What’s Next?
- Step 1: Start on your new iPhone
- Step 2: Choose Move Data from Android
- Step 3: Launch Move to iOS app
- Step 4 – Get the code from iPhone
- Step 5 – Enter the code on Android device
- Step 6 – Connect to a temporary Wi-Fi network
- Step 7 – Select Your Data
- Step 8 – Set Up Your iPhone
- Finishing up
- Need Help with the Transfer?
What You Need to Do Before You Begin…
- Make sure Wi-Fi is enabled on your Android device.
- Connect your newly purchased iOS device and your Android device to the power source.
- Your brand-new iOS device must be able to accept all the content you’re moving, including anything on your external MicroSD card
- On your Android device, update Chrome to the latest version if you want to transfer your Chrome bookmarks.
What’s Next?
This step-by-step guide will show you how to move data from android to iPhone, including Photos, Music, Apps, and Contacts without losing any crucial information.
Step 1: Start on your new iPhone
Make sure your new Apple device is turned on and placed close to your Android device. Follow the instructions on your Apple device’s screen to set it up.
Follow the onscreen instructions after tapping Set Up Manually on the Quick Start screen.
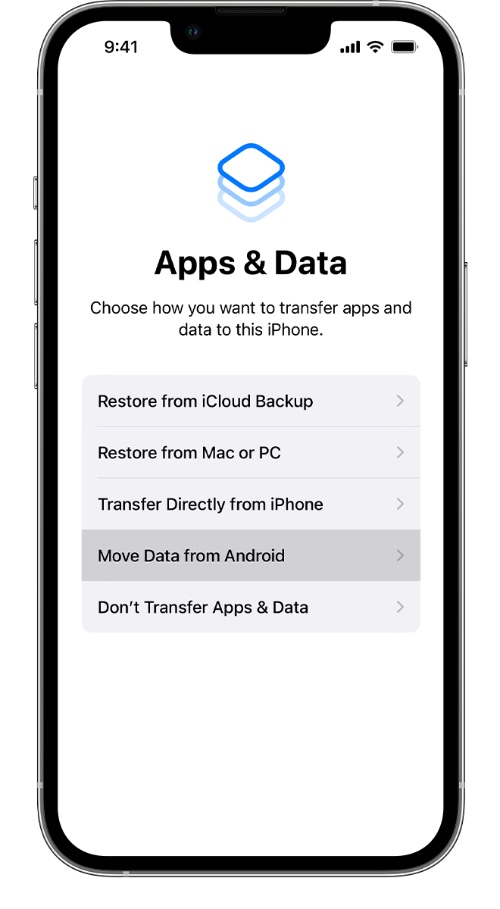
Step 2: Choose Move Data from Android
Find the Apps & Data screen. After that, tap Move Data from Android. (If you have already completed the setup, you need to erase your iOS device and start over. If you do not want to erase, simply transfer your content manually.)
Step 3: Launch Move to iOS app
Open the Move to iOS app on your Android device. If you don’t have the Move to iOS app or android to iPhone transfer app, you can scan a QR code with your Android device’s camera to open the Google Play Store. The terms and conditions will appear after you tap Continue. You can proceed by tapping Agree.
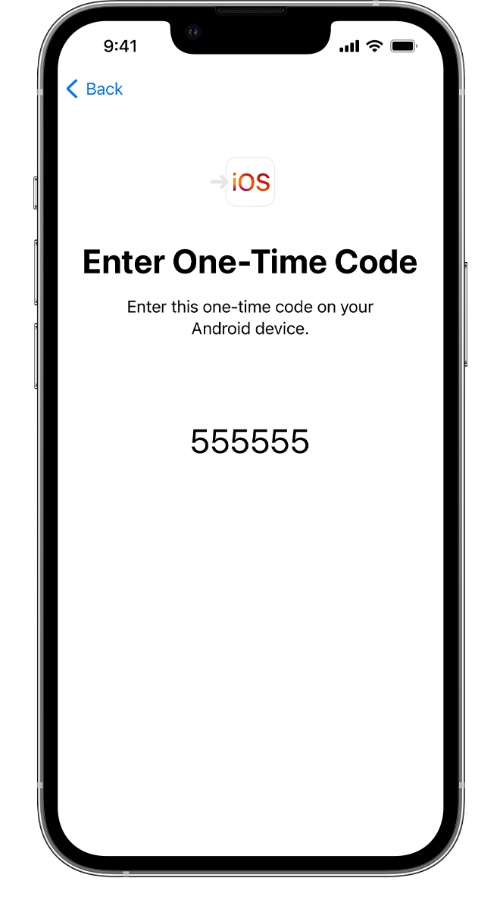
Step 4 – Get the code from iPhone
When you see the Move from Android screen on your iOS device, tap Continue. A code of ten or six digits will appear soon after that. Your Android device will show an alert if it detects that your internet connection is weak. Ignore the alert.
Step 5 – Enter the code on Android device
Enter the code you received on your Android device.
Step 6 – Connect to a temporary Wi-Fi network
A temporary Wi-Fi network will be created on your iOS device. Tap Connect on your Android device when asked to join that network. Wait until the Data Transfer screen appears.
Step 7 – Select Your Data
Then, tap Continue on your Android device once you have selected the content you wish to transfer. After that, leave both devices alone until the loading bar appears on your iOS device, even if your Android device shows the process is finished. While the transfer is in progress, keep your devices close to each other and plugged into power. Depending on how much data you are moving, the transfer can take a while.
Step 8 – Set Up Your iPhone
When the loading bar on your iOS device has finished, tap Done on your Android device. To finish setting up your iOS device, tap Continue and follow the onscreen instructions.
Finishing up
Ensure that all of your content has been transferred successfully. Books, music, and PDFs must be manually moved.
Need Help with the Transfer?
- On your Android device, turn off any apps or settings that might interfere with your Wi-Fi connection, such as Sprint Connections Optimizer and Smart Network Switch. Go to Settings, touch and hold every known network, and then forget the network. Try transferring again after that.
- During the transfer, you should leave both devices alone. When you use Move to iOS download on your Android device, the app should remain onscreen the entire time. Your content will not transfer if you use another app or make a phone call before the transfer is complete.
- If the problem persists, restart both devices.
- Turn off your cellular data connection on your Android device. After that, try again to transfer the files.


