


In this guide, we show you how to change Auto-Lock settings on your iPhone 17 and increase or decrease its screen time-out duration.
Your iPhone’s screen turns off, and the device gets locked automatically after some time. This helps save its battery and prevent unauthorised use.
Change Auto-Lock Settings on iPhone 17
You can change the screen Auto-Lock settings for your iPhone by following a few simple steps. Here’s how to do it.
- Open Settings and tap on Display & Brightness.
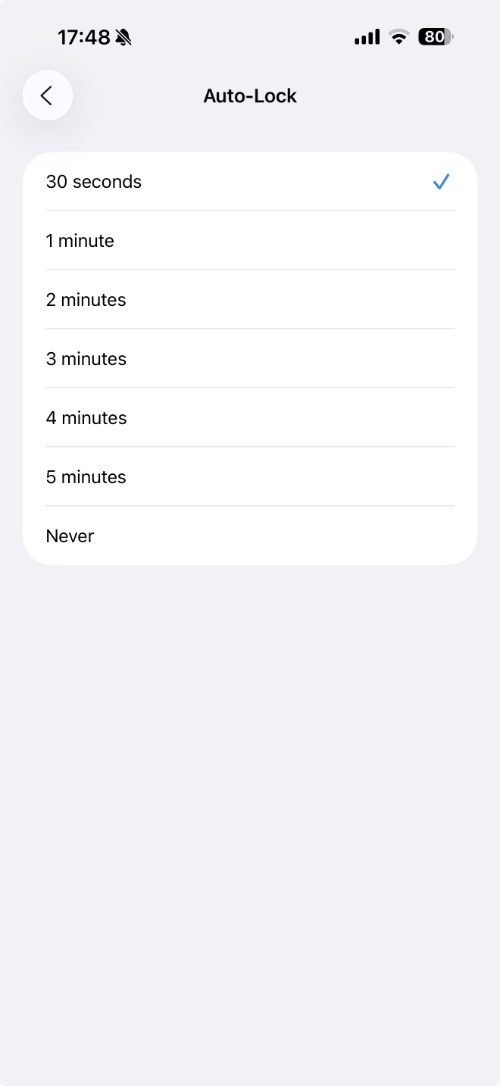
- Next, tap on the Auto-Lock option.
- From the next screen, choose your desired time of duration. You can choose from 30 seconds, 1 minute, 2 minutes, all the way to Never.
- After you are done, exit the Settings app.
It is recommended that you select the 30-second or 1-minute option to save battery life. However, it is a good idea to temporarily increase the Auto-Lock time to 2 or 3 minutes if you are reading something and don’t want the screen to turn off again and again.
Disclosure: iOSHacker may receive a commission if you purchase products through our affiliate links. For more visit our privacy policy page.

