Are you looking for steps on how to change iPhone or iPad’s name? Then you are in the right place. In this guide we will share steps that will allow you to easily change the name of your iOS device and personalize it according to your liking.
Changing iPhone’s name can be quite beneficial, as it makes your device easily recognizable when you are performing different tasks.
When you set a name for your iPhone or iPad that names appears in different iOS apps and services. For example, your iPhone’s name shows up when you AirDrop something, in Find My, Syncing in iTunes or Finder, Personal Hotspot and on Apple ID.
So by changing your iPhone or iPad’s name with the following steps you are essentially changing your iPhone’s AirDrop name, changing iPhone’s Personal Hotspot name and more.
Change iPhone or iPad’s name
Step 1. On your iPhone or iPad launch Settings app and go to home screen.
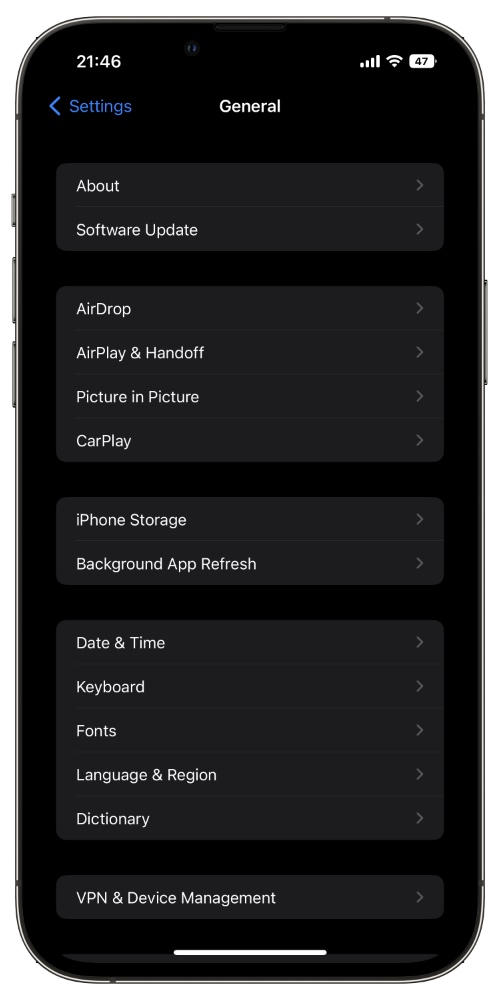
Step 2. From Settings go to General and then tap on ‘About‘ option.
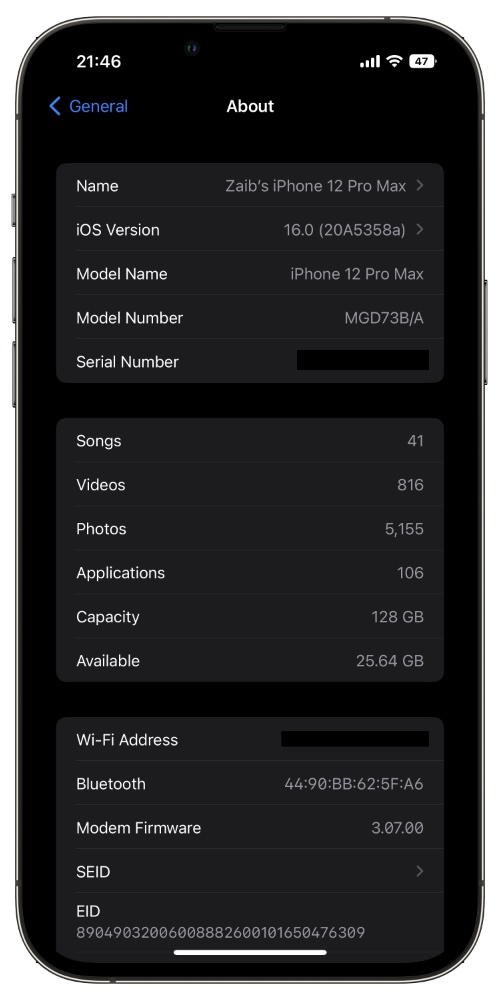
Step 3. On the About page you will see the ‘Name‘ option. Tap on it.
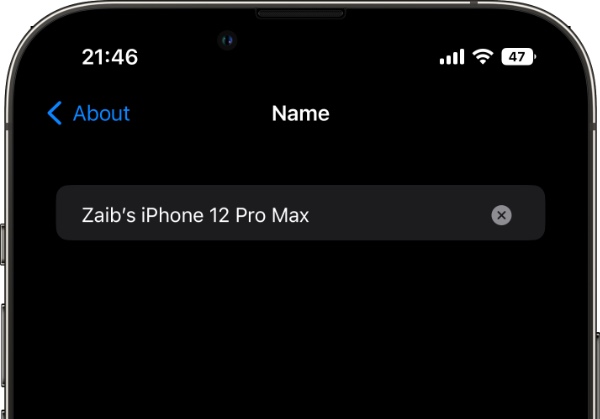
Step 4. Finally tap on the ‘x‘ button to remove your iOS device’s existing name and type the new name of the device according to your choice.
As soon as you are done typing iPhone’s new name exit the Settings app.


