Did you install iOS 10 beta on your iPhone or iPad to try out the new features and now want to go back to stable iOS 9 until the final version of iOS 10 is released? Well you are certainly not alone. Millions of users downloaded iOS 10 to test its exciting new features and after trying them they prefer to return to the current version of the operating system. If you want to downgrade iOS 10 running on your iPhone, iPad or iPod touch back to iOS 9, then you will find the useful step by step instructions below.
Downgrade iPhone, iPad or iPod touch running iOS 10 to iOS 9
1 ) You need to download the latest iOS 9 IPSW before you can start the downgrade process. Download iOS 9 here
2 ) Connect your iPhone, iPad or iPod touch to iTunes and click on the icon from the menu bar to access the Summary page. Now create backup using the ‘Back Up Now‘ button. Once the backup has been created proceed to next step.
3 ) On your iOS device open Settings > iCloud > Find My iPhone and turn off the Find My iPhone feature.
4 ) Now coming back to iTunes hold down the ‘Option‘ key from the keyboard and click ‘Restore iPhone…‘ button. Windows users need to press the Shift key.
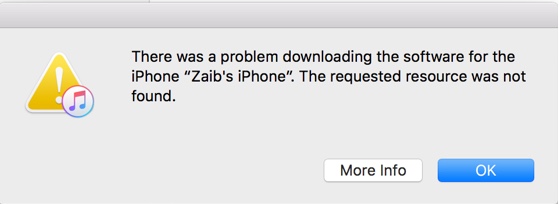
5 ) From the window find iOS 9 IPSW you downloaded earlier and click the open button after selecting it. Alternatively, you can just click on the ‘Restore iPhone…‘ button and iTunes will download the latest available iOS version and then install it automatically. We tried this and got the following error, so if you are getting the same error it is a good idea to download the IPSW separately from here and then restore.
iTunes will now verify the software and start restoring your device to the iOS version you pointed it at. The process will take a few minutes, after which you will have your device running the current stable version of the operating system.
Please note that you may not be able to restore the iOS 10 backup you created at the beginning of this process. If that’s the case, restore the last iOS 9 backup you have saved on iTunes.


