When HomeKit was first announced, many people were very excited. Unfortunately, it wasn’t until recently that home automation makers have released HomeKit support for their products. Arguably one of the most popular home automation devices, Philips’ Hue, has recently been refreshed with HomeKit support. The downside, however, is that you need to buy a new bridge. And depending on where you live, you might not be able to buy the bridge stand-alone yet. But don’t worry! You can enable Siri support for your lights for just 3 dollars with some simple jailbreak tweaks! Here’s how:
How to use Siri to control Hue lights without Homekit
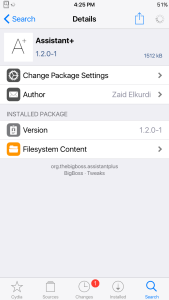
First, open Cydia and search for the package “Assistant+”. Then download the package for $1.99.
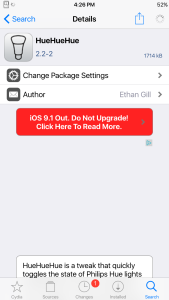
After you have downloaded that, search for “HueHueHue” in Cydia and download that for $0.99.
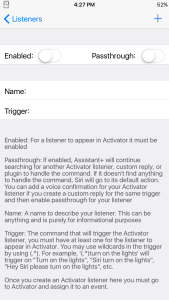
Now with those two packages downloaded, go the the Assistant+ app and select “Activator Listeners”. Press the “+” button in the corner to make a new action.
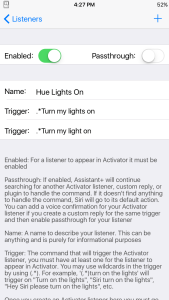
You will then be asked for a name. This is just for informational purposes for yourself to find it later. Name it whatever you like. I chose “Hue Lights On”. Now for the trigger. Start by typing in “.*” without the quotations. This is used in Assistant+ so you can say extra words at the beginning of your trigger (i.e. “Hey Siri” “Siri please” etc.). Now type in the sentence without a space between the “.*” that you want to activate your lights with. For example, this is what I have: “.*Turn my lights on”. If you press the “+” button in the corner, you can add another trigger.
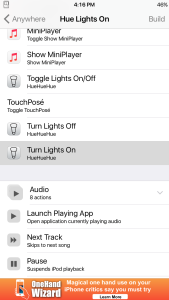
Once you have entered an amount of triggers that you are satisfied, make sure the “Enabled” switch is on and then go to the application “Activator” (if you didn’t have it before, HueHueHue should have automatically installed it). Select “Anywhere” and find the “ASSISTANT+” section. Select the name that you typed in for you Activator Listener. Then select the HueHueHue action for your trigger. So if your sentence was “Turn the lights on”, select the “Turn lights on” selection.
And now for the big moment! Activate Siri, and say your trigger sentence. If you set everything up correctly, your lights will now behave according to your command! Just as a side note, if this is your first time setting up HueHueHue, when you activate a HueHueHue action, it might ask you to press the link button on your bridge. You will only need to do this once.
And that’s it! You know should be able to control your Hue lights with just Siri! This is great if getting a new bridge is not an option right now, or if your on an older iOS version that doesn’t support HomeKit.
Did this work for you? How do you like it? Let us know in the comments! And don’t forget to follow us on Facebook on Twitter for the latest updates on iOSHacker!


