Have you just bought a new Mac? You must be excited to use your new device and take benefit from its features. But wait, before you do that, you may need to move data from your old Mac to the new one without any data loss. So, if you don’t know how to transfer files from Mac to Mac, you have come to the right place!
In today’s post we will show you how to transfer files from Mac to Mac wirelessly. The process is easy and you just need to give attention to the procedure.
Transfer Data Through Migration Assistant:
Needless to say, using Migration Assistant to transfer documents from Mac to Mac is the method you are looking for. This is one of the most effective and easy to use Mac transfer methods available today. Not only documents, but it also transfers Apps, user accounts, and settings from one Mac to another. The biggest benefit? You don’t need to do go through the entire drill manually as the tool will take care of most tasks on its own.
Ensure Your Computers Have The Software, Settings, And Power:
Before you begin the transfer of files, make sure you have installed all the available Apple software updates on both computers. And if needed, install third-party apps that are essential to transfer the data. Now, follow these steps:
- Your old Mac must be using OS X Lion or newer version.
- Ensure your old Mac has a computer name. In order to check this, go to Apple Menu> System preferences> Sharing> and then, check the Computer Name field.
- Now, connect both computers to AC power.
Connecting Your Both Computers to Each Other:
- In case your computers are using macOS Sierra or newer, make sure they are placed near each other and their Wi-Fi is turned on. And if one of your computers is using OS X EI Capitan or earlier, connect both of them with the same network with Wi-Fi or Ethernet.
- You can also connect them through target disk mode and the appropriate adapter or cable. Now, start your old computer in target disk mode.
- Or you can connect your new Mac to a Time Machine backup of your old Mac.
Use Migration Assistant:
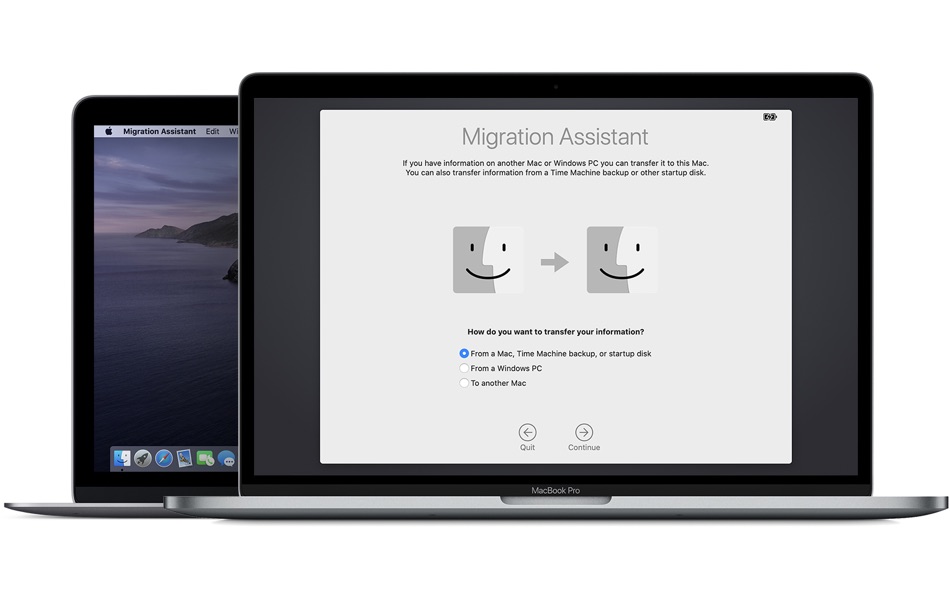
Now is the time to use Migration Assistant and transfer files from old Mac to the new Mac.
- Go to ‘Migration Assistant’ in the ‘Utilities’ folder of your ‘Applications’ folder.
- Click ‘Continue’.
- Here you will be asked how you want to transfer your information. Choose the option to move data from a Mac, Time Machine backup, or startup disk.
- Now, click ‘Continue’.
On Old Mac:
Note: In case you started your old Mac in target disk mode, transferring from a Time Machine backup, skip the following four steps.
- Go to ‘Migration Assistant’
- Click ‘Continue’
- Select ‘Transfer to another Mac’ from the options of how you want to transfer data.
- Click continue
On New Mac:
- When you are asked to select a Mac, Time Machine backup, or startup disk, click the appropriate option.
- Now, click ‘Continue’. You may also see a security code here.
On Old Mac:
Note: In case you started old Mac in target disk mode, or transferring data from Time Machine backup, skip the following two steps.
- Enter the same security code, as on your new Mac.
- Now, click ‘Continue’.
On New Mac:
- Now choose the backup you want to move information from.
- And, click ‘Continue’.
- Select the data to transfer from the backup.
- Now, click ‘Continue’ to start the data transfer. If you are transferring a lot of data, it might take a few hours to finish.
- After it is finished, log in to your transferred account on the new Mac and see the transferred files.
Was this guide helpful? Or did you face any issue while transferring files from Mac to Mac? Share with us in the comments below.
Stay tuned to iOShacker.com for more mini-guides and hacks for your Apple devices.


