


In this article, we will guide you on how to repair Mac disk with Disk Utility using the First Aid feature. So, let’s swing into action!
Using Disk Utility, you can detect and repair formatting and directory structure errors on Mac disks. Macs can exhibit unexpected behavior when there are errors, and significant errors may prevent your Mac from starting up at all.
You should have a current backup of your Mac in case Disk Utility finds errors it cannot fix or if you need to recover damaged files.
Opening Disk Utility
A simple way to access Disk Utility is to open it from Utilities in your Applications folder. You can, however, open Disk Utility from macOS Recovery if your Mac doesn’t start up completely or you want to repair its start up disk:
Step 1: Identify whether your Mac uses Apple Silicon, then follow the steps below:
- Apple Silicon: Turn your Mac on and hold the power button until the start up options window appears. After clicking the gear icon labeled options, select ‘Continue’.
- Intel processor: Turn on your Mac, then instantly press and hold Command (⌘) and R until an Apple logo or a different image appears on the screen.
Step 2: You may be prompted to select a user you already know the password. Click Next, then select the user and enter their administrator password.
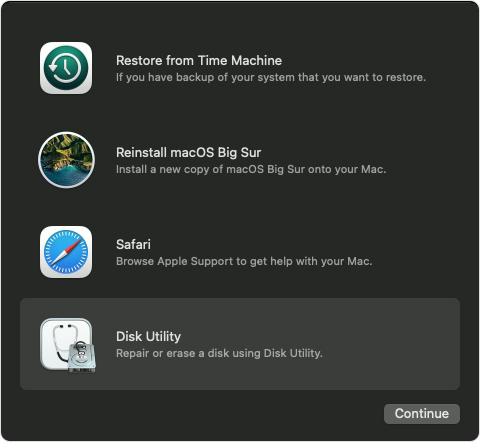
Step 3: In macOS Recovery, choose Disk Utility from the utilities window then click continue.
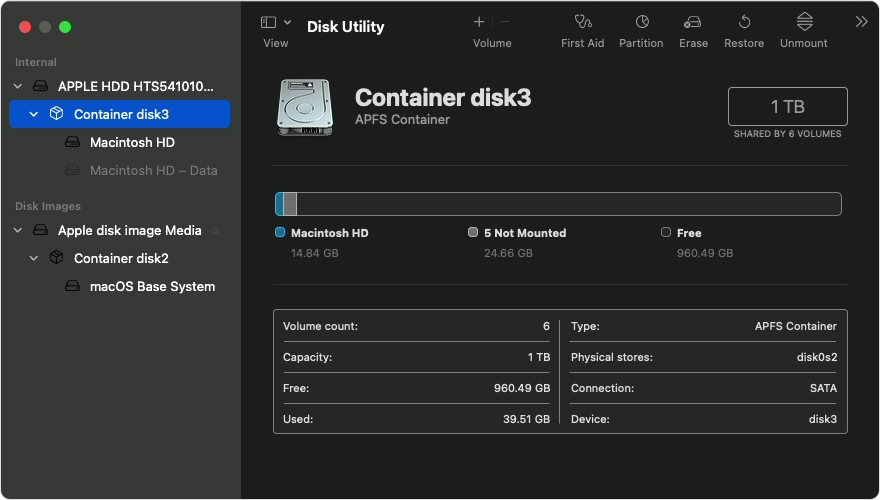
Select the disk that you want to repair
From the Disk Utility menu bar or toolbar, select View > Show All Devices (if available).
In Disk Utility, the sidebar should now display each disk or storage device you have available, starting with your startup disk. There should be a list of containers and volumes beneath each disk.
Start repairing…
When you are repairing disks on your Mac with disk utilities you should repair volumes first followed by containers and finally, you should repair disks.
For each Mac disk repair, on the disk, select the last volume and then click the First Aid button.
Then click on on the Run button to start checking the selected volume for errors.
- Alternatively, you can click the Repair Disk button if there is no Run button.
- If you cannot click the button, skip this step for the selected disk, container, or volume.
- Enter your administrator password if you are asked for a password to unlock the disk.
Step 1. Once Disk Utility has finished checking the volume, select the next item above it in the sidebar and run First Aid again.
Step 2. Continue running First Aid on each volume, each container, and finally the disk itself by moving up the list.
Step 3. Exit Disk Utility once it has finished.
Step 4. Now that you have completed macOS Recovery using Disk Utility, you can restart your Mac by clicking on the Apple logo from the top and then clicking Restart.
Disk Utility Finds Error That It Can’t Repair? Here’s what to do
If Disk Utility has found errors that it cannot fix, then you can use Disk Utility to erase (format) your disk if Disk Utility found errors it couldn’t fix.
Disk not showing in Disk Utility?
When Disk Utility cannot see your disk, it also cannot see any containers or volumes that are on it. Here is what you need to do:
Step 1: Turn off your Mac, then disconnect all non-essential devices from your Mac.
Step 2: Make sure the external drive is connected directly to your Mac using a known-good cable when you’re in the process of repairing it. After that, restart the drive.
Step 3: Disk Utility may not detect your disk if your Mac needs servicing.
Final Words
If you’re experiencing problems with your Mac, it may be due to a physical problem with its hard disk. There are many reasons why disks stop working, including liquid damage or hard knocks, but they can also become inoperative as they age.
You should consider hardware repair instead of Mac disk repair if the above instructions did not help. Find out what options are available to you by scheduling an appointment at an Apple Store or with an Apple Authorized Service Professional.
Leave your related queries in the comment section below.

