


Are you looking for steps on how to screenshot on Apple Vision Pro or perhaps the instructions on how to Screen Record on Apple Vision Pro? Then fret not, as you are in the right place.
In this step-by-step guide, we will show you can take a screenshot of what you are seeing on your Apple Vision Pro so you can share the image of what’s in front of you with others.
In the second part of this guide, you will find detailed instructions on how to screen record Apple Vision Pro. With these steps, you can learn how to record what you are seeing on Apple Vision Pro and share it in the form of a video with other people.
How to screenshot on Apple Vision Pro
Taking screenshots on Apple Vision Pro is similar to how you can take screenshots on an iPhone or iPad. Perform the steps below to capture your view on Apple Vision Pro.
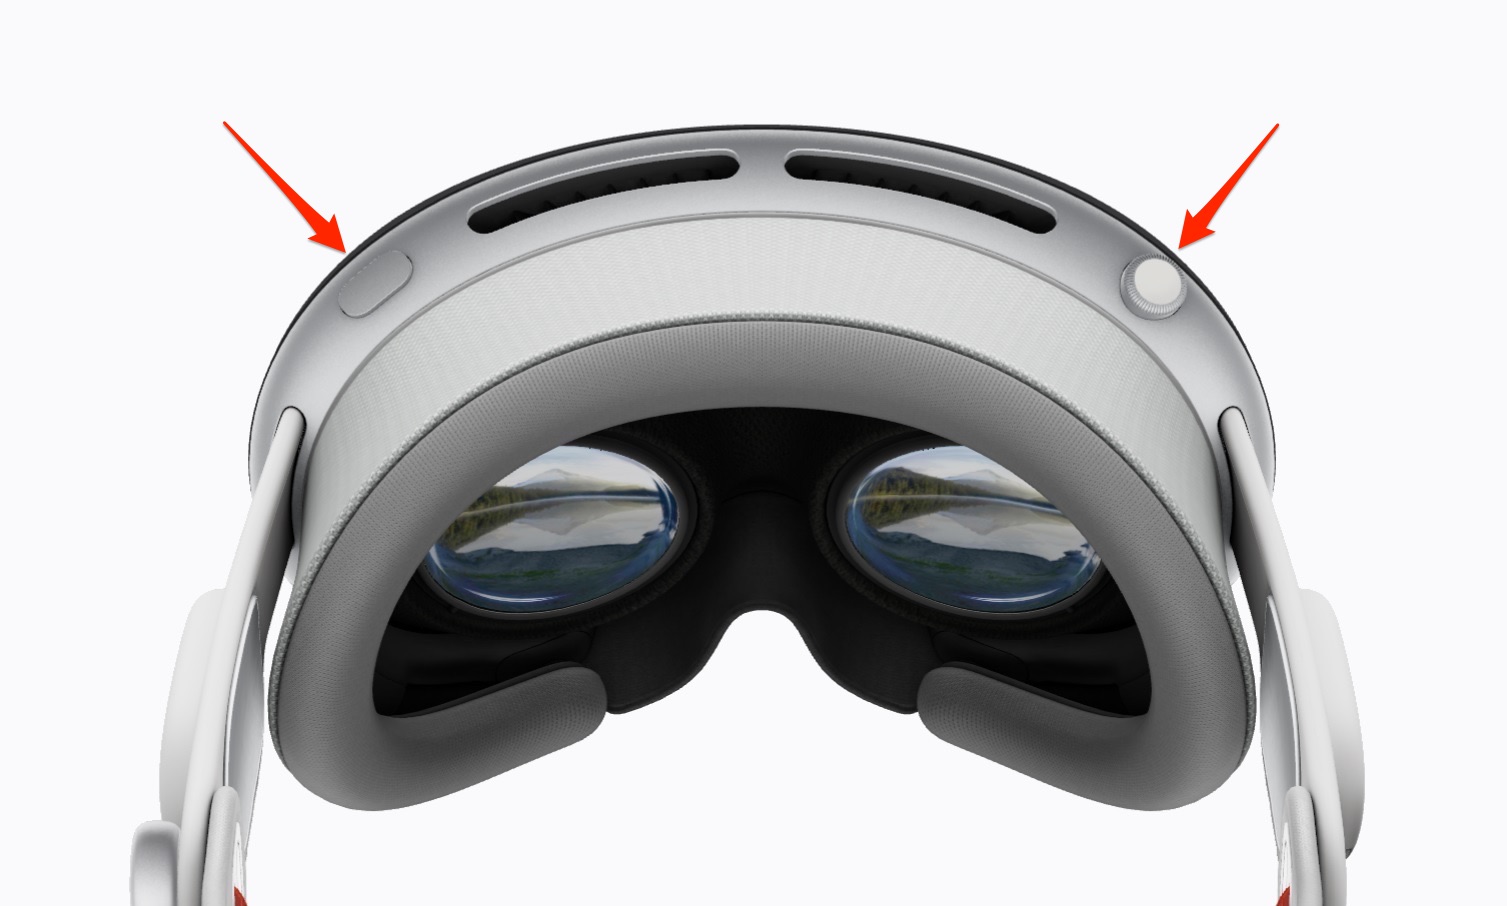
Step 1. Press the Digital Crown and Top buttons simultaneously.
Step 2. Now say “Siri, take a screenshot”.
Step 3. Next, open the Photos app. There you will find your saved screenshot.
How to screen record on Apple Vision Pro
Screen recording on Apple Vision Pro is very similar to how screen recording works on iOS devices. Follow these instructions to record your view in Apple Vision Pro.
Note: If you don’t see the Screen record button in the Control Center as shown in Step 3, then open Settings -> Control Center and add the Screen Recording button to the Control Center screen before performing these steps.
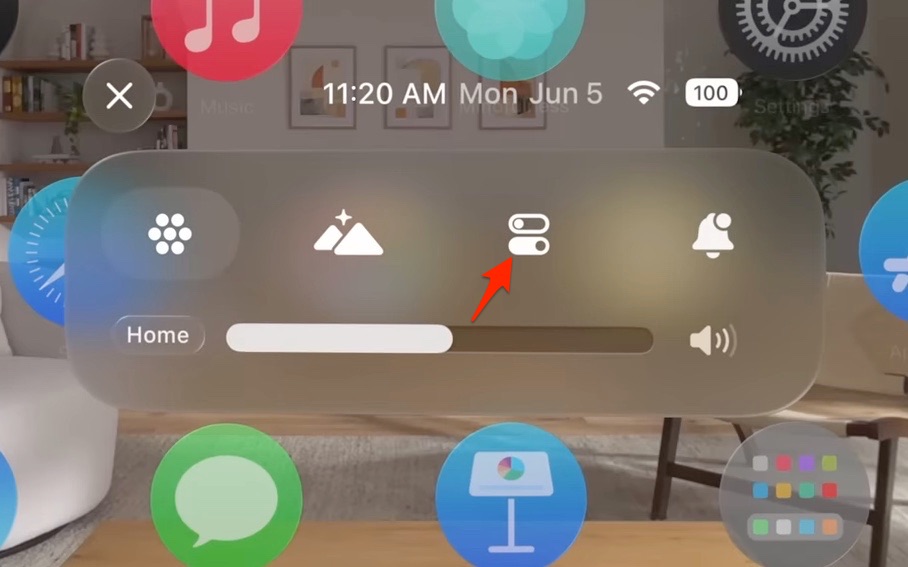
Step 1. Look at the top and tap on the downward facing arrow.
Step 2. Now tap on the Control Center button (it’s the button that looks like two toggle switches).
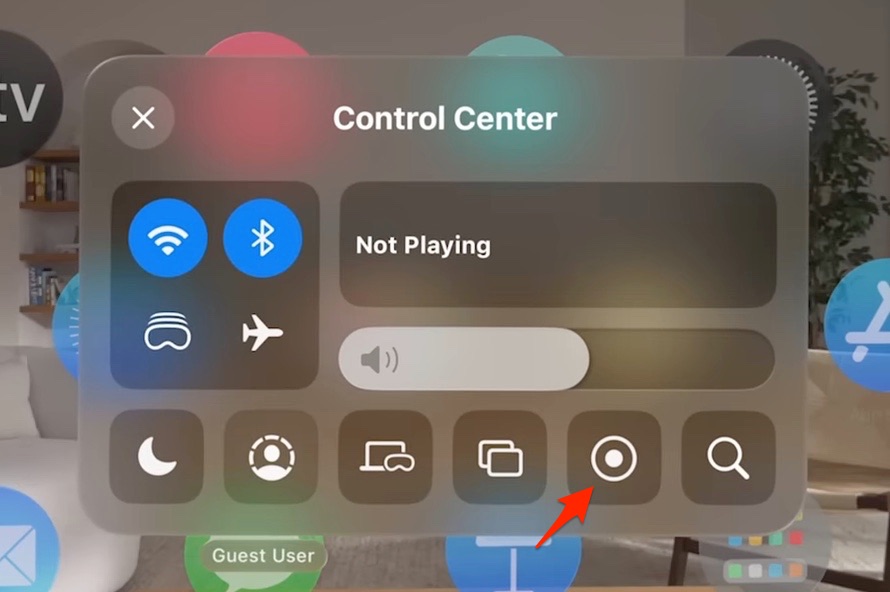
Step 3. From the Control Center screen tap on the Screen Record button to start recording.
Step 4. When you are done recording tap on the red status bar located at the top of your view to stop recording.
After you are done recording your saved clip will be saved to the Photos app, where you can watch it and share it with others.

