


Here you will learn how to use Hide My Email feature that is available to iCloud+ users on iPhone and iPad. With this email you can protect your real email address and share a random and unique address with websites and apps.
Apple’s Hide My Email feature allows users to protect their privacy and email address from getting into the hands of spammers, marketers and others. With iOS 15 Apple has enhanced the Hide My Email feature in meaningful ways to improve user privacy.
Now users can generate unique and random email addresses and share them with apps, websites and businesses, so that they don’t receive your real email address.
Hide My Email feature started as a way for users to sign up to apps and compatible websites using Apple Sign In, however with recent iOS versions users get more features and control over how this feature works.
What is Hide My Email feature?
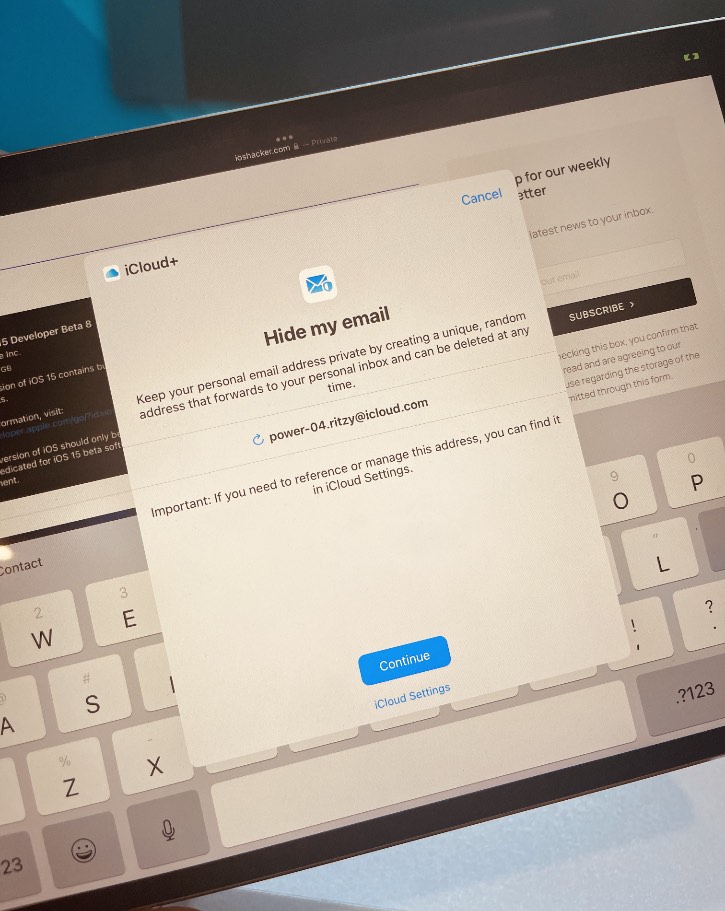
Hide My Email feature is an iCloud+ feature that enables users to generate unique and random email addresses, which they can share with apps, websites and businesses. This way they don’t have to share their real email address with a business when filling out online works or signing up for newsletters etc.
When you share an email address generated with the help of Hide My Email feature, your email is forwarded to your real email address that is associated with your iCloud account.
The best thing about this feature is that it is built into Safari, Mail and iCloud Settings so using and managing it becomes very simple and intuitive.
How to create a random Hide My Mail Address
Whenever you try to sign up to a newsletter or filling out a form on the web iOS will display Hide My Email option right above the keyboard. You can tap on the Hide My Email option and iPhone will generate an email address that will be shared with the website or service you are using.
However you can also manually create random Hide My Mail address by following the steps outlined below.
Step 1. Open Settings and tap on your name at the top.
Step 2. On the next page tap on iCloud option and then on Hide My Mail.
Step 3. Next tap on Create New Address option.
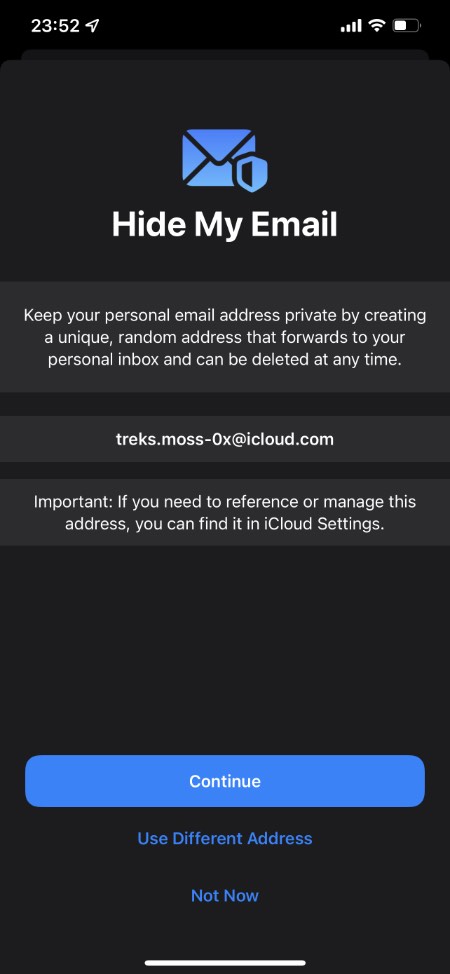
Step 4. You will be presented with a unique and randomly generated email address. You can tap on Use Different Address to generate a different address or tap on the Continue button to proceed.
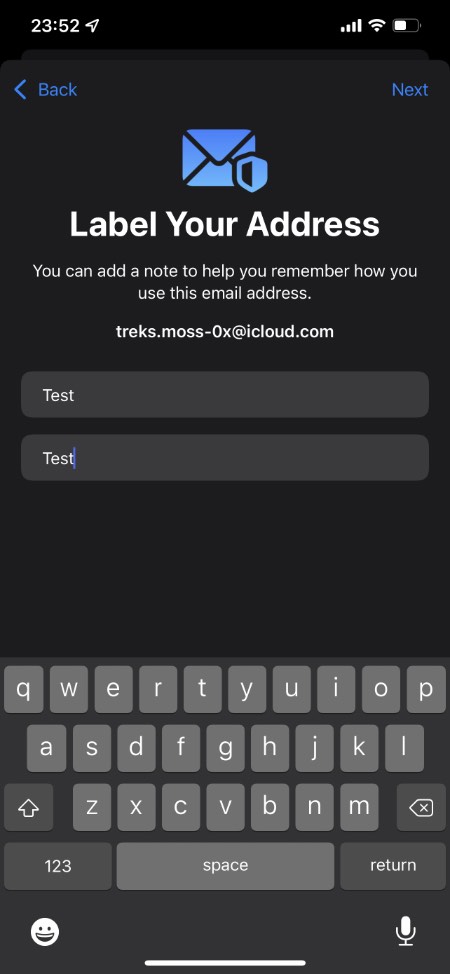
Step 5. On the next page you can create a lable to help remember the purpose of the email address. Add label and hit the Next button.
Step 6. Finally you will be presented with your unique and random address. Tap on the Done button to complete.
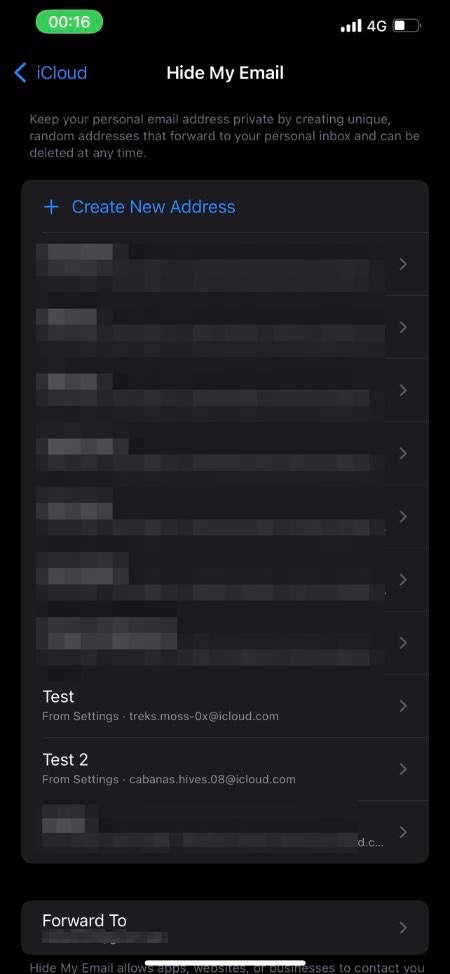
How To Find Or Delete A Previously Generated Email Address
You get the ability to view and even delete a generated email address. This can be done with the following steps.
Step 1. Open Settings and tap on your name.
Step 2. Go to iCloud -> Hide My Email.
Step 3. Find the address by looking for its label and tap on it.
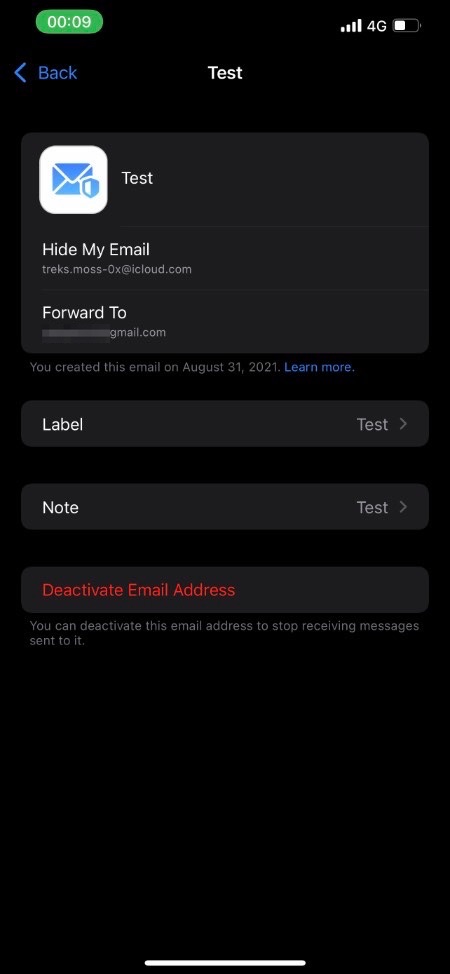
Step 4. On the next page you can view your email address, change the email address mails are forwarded to, change its label and deactivate email address.
Note: When you Deactivate Email Address you will stop receiving messages that are sent to it.
How to change email address mail is forwarded to in Hide My Mail
If for any reason you want to change the email address your Hide My Email mails are forward to, then you can do so by following these steps.
Step 1. Open Settings and tap on your name.
Step 2. Go to iCloud -> Hide My Email.
Step 3. Now scroll down and tap on Forward To option.
Step 4. Finally tap on the alternate email address you want your email to be forwarded to.
How to stop using Hide My Email service for a certain website or app
If you want to stop using Hide My Email service for a certain website or app, then you can easily do so by following these steps.
Step 1. Open Settings and tap on your name.
Step 2. Go to iCloud -> Hide My Email.
Step 3. Tap on the app or website you want to stop using Hide My Email for.
Step 4. Turn off the toggle for Forward To on the next page.
Note: For app logins tap on ‘Manage Sign in with Apple Settings’ and then tap on the app name from the next page. Then on the next page tap on Stop Using Apple ID. When you do this you might to sign up to the app again.
There you go folks, this is how you can use Hide My Email service and take advantage of iCloud+’s many privacy features.
You should also learn more about iCloud Private Relay, which is another iCloud+ feature.

