


iOS 13 for the first time brings powerful video editing features to the Photos application. Now iPhone and iPad users can edit their videos without relying on a third-party app. The built-in video editing features allow users to make a wide range of edits on their videos.
There are 14 different editing adjustment tools available under iOS 13’s video editing interface including:
- Exposure
- Highlights
- Shadows
- Contrast
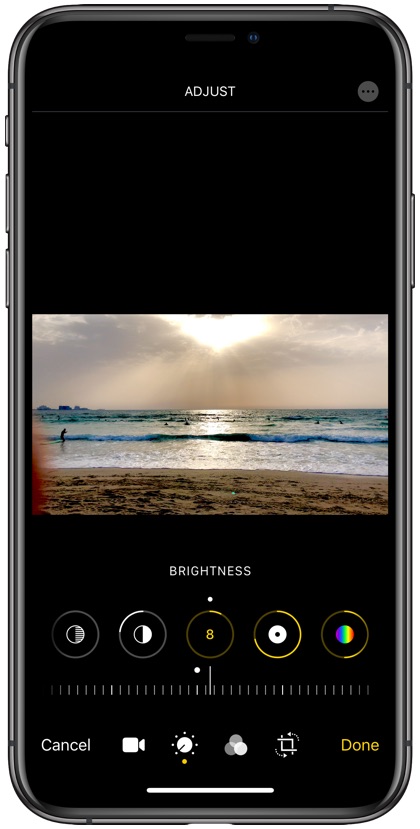
- Brightness
- Black point
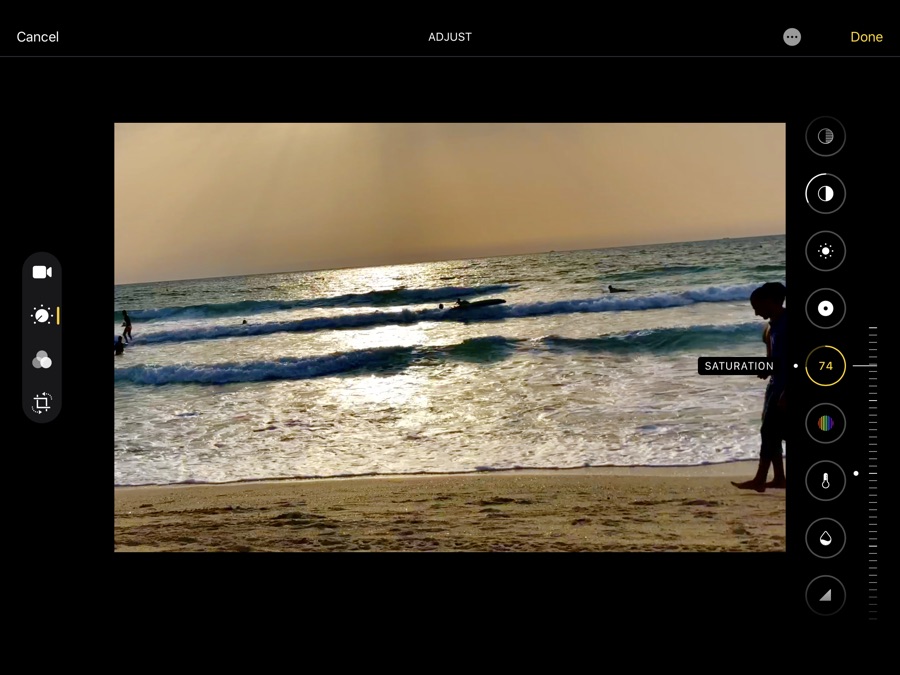
- Saturation
- Vibrance
- Warmth
- Tint
- Sharpness
- Definition
- Noise Reduction
- Vignette
Using the new Photos app’s video editing tools is pretty simple. To access all the features listed above you have to launch the Photos app and load the video you want to perform edits on, and then tap on the ‘Edit’ button.
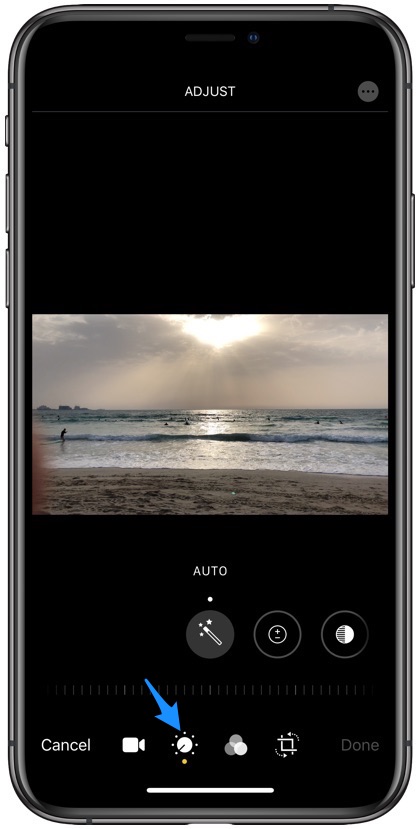
Once you are in the editing mode simply tap on the adjustments button shown in the screenshot above. As soon as you tap on this button you will be able to access all the edits you can make on your video.
Simply swipe on the tool bar to access the right option and then move the adjustment slider left or right in order to increase or decrease the level of selected feature. As you are moving the slider you will be able to see the effect in action in real-time.
iOS 13’s video editing features are not limited to adjustments only as you can also use the built-in video editor to perform the following video editing tasks.
- Crop
- Rotate
- Flip
- Straighten
- Move Vertical
- Move Horizontal
You can access the features above but tapping on the Rotation button.
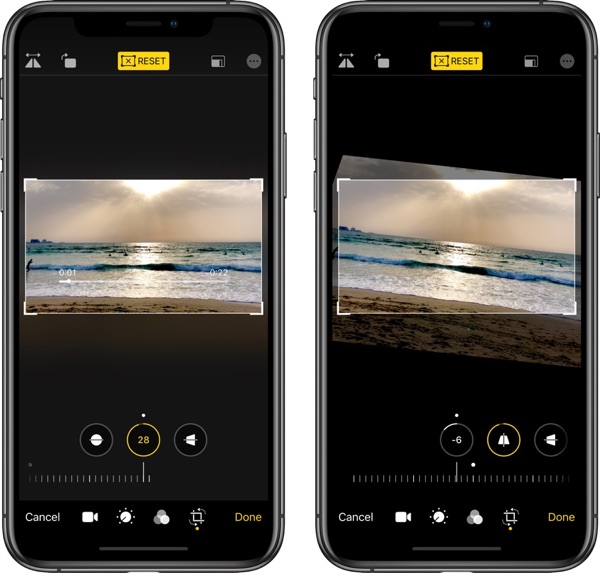
Once you have tapped on this button you can crop parts of the video by resizing the selection box. The process is very similar to how you can crop photos in the Photos app.
You can rotate or flip the video by tapping on the buttons located on top left corner of the screen.
The Straighten, Move Vertical and Move Horizontal features are available at the bottom. You can tap on these options and then use the slider to precisely move the video just the way you want.
Once you are done editing a video you can tap on the Done button and wait for your iPhone or iPad to save changes.
If you are not happy with the changes you had made earlier, you can return to the video and enter the edit mode by tapping on the ‘Edit’ button. Then simply tap on the ‘Revert’ button to bring video to its original form.

