


For those of you who use VPN services to access blocked or censored websites as well as for anonymous web browsing on computers, TunnelBear VPN would be a familiar name. It is one of the best VPN services out there as it provides a fast and clutter free experience to the users of many platforms. And if you already love TunnelBear you would be pleased to know that it also offers free and affordable services to iPhones and iPads through its TunnelBear VPN app for iOS.
Just like the desktop apps TunnelBear provides a great experience on iOS and enabling it literally just a flick away. This would definitely come as a relief for users who had to deal with the complicated VPN apps that needed users to follow complicated steps in order to set them up and took forever to get enabled.
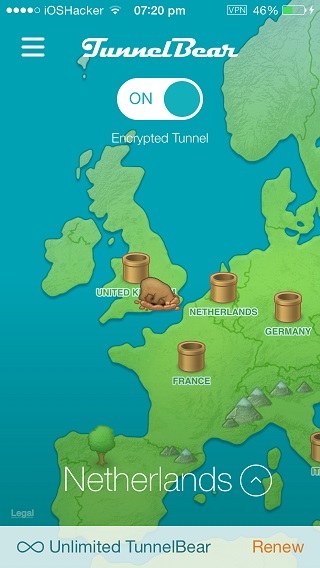
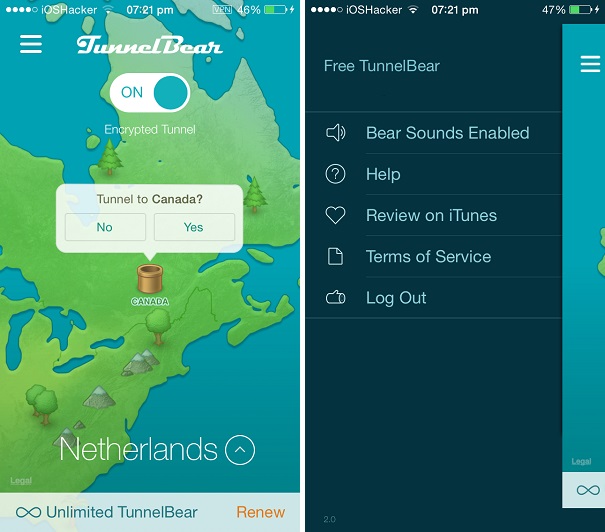
The new interface of the TunnelBear VPN app makes tunneling a lot easier as you get a real map of the world. You can simply move around and select the country you want to use the internet from by tapping on it. There is a wide range of countries that you can choose from including United States, United Kingdom, France, Netherlands, Germany, Australia, Canada, Italy and Japan. Once you tap on your desired country you are connected through it in a matter of few seconds.
When I installed the app on my iPhone it took me less than 5 minutes to get it activated after which I was able to use it for my tunneling needs.
While the new app works totally fine on iOS 8 there is a connectivity issue that may occur when you upgrade from iOS 7 to iOS 8. The app asks for a ‘VPN Password’ from the user and does not work properly. There is a simple solution to that problem that we have detailed below.
This can be done both after and before the installation of iOS 8, however if you haven’t updated yet it is recommended that you do it before upgrading.
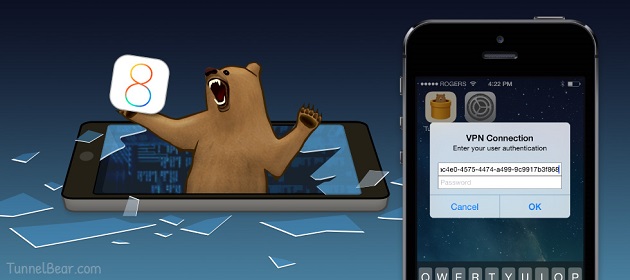
Deleting the TunnelBear profile
- Open Settings app and go to ‘General’.
- Now tap on ‘Profiles’. On the next screen you have to tap on the ‘Delete Profile’ option. Here’s you may need to enter your device’s passcode.
- Then simply tap on ‘Delete’ to confirm.
Installing the TunnelBear Profile
After you have successfully deleted the profile you have to reinstall it. To do so follow the steps below.
- On your iOS 8 powered iPhone, iPad or iPod touch open the TunnelBear VPN app.
- Tap on the menu button and then hit ‘Reinstall Profile’.
- You will now be taken to a different screen where you can confirm and finish the process.
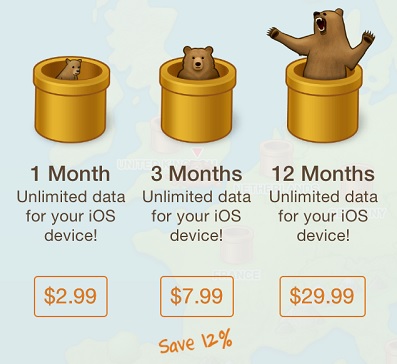
For free users TunnelBear provides a limited usage of 500MB that can be extended to 1.5GB if you tweet about the application. It also offers affordable options for the users that enable them to have 1 month of unlimited access on iOS devices for $2.99. 3 months and 12 months packages are available for $7.99 and $29.99 respectively.
You can download the TunnelBear app for your iOS device from the App Store. It is available for free.
- Download TunnelBear

