


Files app provides a great way for iPhone and iPad users to manage their documents, videos, photos and other types of content on their device. Files app is not only great for managing files stored in your device’s memory but it can also be used to access and manage files stored in many online cloud storage services.
In addition to having access to iCloud Drive inside the Files app users can also access their accounts on most of the popular cloud storage services out there.
After signing in to their favorite online cloud storage service users can access files stored on these accounts right from the Files app.
Files app supports a wide range of services including Dropbox, Google Drive, Microsoft OneDrive, Box, Amazon Drive and MEGA. In addition to these big players you can also add you account on following services and access files stored there through the Files app.
- Adobe Creative Cloud
- Documents by Readdle
- Citrix Files
- Boxcryptor
- ownCloud
- ibi
- Baidu Cloud
- Tresorit
- SugarSync
How To Add A Cloud Storage Account To Files App
In this tutorial you will find steps on how to add Dropbox, Google Drive, OneDrive or other storage service to Files app. Adding these cloud storage accounts to iPhone or iPad’s Files app is quite easy. All you have to do is follow the simple steps below.
Step 1. First of all download the official app for the cloud storage service that you want to use with Files app, links are available above.
Step 2. Once you have downloaded the app open it and sign into your account.
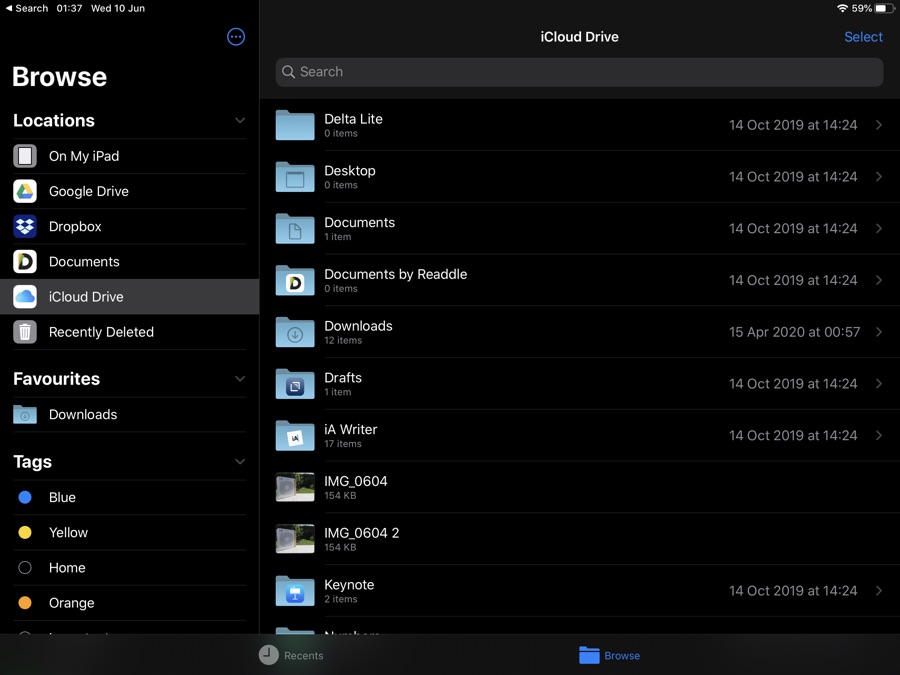
Step 3. Now launch the Files app and tap on the ‘Browse’ tab from the bottom bar.
Step 4. Now tap on the ‘…’ button from top right corner of the screen and then tap on ‘Edit’ option from the menu.
Step 5. Under the Locations heading make sure to turn on the toggle for the cloud service you want to enable in Files app.
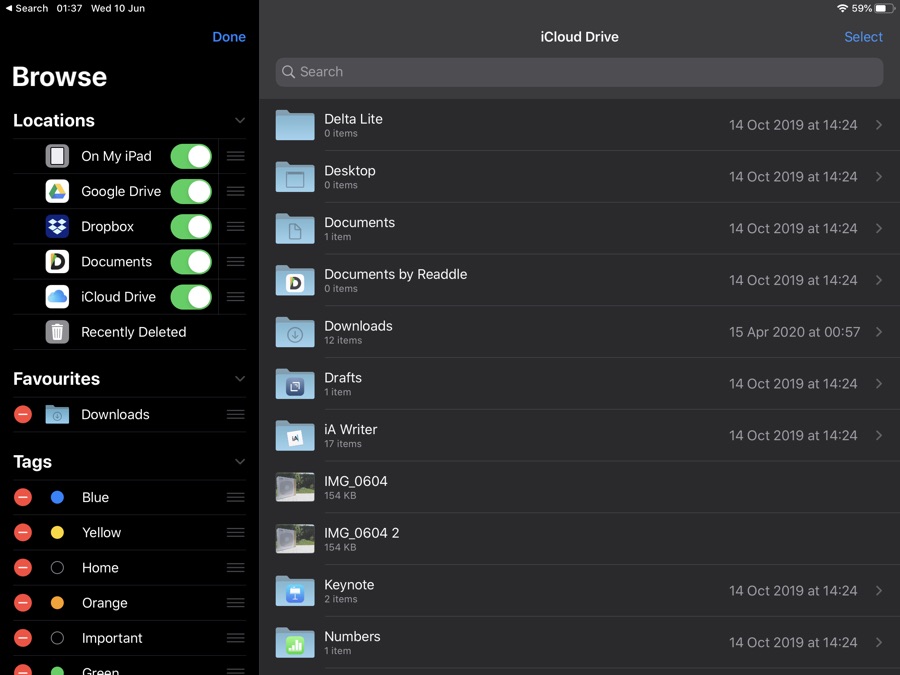
Step 6. Tap and drag on the grabber located next to the toggles to move ‘Locations’ up and down.
Step 7. Once you are done simply tap on the ‘Done’ button to exit the edit mode.
That’s it, your favorite cloud service should now be integrated with the Files app and you should be able to view and manipulate files stored on that service.
Remember you need to keep the official app of the cloud storage service installed on your iPhone or iPad in order to continue using it.
Some services might require you to log in again within the Files app. When prompted simply enter your username and password for the cloud storage service in order to gain access to your files and content.
There you go folks, this is how you can easily add Dropbox, Google Drive, OneDrive or any other cloud storage service to the Files app and use it to access your online files.
If you want to learn more about the Files app, then feel free to check our Files app guides below.
Some more useful Files app tutorials:
- How To Zip Or Compress Files On iPhone And iPad Using Files App
- How To Connect iPhone Or iPad Files App To Mac Via SMB [Tutorial]
- How To Share An iCloud Drive Folder With Someone
- How To Switch Between Icon, List And Column Views In Files App

