


![]()
OS X has so many hidden gems that it never seizes to surprise even those who have been using it for years. One super useful feature of the Preview app allows users to add their signature to the Mac, and then quickly insert it on any PDF document. In this post we will show you how you can add your signature to the Mac and then use it to insert in any PDF using the stock Preview app. Before you begin make sure you have a pen and a paper because you are going to need them during the process.
Adding your signature to the Mac
1 ) First of all take the white piece of paper and sign on it.
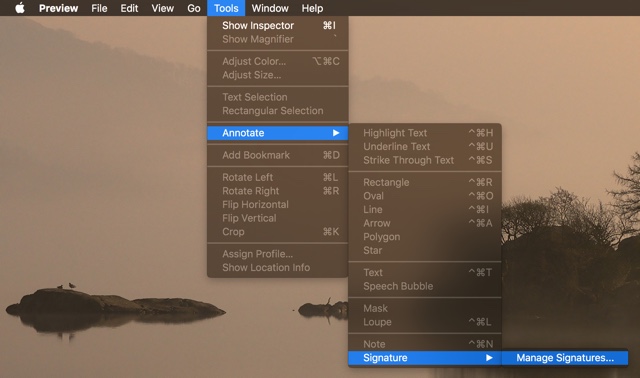
2 ) Now launch the Preview app and from the menu bar click on Tools > Annotate > Signature > Manage Signatures.
3 ) On the Manage Signatures window you will find two options, ‘Trackpad’ and ‘Camera’. While you can use trackpad to enter your signature, we recommend using the camera for better results. Hit the ‘Camera’ tab and then place the signature you just made on the white piece of paper in-front of the iSight camera. Make sure the room has enough light for the camera to read the signature properly. If light is not available, try increasing the screen brightness as that would help a lot.
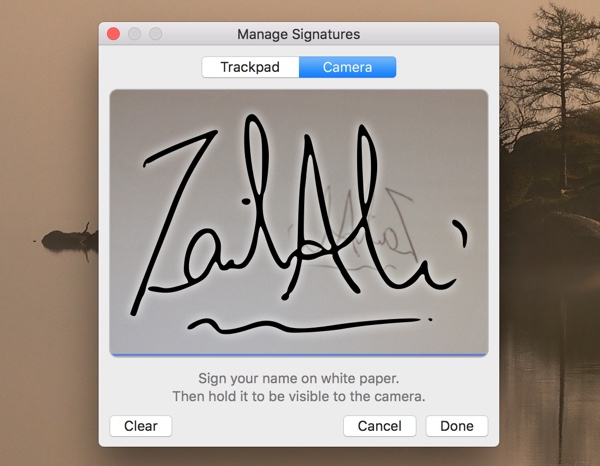
4 ) Once the signature has been scanned properly it will appear on the screen, hit ‘Done’ if you are satisfied with result or scan again if you are not by hitting the ‘Clear’ button.
Inserting your signature into PDFs
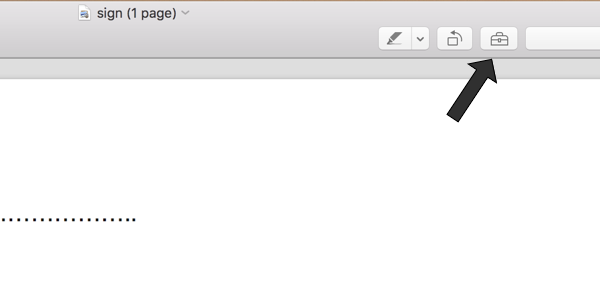
Preview app: Now that your signature has been added to the Mac, you can quickly insert it whenever you like. To insert your signature in a PDF that is opened in Preview app, click on the ‘Toolbox’ button as shown in the screenshot above.

Now click on the ‘Signature’ button from the menu bar that has appeared. You will get a list of all the signatures that are added in your computer, click on the one you want to insert, resize it and adjust its position.
That’s it! Now you know how to add and insert a signature on your Mac. If you have any questions, then let us know in the comments section below.


What if I already have the signature in a .png file, is there a way to save it on Preview.app somehow?