Apple has recently extended the two-step verification to iMessage and Facetime services. This is addition to iCloud, that already had it. If you care about privacy and want to make your Apple ID more secure then you should enable this security feature for your account. In this post we will show you how you can add two-step verification for your account and add more trusted devices to it.
Adding two-step verification to iOS devices
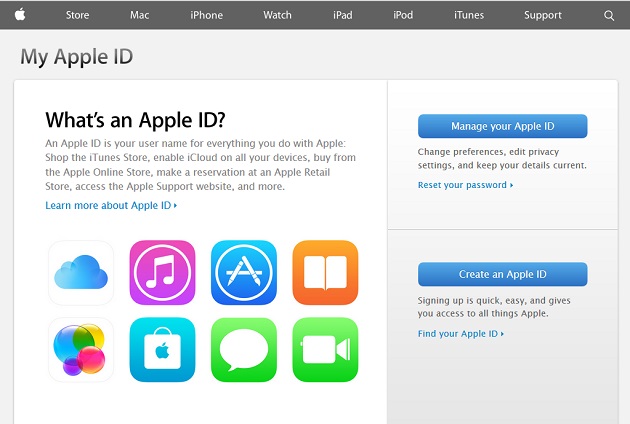
- First of all open the My Apple ID page and click on ‘Manage your Apple ID’ button.
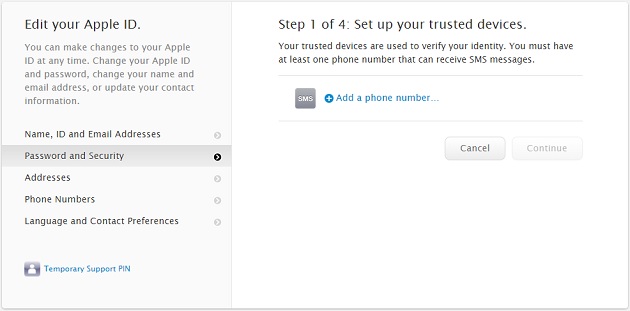
- After you have signed in to your account click on ‘Password and Security’ option from the side menu.
- On the next screen you will be asked to answer the security questions you had set up while creating the account.
- Once you have answered the questions correctly click on the ‘Get Started…’ link under Two-step Verification heading.
- On the next screen read the instructions and click on ‘Continue’ button. On the next page hit continue again. Finally hit the ‘Get Started’ button after reading the on-screen instructions about the feature.
- On the next screen you will be able to add phone numbers that will receive a code in SMS when you or someone tries to log into your account. Once added hit the ‘Next’ button.
- Apple will text you the code on your phone number. Simply enter the four digit code on the screen to complete verification. That’s it!
If you have multiple phone numbers, want to remove your old number or simply change the one you previously added you can follow the same steps above.
Disclosure: iOSHacker may receive a commission if you purchase products through our affiliate links. For more visit our privacy policy page.


