


In this guide, we have shared instructions on how to back up your iPhone on a computer using iTunes and Finder. With this guide, you can back up your iOS device on a Mac and Windows PC, without even purchasing an iCloud subscription.
If you are tired of seeing iCloud storage full errors and paying for extra iCloud storage, then local iPhone backups are the way to go. Not many people know that you can still back up your iPhone on your computer without needing an iPhone.
This tutorial shows you exactly how to do this.
For Windows Users:
Skip the download if you already have it installed on your Windows PC.
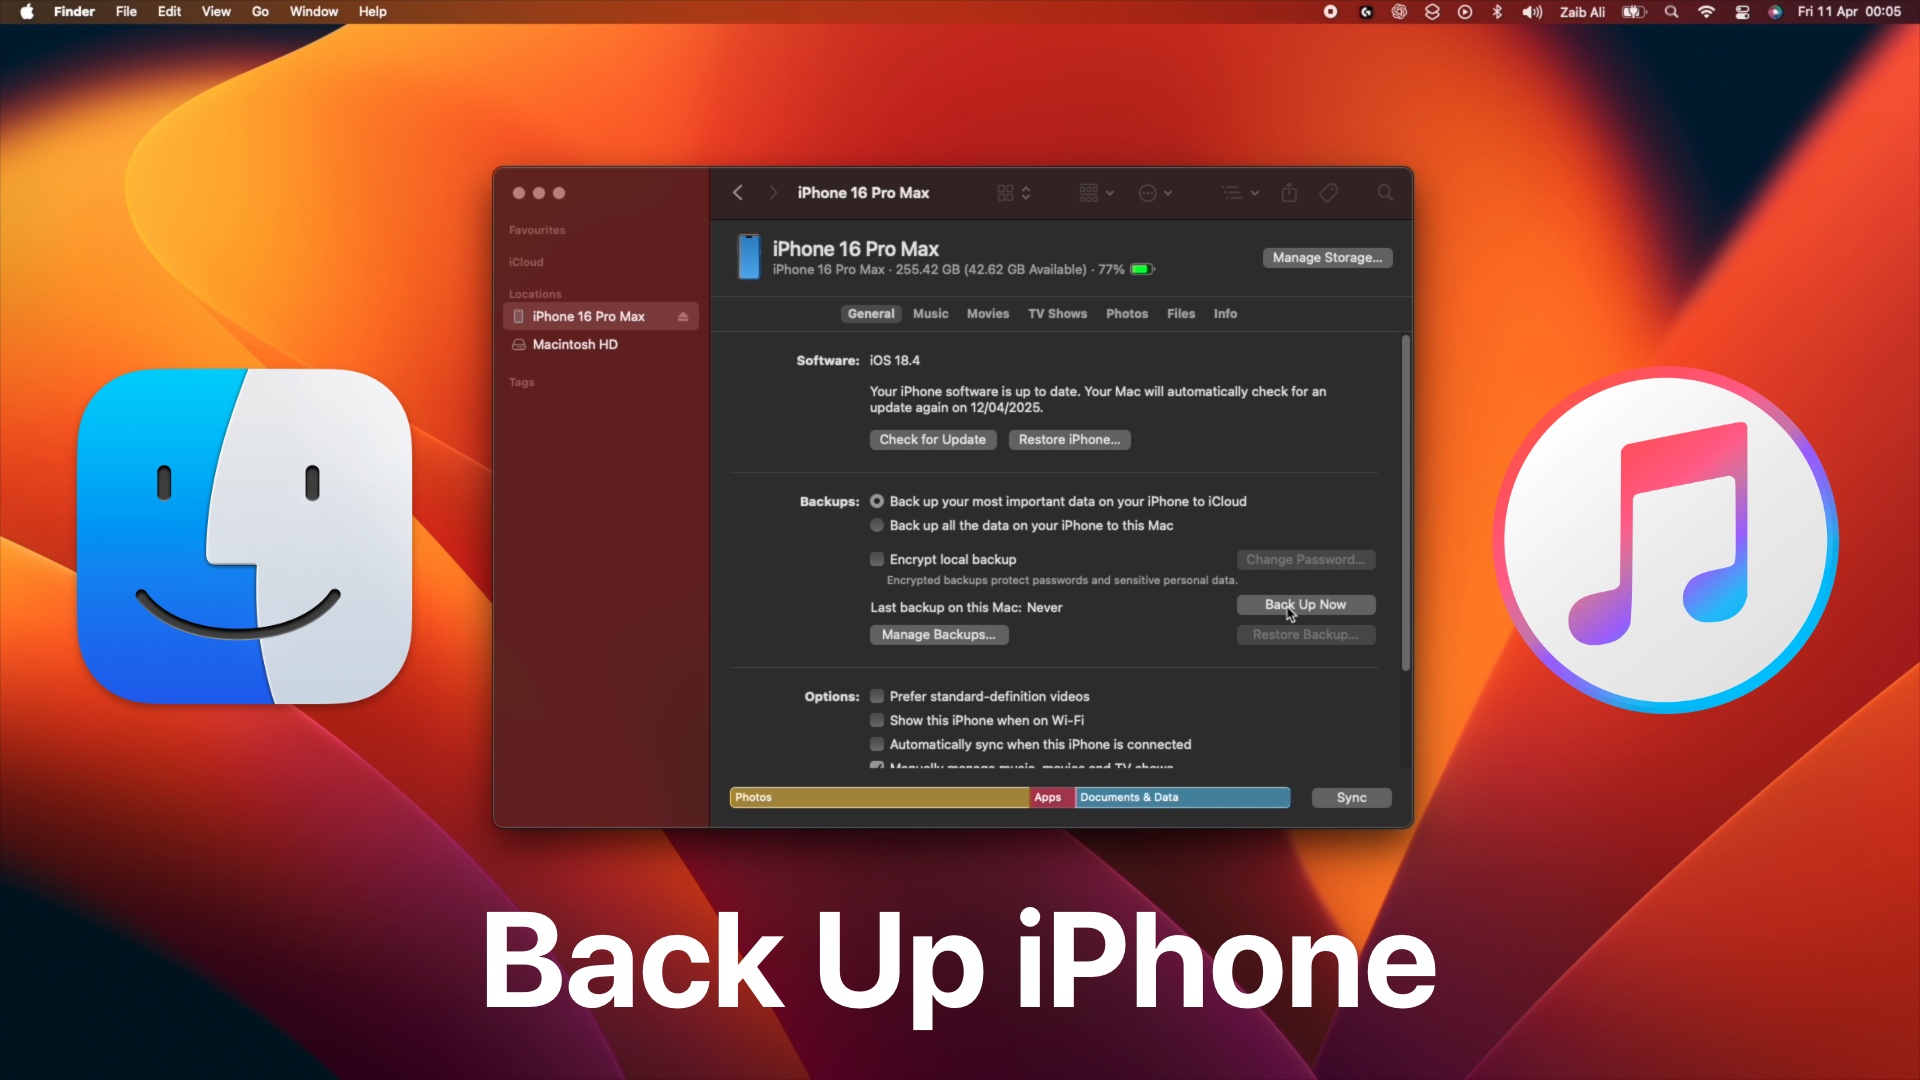
Back Up iPhone To Computer
- Connect your iPhone to your computer using a USB cable.
- Launch iTunes on Windows and Finder on Mac.
- In iTunes click on the little iPhones icon from the top to access iPhone settings. In Finder click on your iPhone’s name from the side pane.
- Make sure you are on the Summary page (General page on Mac).
- Under the Backups you will find the Back Up Now button. If you want extra security, then you can also encrypt your backups with a password.
- Click on the Back Up Now button and wait for your computer to fully back up. Depending on how much data you have on your iPhone this process could take a few minutes to complete.
After your device’s backup has been created, you will see the latest backup date in the Backups section of iTunes and Finder.
That’s it, this is how you can create local computer backups of your iPhone on your Mac or Windows PC. This way you can create backups locally and cancel your iCloud subscription as you no longer need it for backups, and solve your iCloud storage full issue.

