


iPhone has had the slo-mo or slow motion recording feature for a while now. The feature was introduced back in 2014 with the release iPhone 5s. Now iPhones offer far better slo-mo performance than they original did and enable users to record breathtaking slo-mo videos. While a lot of users take advantage of this camera app functionality many don’t know that they can adjust the frame rate settings to make their device record better quality slo-mos.
You can changge the fps settings for slo-mo videos on iPhone to make the videos according your needs. From the Settings app you can change the iPhone’s slo-mo fps settings and choose between 120 frames per second or 240. Changing this particular setting has a very noticeable affect not only on the video’s quality but also on its size.
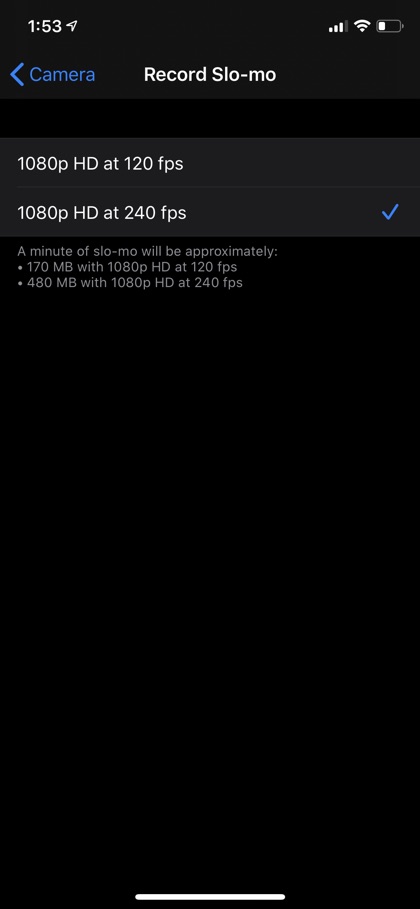
For example 1 minute 1080o video recorded with 120fps will be 170MB while the same video recorded at 240fps will be 480MB in size. This size difference can be crucial if you want to keep the size of the video low.
How to change fps settings for slo-mo on iPhone
You can easily change slo-mo fps settings on your iPhone using the steps below.
- Open Settings app and scroll down until you see ‘Camera‘ option.
- On the ‘Camera‘ settings page look for ‘Record Slo-mo‘ and tap on it.
- Finally you will see two options: 1080p HD at 120 fps and 1080p HD at 240 fps.
Basically choosing the 240 fps option over 120 fps will make your device take 240 shoots per second, resulting in a smoother and more dramatic slo-mo. Right now iOS offers two settings for users to choose from, including 1080p at 120 fps and 1080p at 240 fps. The video resolution is reduced at 240 fps to make sure the video size does not get too big. While a video shot with 120 fps will offer a higher resolution, the 240 fps option will provide better slo-mo result.
So this is how you can change the slo-mo settings of your iPhone and record video with your desired fps settings. If you have any questions, then let us know in the comments section below.

