


iCloud Shared Photo Library is one of the new features in iOS 16 that helps you share photos with family and friends. Read on to find out how to create iCloud Shared Photo Library and how you can add participants to it.
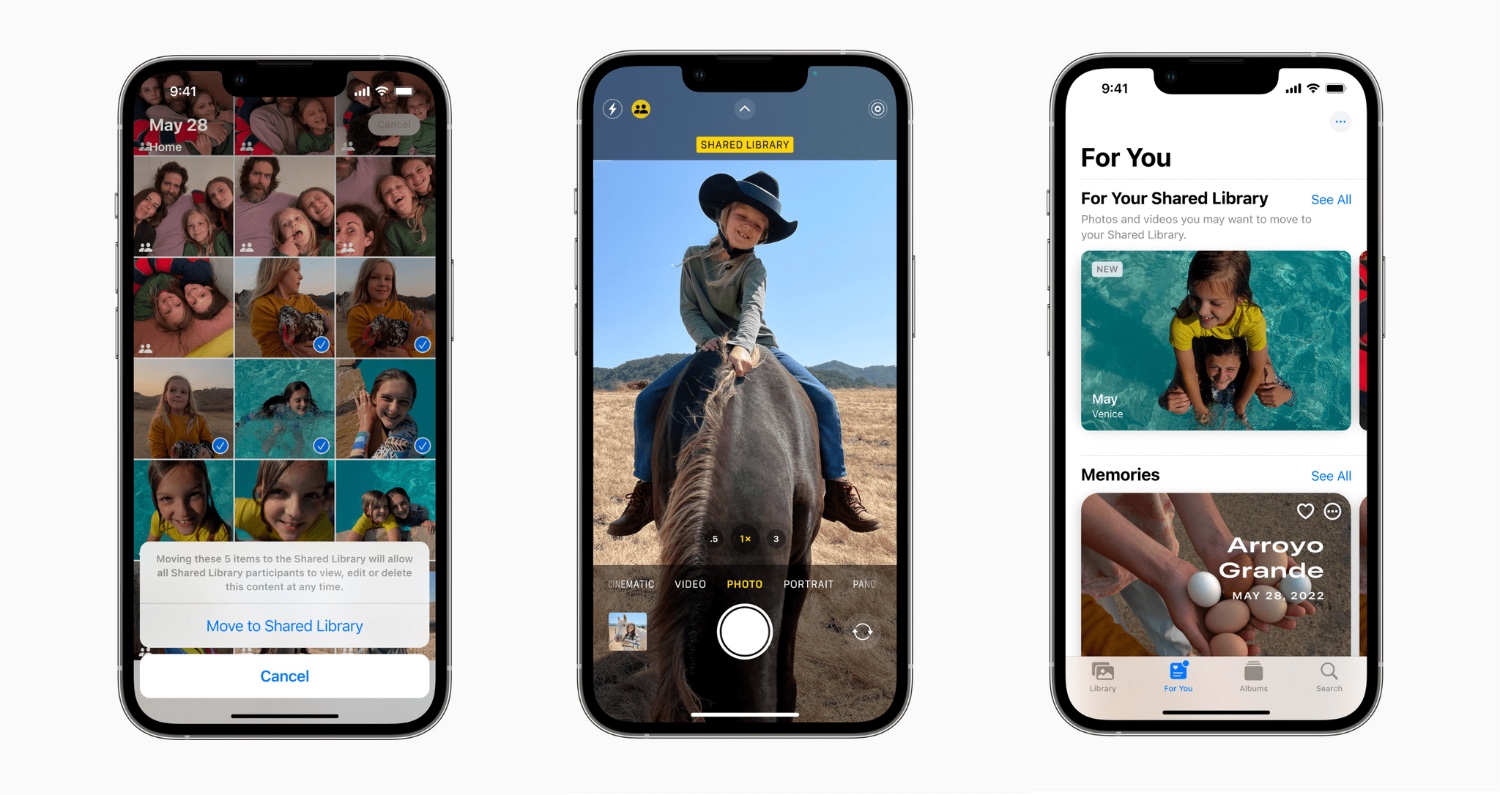
If you are wondering What is iCloud Shared Photo Library. Well, as mentioned before, in iOS 16.1 or later, you can now set up a shared photo library in the Photos app that can be accessed by anyone with an Apple device, which allows them to view the photos, contribute photos to it, and edit the photos, including favoriting images and adding captions.
The best part is all participants have the same permissions, and there are no limitations.
Note: iCloud Shared Photo Library feature is available on iOS 16.1 and iPadOS 16.1 or later.
How to Activate iCloud Shared Photo Library
It is a piece of cake to create a shared library. You can browse your iCloud Photo Library to add images to the Shared Library, and then preview the content you added before sharing it.
All of this can be done through the pop-up interface that appears the first time you open the Photos app after updating to iOS 16, or you can set one up later via Settings.
Here are the steps you can follow if you want to go for the latter option.
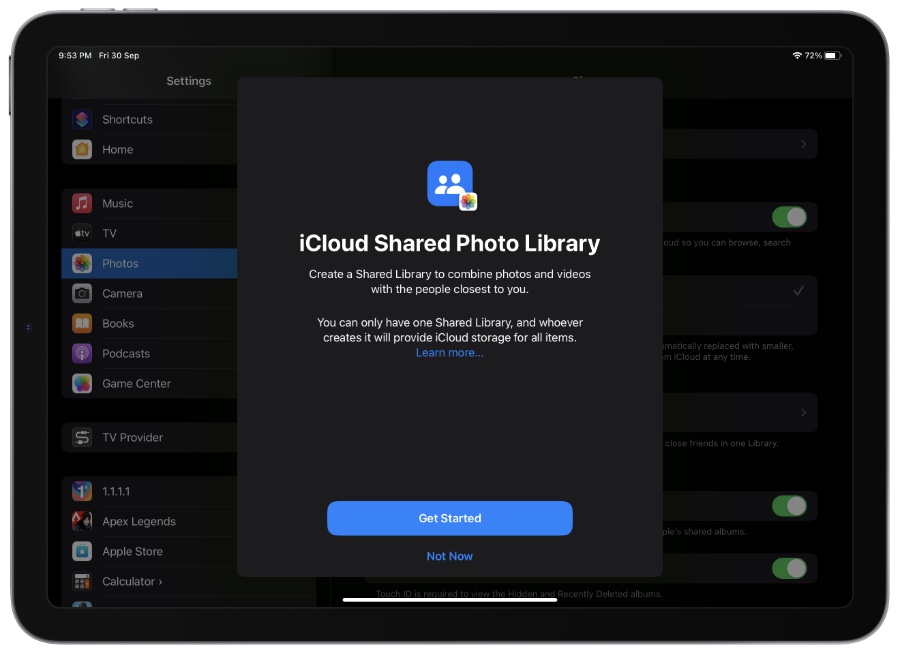
Step 1. On your iPhone or iPad launch the Settings app.
Step 2. Tap on Photos.
Step 3. Select Shared Library under “Library.”
Step 4. Tap Get Started.
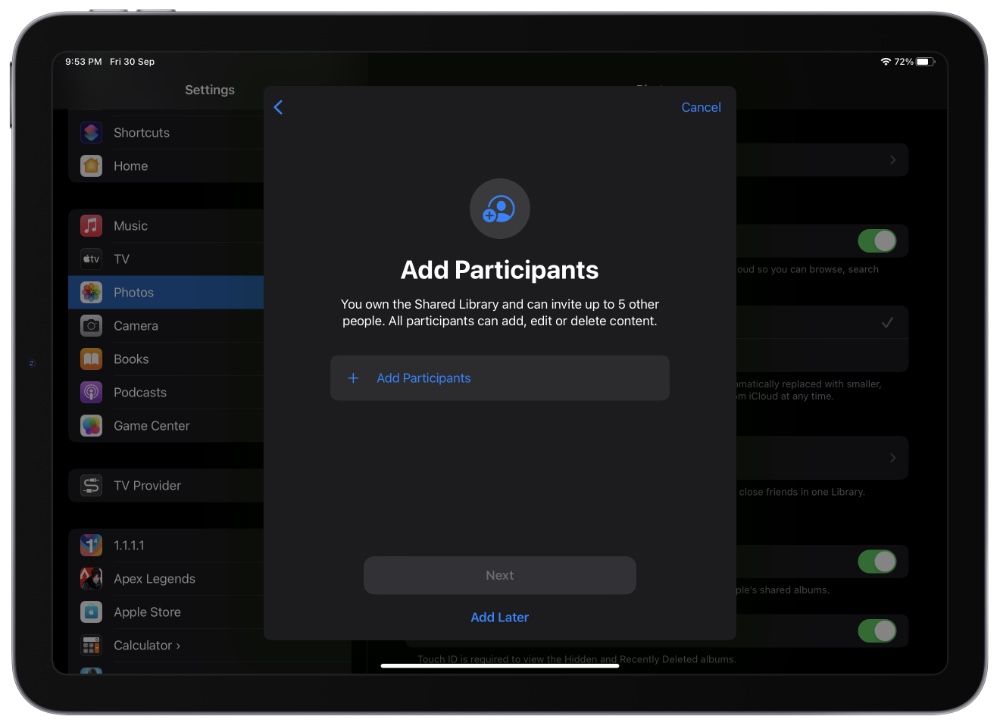
Step 5. Tap ‘Add Participants’ button in order to add people to iCloud Shared Photo Library, then tap Next. Alternatively, select Add Later.
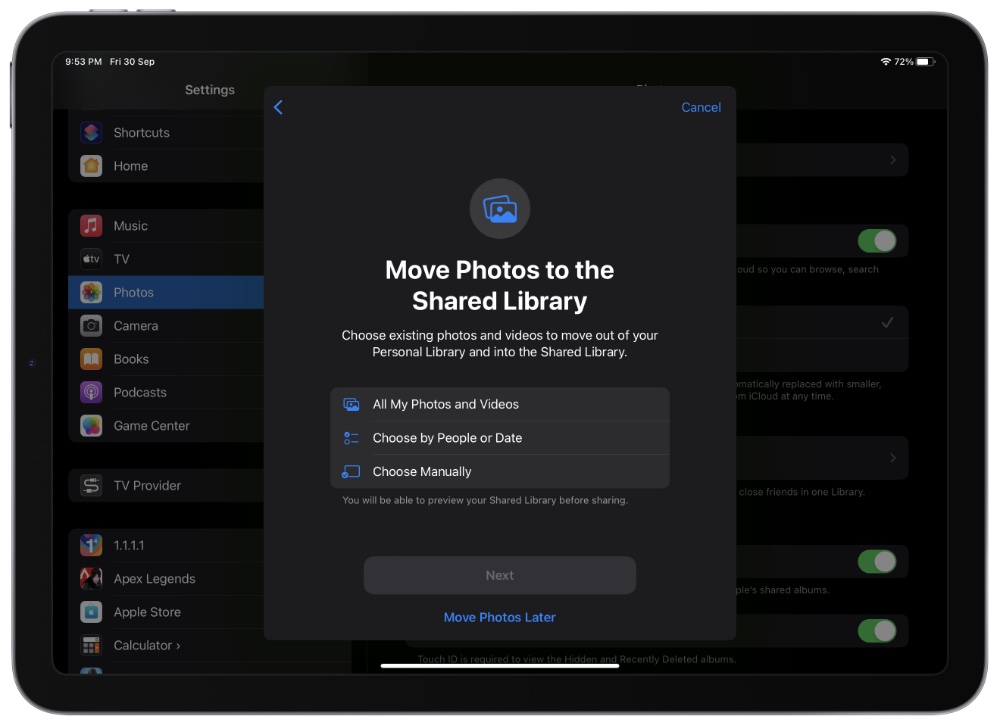
Step 6. Choose one of the following options to move existing photos and videos from your personal library to the shared library:
- All My Photos and Videos
- Choose by People or Date
- Choose Manually.
Then tap Next.
Step 7. Select Preview Shared Library or simply Skip.
Step 8. To invite participants in an iMessage, tap Invite via Messages, or tap Share Link alternatively.
Step 9. Share photos automatically or manually from your camera.
Step 10. Tap Done to finish setting up the Shared Library.
As soon as your Shared Library is up and running, it will appear in the Photos section of the Settings app, where you can add more participants, toggle suggestions, and control what images are shared from the camera. Additionally, you can choose whether to receive deletion notifications or not.
You can also create iCloud Shared Photo Libraries on Macs running macOS Ventura if you don’t have an iPhone or iPad. To create a Shared Library, go to the Photos app, click Settings, and then opt for the Start Setup option.
How to Invite Someone to iCloud Shared Photo Library
By following the steps below, you can invite more friends and family to your iCloud Shared Photo Library if you have already created one.
Note: As the creator of the shared collection, you are considered to be the “host,” so any photos you add will be stored in your iCloud account.
Step 1. Open Settings app and tap on Photos option.
Step 2. Under “Library,” tap Shared Library.
Step 3. Select Add Participants.
Step 4. Type the name of the person(s) you would like to invite, then select their email address or contact number from the search of your contacts list. If you want to add more people, tap the encircled + button.
Step 5. Once you are finished, tap Add.
Step 6. Tap the arrow in the blue circle to send them an iMessage invitation to the shared library. You can add a comment if you like.
That’s All There is to It, Folks!
As soon as the invitation is accepted and the person(s) is/are added to the library, you will be notified by the Photos app.
Do you like this new iCloud Shared Library Feature? Let us know your thoughts in the comments below.

