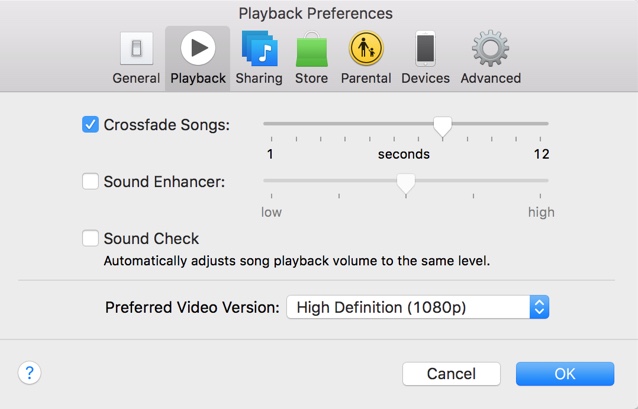
If you use Spotify, then you would be familiar with the music service’s crossfade effect, which fades out the currently playing song right at the end. What many people don’t know is that you can do the same on iTunes, on both Mac and Windows versions of the application, giving users a seamless music listening experience. When the crossfade feature is enabled, iTunes will fade out the song near its end and merge the playback with the next song for first few seconds (depends on the duration you set). iTunes even allows users to change the duration of the crossfade effect, giving users more control over it. Read on to learn how to enable Crossfade on Windows or Mac.
Enabling iTunes Crossfade on the Mac
If you are on a Mac, then simply launch iTunes and click on the ‘iTunes’ option from the top menu bar.
Next open ‘Preferences’ and from the top select the ‘Playback’ tab.
Now just enable the Crossfade Songs setting by checking the tick button. You can change the duration of the effect by moving the slider.
Enabling iTunes Crossfade on Windows
Windows users can also enable the crossfade effect. In order to do so, simply click on the ‘Edit’ option from the iTunes menu and from the dropdown click on the ‘Preferences’ option.
Now click on the ‘Playback’ button and enable the ‘Crossfade Songs’ and move the slider to change the duration.


