If you’re looking to enable Find My Mac in 2021, then you have come to the right place. Find My Mac service lets you locate your lost or stolen Mac on the Mac, and perform useful functions like remote erase.
By enabling Find My Mac feature on your MacBook and even iMac, you can make sure you are able to find the lost or stolen Mac and delete your data remotely in case it has fallen into the wrong hands.
Why enable Find My Mac? Well this is the same service that is available on iOS devices and it can be very instrumental in finding a Mac after you have lost it. And the biggest reason to enable it is that it has not only proven to work but it is also available for free from Apple.
Enable Find My Mac
It is very easy to turn on Find My Mac service on a Mac. We recommend that every Mac user should keep the feature active to improve chances of finding a lost Mac.
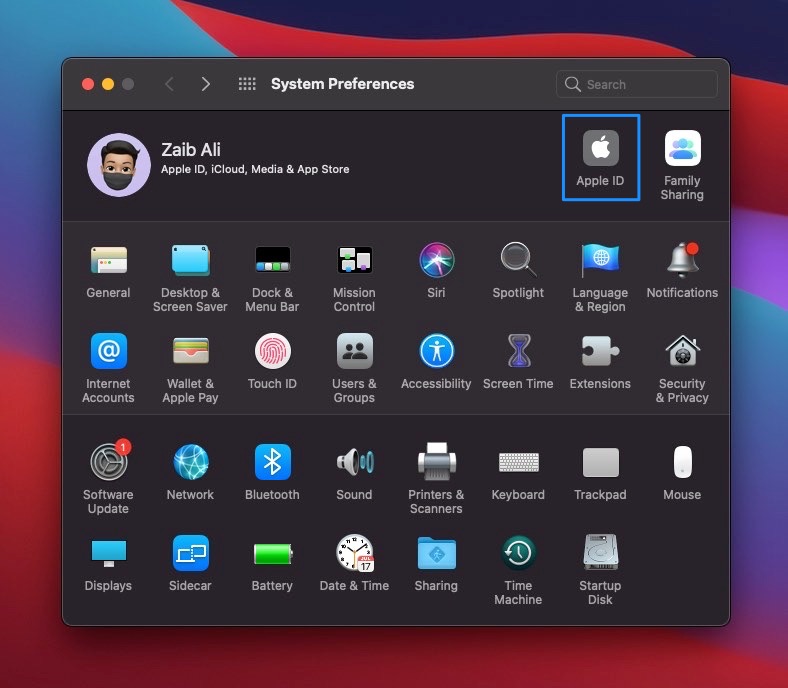
Step 1. On your Mac open System Preferences.
Step 2. Next click on the Apple ID option.
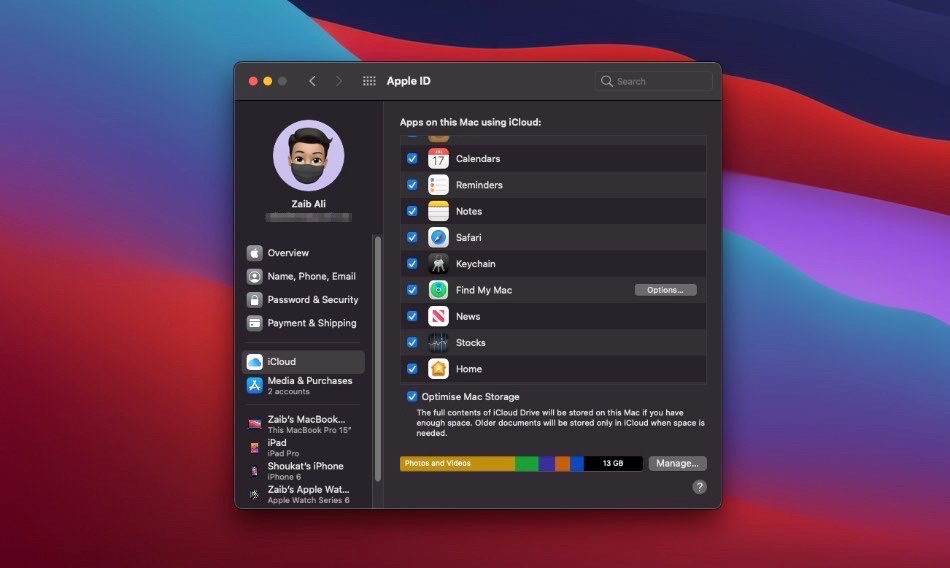
Step 3. Make sure the iCloud option is selected from the side pane.
Step 4. Now under ‘Apps on this Mac using iCloud:‘ look for Find My Mac.
Step 5. Enable Find My Mac by clicking on the tick mark button next to Find My Mac option.
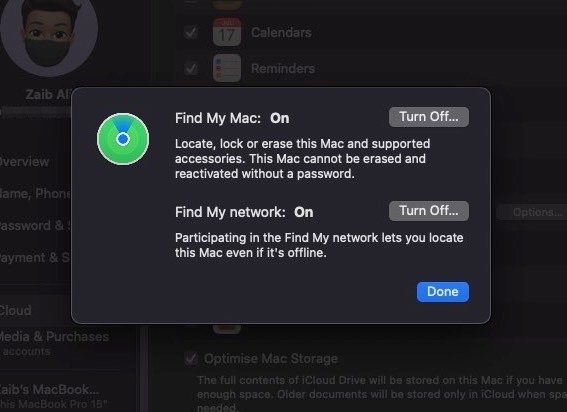
Turning on Find My Mac will not only enable Find My Mac service but it will also enable Find My network feature.
Find My network feature allows participating devices to locate your Mac even if it’s offline. This is a very useful feature and keeping this on can greatly improve the changes of you finding your lost or stolen MacBook.
Disable Find My Mac
You can disable Find My Mac service on your Mac or MacBook by following these steps.
Step 1. Open System Preferences and go to Apple ID.
Step 2. Select iCloud from sidepane look for Find My Mac under ‘Apps on this Mac using iCloud:‘ heading.
Step 3. Click on the tick mark to hide the tick.
There you go folks, this is how you can enable or disable Find My Mac service on your Mac or MacBook. If you have questions, then feel free to share with us in the comments below.
More useful Mac Tips:
- How to add your name to Mac menu bar
- How To Turn Off Notifications On Mac
- MacBook Pro Touch Bar Stuck At Black Screen With Only Esc Showing? Here’s The Fix
- How to Shutdown, Restart, Sleep or Log Out on Mac with Keyboard shortcuts only
- How To Reset Mac Bluetooth Module And Fix Bluetooth Connectivity Issues


