


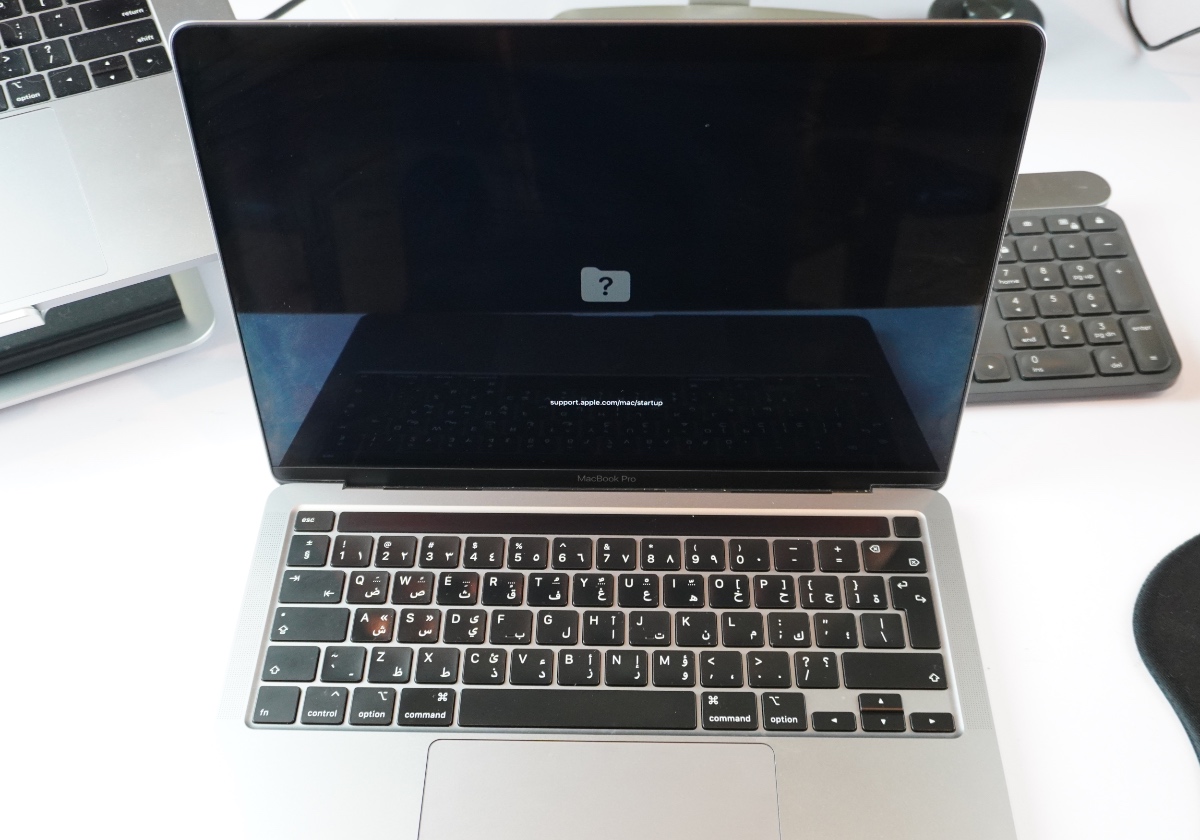
Are you experiencing an issue where a folder icon with a question mark appears on the screen and keeps on blinking. In this situation you will not be able to boot up macOS on your machine and Mac will become unusable.
In this guide we will show you how to fix Mac question mark folder error and get your Mac to boot macOS again.
Why does Mac question mark folder appear?

A Mac will show a flashing question mark folder icon when there is no startup disk available or it does not have macOS operating system installed. The error could show up if the Mac operating system is corrupt or it has been deleted by the user.
Hardware issues with the hard drive can also cause Mac question mark folder to appear. In that case either there is a problem with the hard drive itself (common with older Macs) or the issue is with the connection.
Fix Mac Starts up to question mark folder issue
In this guide we will show you how you can fix any software issues with your Mac that would be causing the flashing question mark folder to appear on it. So without any further ado, let’s get started.
Follow these steps if your Mac shows question mark folder momentarily and then boots up normally to macOS.
Step 1. Reset NVRAM on your Intel powered Mac.
- Shut down your Mac by hard pressing and holding the Power button.
- Once the Mac has turned off turn it on, and press and hold the Command-Option-P-R key combination.
- Release the keys after you see the Apple logo on the screen.
Step 2. Select your Startup disk.
- On Intel Mac: Press and hold Option key.
- On Mac with Apple Silicon: Press and hold power button until you see the Loading startup option.
Step 3. From the list of available startup disks select the one that has macOS installed and click on the up arrow or Continue button to choose your startup disk.
Mac stuck on blinking question mark folder
Follow these steps if your Mac boots up and then permanently shows question mark folder.
Step 1. Press and hold the power button for 10 seconds so that your Mac turns off.
Step 2. Turn on your Mac and immediately press the Command ⌘ + R keys. This will start your Mac in macOS Recovery. Select your Wi-Fi network and enter its password.
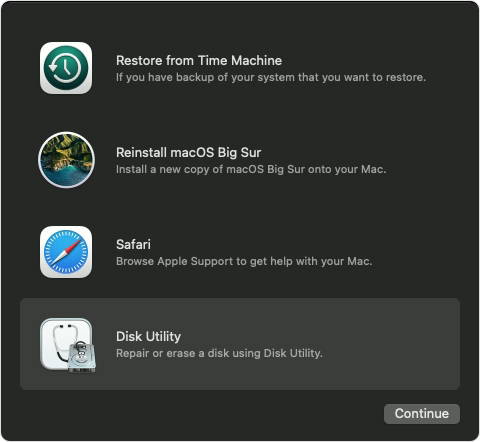
Step 3. Once you are in macOS Recovery from the menu click on Disk Utility. Skip this step if you directly want to install macOS on your Mac.

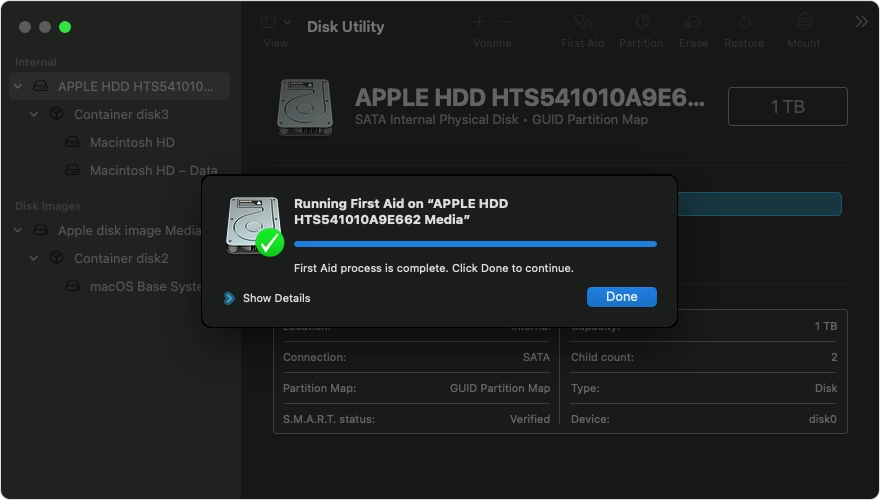
- Once in Disk Utility click on button located on top left side and make sure all volumes and containers are showing.
- Choose each volume and container and then click on the First Aid button to repair it.
- Next click on the Run button to start checking the selected volume for errors.
- After the disk utility has complete repairs on your selected volume, repeat these steps for each volume and container on your hard drive.
- Close the Disk Utility window to return to the main Recovery menu.
Step 4. Click on Reinstall macOS option.
Note: In case your disk does not show up or you are notified that macOS cannot be installed on your computer or volume, then you will have to erase your Mac’s disk. This can be done with following steps.
All of your data will be lost if you follow these steps.
- Return to the main Recovery menu and click on Disk Utility.
- Make sure you select the Macintosh HD from the side pane and then click on Erase button from the toolbar.
- Make sure you enter ‘Macintosh HD’ in the name field and select APFS or Mac OS Extended (Journaled) as the drive’s format.
- Finally click on the Erase Volume Group or Erase button.
- Exit Disk Utility to return to the main Recovery menu.
Step 5. Install the macOS and wait for your Mac to install the operating system.
There you have it, following the steps in the guide above should fix Mac showing blinking question mark folder and let you boot macOS without any troubles.
If you have any questions related to this guide, then feel free to let us know in the comments below.

