


In this tutorial, we’re going to show you how you can limit Photos access on your iPhone running iOS 17, making sure your personal pics remain strictly your eyes only.
We get it, your photos are your treasure trove of memories, and guarding them like a dragon hoards its gold is a top priority. We’re all tired of feeling like your cherished memories are being ogled by every app on your iPhone.
Your phone should be your personal space, not an open exhibit for every curious app. So, what’s the solution here?
Cue the all-new iOS 17 limit photos access for third-party apps feature. Think of this as your secret weapon in the battle for digital dignity.
How does the Limit Access to Photos feature work?
With iOS 17 update, Apple has dialed up the protection for your precious memories.
One of the new privacy boosting features introduced in the new update is the revamped Photos picker. Imagine it as a finely crafted sieve that lets you handpick which parts of your gallery each app gets to feast upon.
No more granting all-access passes to your camera roll – just give access to photos that you actually want to share with the app.
But that’s not all. The alerts about full-access app invaders are here to save the day, popping up to keep you in the loop.
In iOS 17 Apple will tell the users more information about what information will be shared with the apps. Not only will you be asked for permission to grant apps on iOS 17 full access to photos, but you’ll also get a sneak peek into what exactly the app wants to gobble up.
Location data? Image captions? They’ll spill the beans on it all, empowering you to make informed choices about who can step into your private playground.
Limit Access to Photos on iPhone with iOS 17
With the remarkable iOS 17 update as our guide, we’re delving into the art of limiting photo access on iPad and iPhone and ensuring your cherished memories remain for your eyes only.
So, let’s jump in and unravel the magic of iOS 17’s privacy prowess. Here’s a step-by-step guide to limiting Photos access on iPhone:
Step 1. Begin by installing the iOS 17 update on your iPhone. To update go to Settings -> General -> Software Update.
Step 2. After you have installed the update, you will begin receiving alerts when an app is requesting access to your photos. Review these alerts and decide whether you want to let these apps maintain their access. You’ll have three options to choose from:
- Limited Access: With this option, you give apps limited access to your photos. You can select which photos are shared.
- Allow Full Access: This is the all-access pass. If you trust the app, go ahead and let it roam free.
- Don’t Allow: If the app’s photo curiosity isn’t welcome, this option puts up a big “Do Not Enter” sign.
Step 3. When a new app seeks permission to access your Photos app for the first time, you’ll receive an alert notifying you about it.
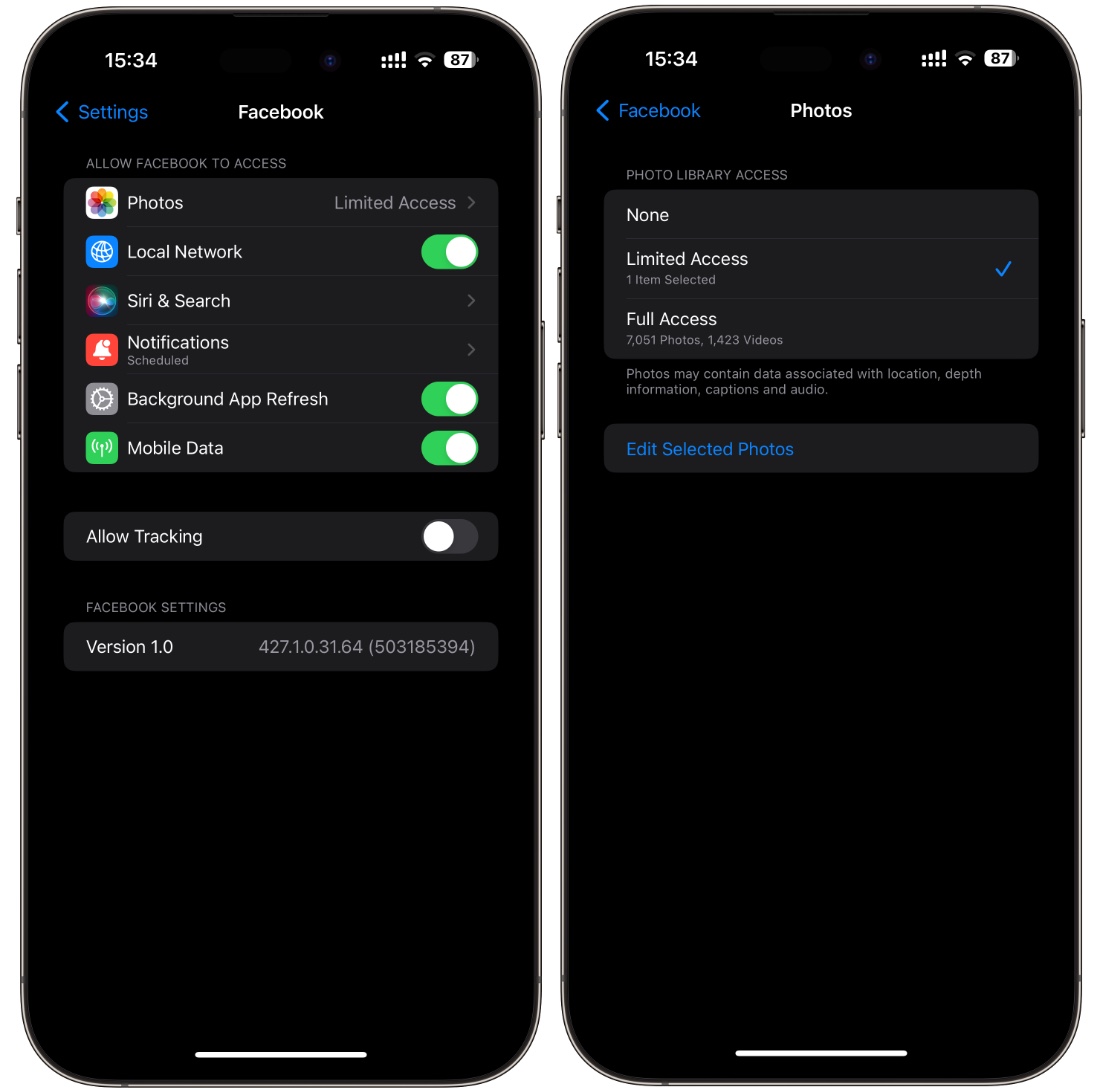
Step 4. Take Control of Access. If you want to restrict an app’s access to your iPhone Photos app, follow these simple steps:
- Head to the “Settings” app on your iPhone.
- Scroll down the list of apps and find the one you wish to limit.
- Tap on the app to enter its settings.
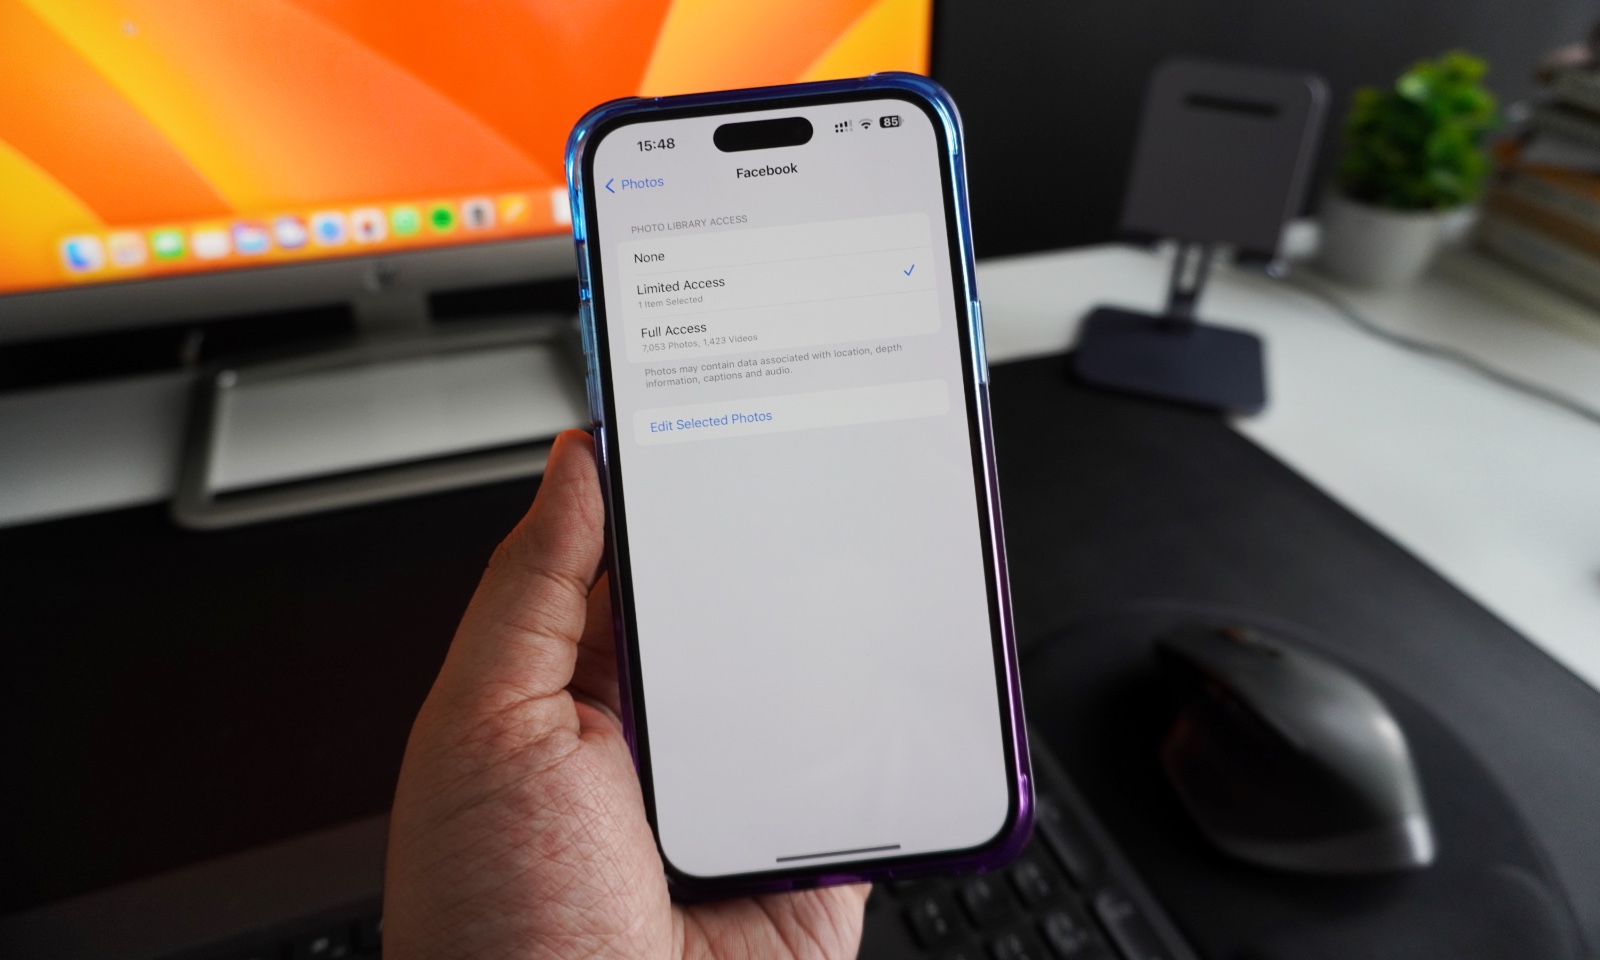
- Among the options, choose “Photos.”
- You’ll then be presented with the choice of “None” or “Limited Access.”
Once you’ve adjusted an app’s access from full to limited, the iOS 17 Photos picker will start appearing when an app tries to access your photos.
Bonus: Navigating the iOS 17 Limited Access to Photos
Once you’ve established restricted access to an app’s Photos, you’re always in control. If you decide an app’s access should be adjusted, simply follow these steps:
- Start by opening the “Settings” app on your iPhone.
- Navigate to the specific app for which you want to alter the access level.
- Once you’re inside the app’s settings, tap on the ‘Photos’ option.
- Within the ‘Photos’ section, you’ll find your previously chosen option (“Limited Access” or “None”).
- With a quick tap, you can switch it up and select a new access level that suits your ever-evolving privacy preferences.

