


One of the things that keep Apple users buying more and more of company’s devices each year is its sweet ecosystem. While Apple’s walled garden annoys those who own devices from several different manufacturers, those who are all-in on Apple enjoy many perks.
If you don’t already know this, iOS has a killer document scanning feature built inside the Notes app, which allows users to quickly scan a document using the device’s camera. We compared the document scanning feature of iOS with an actual scanner and iOS’s performance was pretty impressive.
One of the great Continuity features that makes user’s life convenient is the ability to scan a document from an iPhone, iPad and iPod touch and directly insert it anywhere on the Mac. Yes you read that right, you can use your iPhone’s camera to scan a document and then directly insert that scanned image anywhere on your Mac including but not limited to Pages, Mail, iMessage or any third-party app. All this without even having a bulky scanner.
Scan A Document Anywhere On Mac Using iPhone or iPad
To scan a document on your Mac through an iPhone or iPad follow the simple instructions below.
1. On your Mac open the application you want to insert the scan in. While this works in most applications, we will be using Pages for Mac for this tutorial.
2. Once the application is running on the Mac right-click on the document you want to insert the scan into.
3. If you have one iOS device then you will get the Scan Document option on this menu. If you have multiple, from the right-click menu click on ‘Import from iPhone or iPad’.
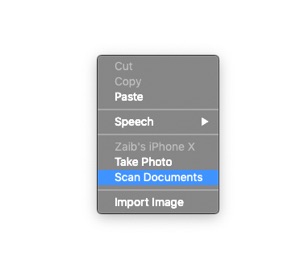
4. Now you will see another menu that lists all of your iOS devices. Under the device you want to take the scan from click on the ‘Scan Document’ option.
5. Doing so will instantly open the document scanning interface on the selected iOS device.
6. Position the document properly on your iPhone’s viewfinder and click on the shot button to take the scan.
7. Now drag the corners of the scan area to make adjustments.
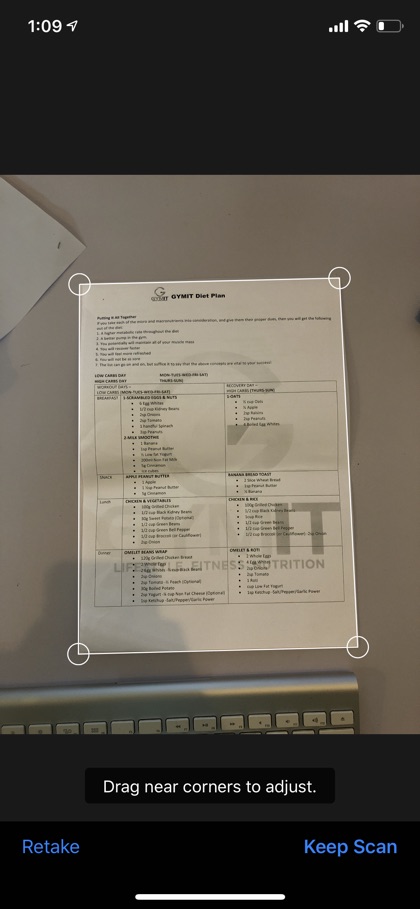
8. Finally tap on the ‘Keep Scan’ button from your iOS device. Then you can either take another scan or tap on the ‘Save’ button to finish.
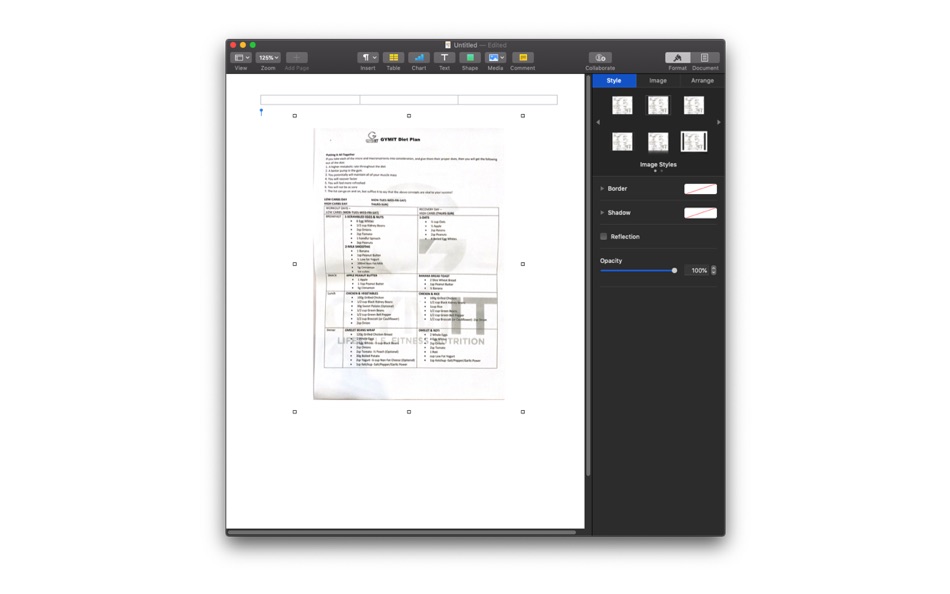
Once you have finished the document scanning process, your scanned image will be automatically transferred to your Mac and inserted in the document you are working on.
While this method is great for casual document and receipt scanning, you would still want to use a dedicated scanner for professional work. Still this is an amazing feature to have that can be pretty useful in situations where you need to take a quick scan.

