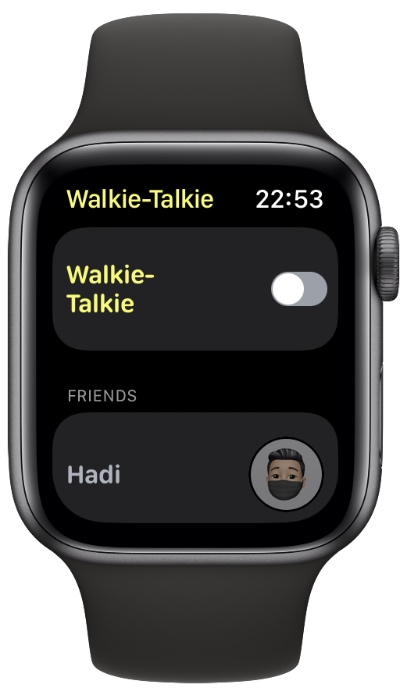
Walkie-Talkie on Apple Watch is one of my favorite features of watchOS, as it allows users to quickly talk with friends no matter where they are.
You can use Apple Watch Walkie-Talkie feature to quickly communicate with a friend when you are out shopping or when you want to find someone in the crowd.
Apple Watch Walkie-Talkie is also a fun feature that is reminiscent of walkie-talkie toys we used to play with as children.
While all Apple Watch models running watchOS 5.3 or later feature Walkie-Talkie support, many users keep asking how do you use walkie-talkie on Apple Watch. If you also have this question, then we have got you covered.
Before you can use Walkie-Talkie on Apple Watch make sure of the following points.
- Your Apple Watch is running watchOS 5.3 or later.
- Your iPhone is running iOS 12.3 or later.
- Your iPhone has FaceTime app installed and you are able to make and receive FaceTime audio calls.
- Walkie-Talkie app is available in your region (check here).
How to set up Walkie-Talkie on Apple Watch
You can follow the steps below to add friends to Walkie-Talkie feature, Accept Walkie-Talkie Invitations, Start a Walkie-Talkie conversation, talk over Walkie-Talkie, and turn Walkie-Talkie on or off.
Add friends to Apple Watch Walkie-Talkie
You can add friends to Walkie-Talkie Apple Watch feature by following these steps.
- Open the Walkie-Talkie app on Apple Watch and tap on ‘Add Friends’.
- Choose the contact that you want to add to Walkie-Talkie.
- Wait for the contact to accept your invitation.
Your friend’s card will appear grey and appear under ‘Friends You Invited’ until your friend accepts the invitation. As soon as they accept the card will turn yellow and you will be able to talk to them.
Accept Walkie-Talkie invitation
If you have received a Walkie-Talkie invitation from a friend, then you can accept it in the following way.
Tap on ‘Always Allow’ in the notification that appears when someone invites you. If you have missed this notification, then you can also find it in Notification Center by pulling down from the top of your screen.
You can also find pending Walkie-Talkie invitations inside the Walkie-Talkie app on Apple Watch.
Start a Walkie-Talkie conversation
You can start using Walkie-Talkie and talk to friends by following these steps.
- On your Apple Watch open the Walkie-Talkie app.
- Tap on the name of friend you want to talk to.
- Touch and hold the ‘Talk’ button and say what you want to say.
- Whenever you talk your friend will receive an alert.
Are you seeing ‘Connecting’ on the screen? Make sure you and your friend are connected to the Internet and wait for Walkie-Talkie app to connect.
Talk over Walkie-Talkie
You can talk over Walkie-Talkie by tapping on your friend’s name in the Walkie-Talkie app and then tapping and holding on the Talk button.
You can also enable Tap to Talk feature of Walkie-Talkie app so you don’t have to keep the Talk button pressed while you talk.
Turn off Walkie-Talkie feature
You can temporarily turn off Walkie-Talkie feature by following these steps.
- Launch the Walkie-Talkie app on your Apple Watch.
- Scroll all the way up to the top and turn off the Walkie-Talkie toggle.
When you turn off Walkie-Talkie toggle you will become unavailable and your friends will no longer be able to reach you.
You can turn on Walkie-Talkie again by turning the toggle back On.
There you have it folks, this is how you can set up Walkie-Talkie feature on Apple Watch and add friends to it.


