


Provenance is an excellent emulator for iOS and tvOS. It allows you to play old Sega and Nintendo games on your device. Not only does it fully play the games, but it also allows other features that are not supported on the original consoles, such as HD output and save states. Today, we are going to be going through the steps needed to set up Provenance on your Apple TV, so you can enjoy your childhood memories all over again! While this tutorial is focused on the tvOS version, most of the steps will apply for the iOS version as well.
Getting started with Provenance on tvOS/iOS
Here are the things you will need:
- Apple TV 4th Generation or higher
- Mac with Xcode 7 or higher
- USB Type A to USB Type C cord (Or if you have the new MacBook and want to plug your Apple TV directly into it, a USB Type C to USB Type C cord)
The first thing your going to want to do is plug in your Apple TV into your Mac. Once that’s done, open Xcode and go to the menu bar. Select “Source Control” > “Check Out”. Go to Provenance’s GitHub page here and copy the url found on the page.
Now Copy it back to the check out window in Xcode and hit next. Afterwards select Master branch and continue. Press download and then select Provenance.
Now in the top left corner, there should be the Provenance icon. Select it, then choose “ProvenanceTV-Release”. In the main window, you should see a text field entitled “Bundle Identifier”. Beside it should be “com.jamsoftonline.Provenance”. Change the “jamsoftonline” to something unique. A good option is your full name.
In this case, I’m using “iOSHacker”. Enter in your unique Bundle ID, then look lower at “Team”. If it says “None” select it and choose “Add an account…” Type in your Apple ID and password. If you need a developer account, you may sign up for one here. If you see a warning saying that there are no matching provisioning profiles found, just press the “Fix Issue” button.
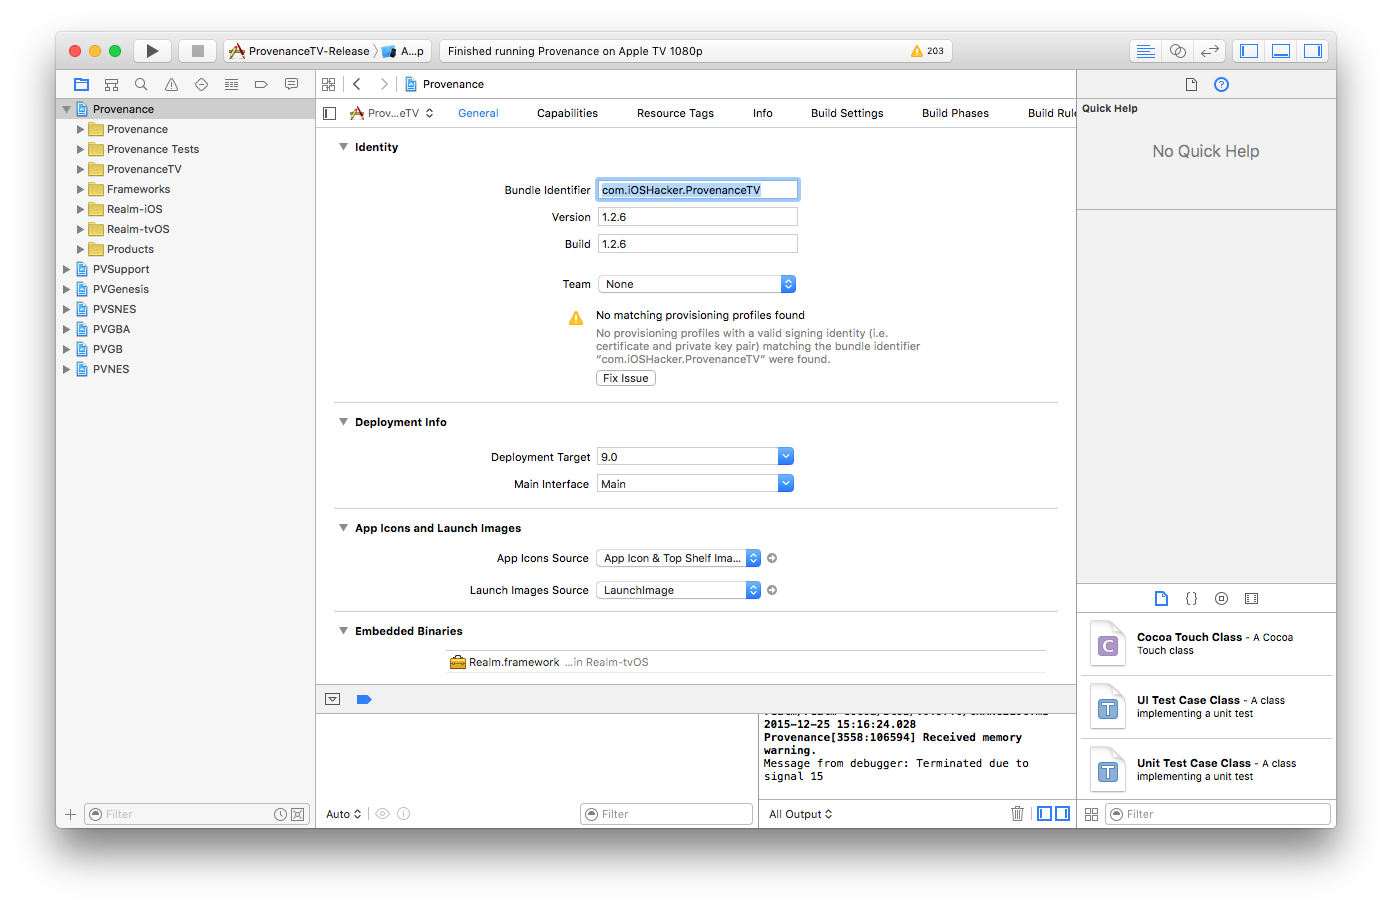
Now, beside the “ProvenanceTV-Release” button that you selected early, there should be another button beside it. It should say Apple TV 1080p. Select it and change it to your Apple TV that you have plugged into your Mac. Now for the big moment! Hit the Run button beside it, wait for it to compile, and if you did everything right, Provenance should now be installed on your Apple TV!
![]()
Now with that done, we move into the next step, which is transferring ROMs from you computer to the Apple TV. You may follow the following steps, or watch the following video to see how.
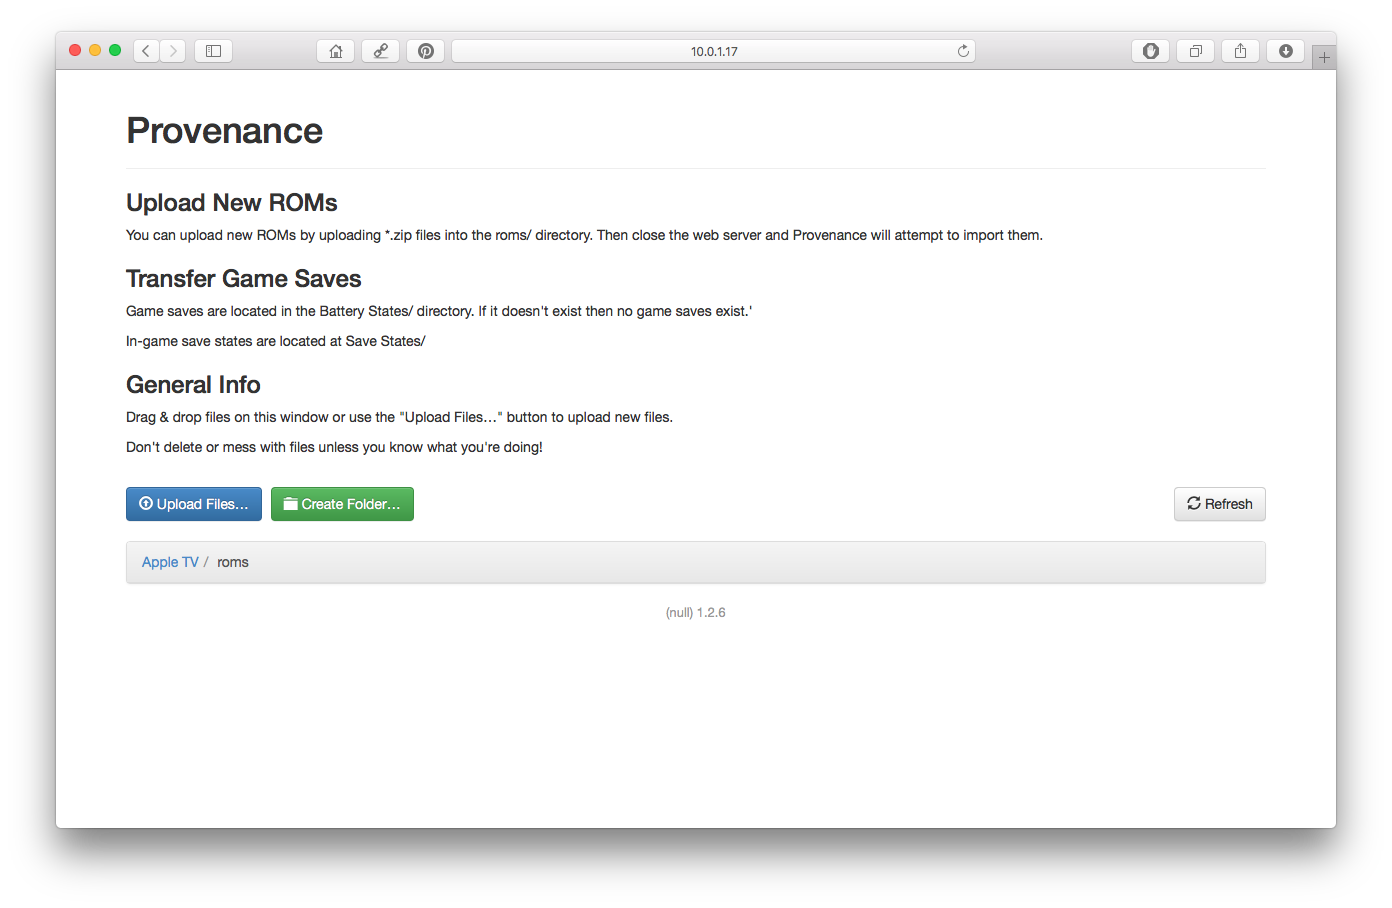
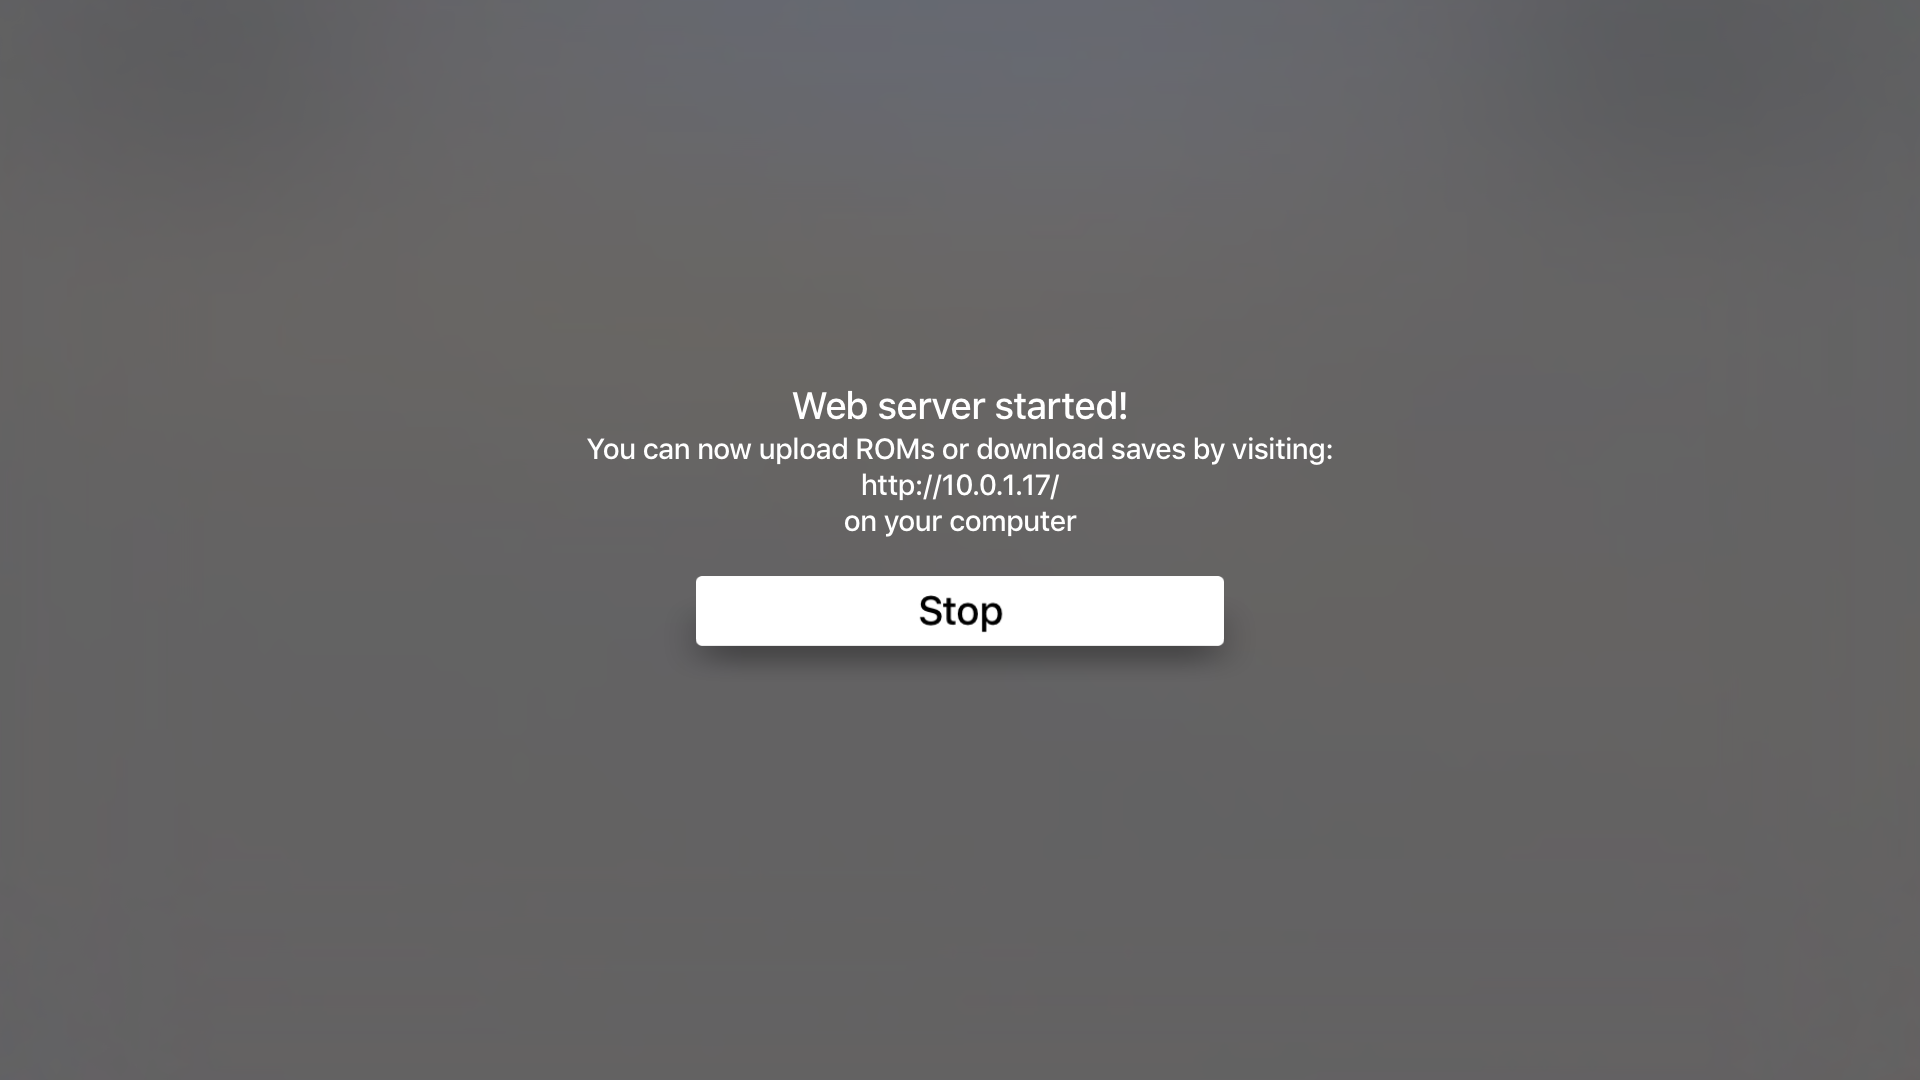
Open Provenance on your Apple TV. In the top right corner there should be an “Import ROMs” Button. Press it. Now a web server has started. Enter the URL it gives you on the computer you want it to connect to thats on the same network (It doesn’t need to be a Mac). It’s most likely “http://10.0.1.17”. You should now be connect to the Apple TV.
Now, find your ROMs on your computer. You may find commercial ROMs on the internet just by doing a quick Google search. You can also find some pretty fun and cool Homebrew games as well, such as the excellent D-Pad Hero and it sequel. If your interested, you can find it here. If you just trying to find a quick ROM to test with, you may use this one found here.
In your browser, open up the ROMs folder in the browser, then drag and drop your ROM in the folder. Once you uploaded your ROMs to the Apple TV, you can select “Stop Server”.
And that’s it! Now you can select the ROM you want to play and start playing! It’s best if you use a bluetooth controller with it if you want the best experience, but the Apple Remote isn’t bad for some games. For example, I was able to beat Mega Man 2 with it with no save states. And some games have controls that work really well (In Super Mario Bros., you touch your finger in the direction that you want to walk, and you can press it to run).

How did you like this tutorial? Did it work for you? Let us know in the comments! And don’t forget to subscribe to us for more updates!

