Despite their popularity not all of the macOS users know how to use emoji on Mac. So if you are a Mac user, you should know how to add emoji on Mac, and that is exactly what we are going to tell you in this post. Read on to learn how to get and use Emoji on Mac.
Emojis have become pretty viral in the past few years. While they were originally popular in Japan, today Emojis enjoy a global dominance and have changed the way we communicate over instant messaging.
Emojis not only help us in expressing emotions and thoughts but also augment our words and deliver the right meaning of our message. The emojis are now effortlessly included in our everyday conversation that is the reason we now see them everywhere including on our Macs.
How to Use Emojis on Mac
Here is what you can do:
- Place the cursor in the text field where you want to add an emoji.
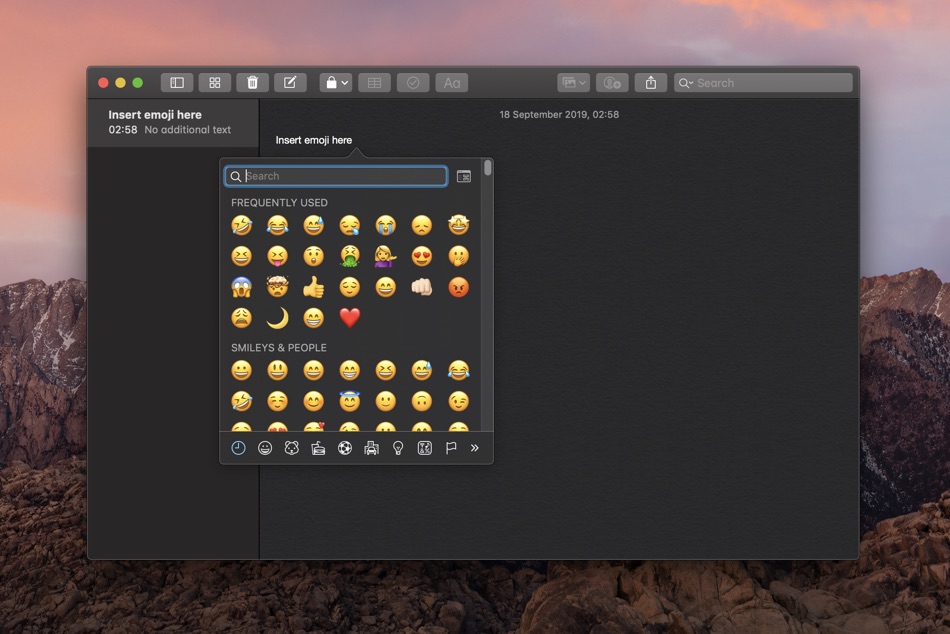
- On your keyboard press Command-Control-Spacebar keys to display the emoji selection interface.
- Click on the emoji you want to use and emoji will be inserted in the area where you placed the cursor.
How to Get Emojis On Mac Menu Bar
While accessing the Emojis picker on Mac becomes simple through the keyboard shortcut shared above, you can also get Emojis to Mac menu bar for easier access. This way you can type emojis on Mac more quickly.
In order to quickly access the emoji picker, you can add them to the Menu bar of your Mac quite easily. Here is what you need to do:
- Click the Apple icon on the top left corner of your Mac’s screen.
- Go to System Preferences.
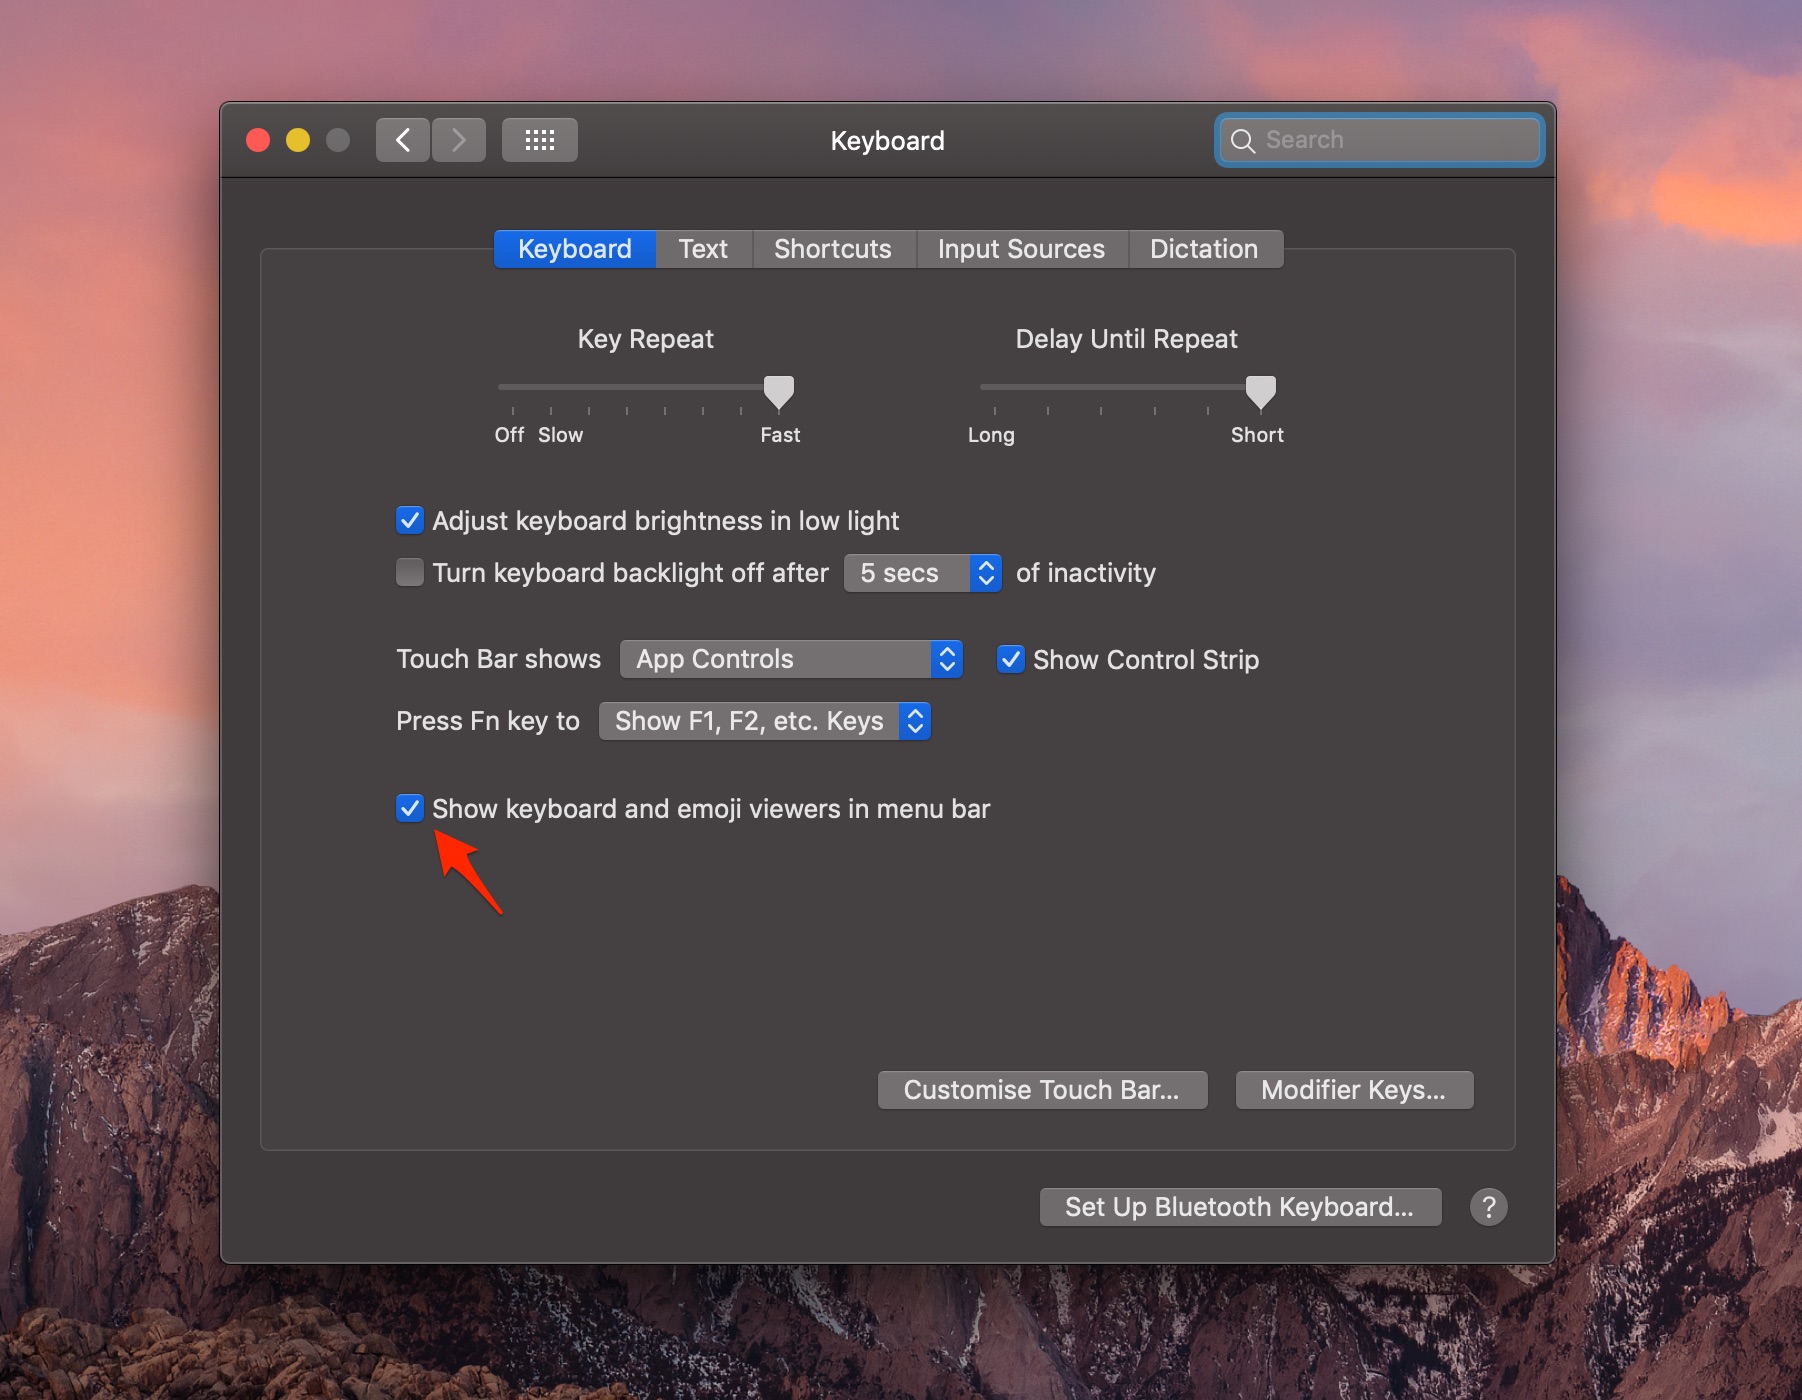
- Now click on Keyboard.
- Click on the option box near ‘Show keyboard and emoji viewers in the menu bar’.
Note: There are several emojis divided into various categories such as basic smileys and emotions to people, animals, nature, food and drink, activities, places, flags objects, and symbols. To find your emoji quickly you can type few letters of the desired emoji that you want to use. This way you will not have to scroll through the entire list of the emojis.
Did you find this article helpful? Share with me in the comments below.
For more useful posts, stay tuned to iOSHacker.


