


The seamless connectivity between an iPhone and a Mac is one of the reasons why many people use both. You can transfer files with AirDrop, take calls with Handoff, and continue a task on another device with Continuity. As it turns out, the Apple ecosystem does indeed serve a useful purpose.
One of the many useful features is the Continuity Camera. It allows you to take pictures or scan documents with your iPhone and attach them to a Mac. Whether you are adding an image to an email or a note, you can do this. Using this method makes your iPhone and Mac work better together and adds a good level of convenience.
Here’s how you can take photos with iPhone camera on Mac and use your smartphone to scan and add documents to your Mac.
Use iPhone’s Camera to Scan Documents on Mac
Do you want to snap a picture immediately and import it into a Mac application? Is there a document you want to scan and insert into the current document? If you want to do either, here’s how it works with Continuity Camera:
Take a Picture with iPhone Camera on Mac
Step 1. On your Mac, open a supported app.
Step 2. Choose one of the following options:
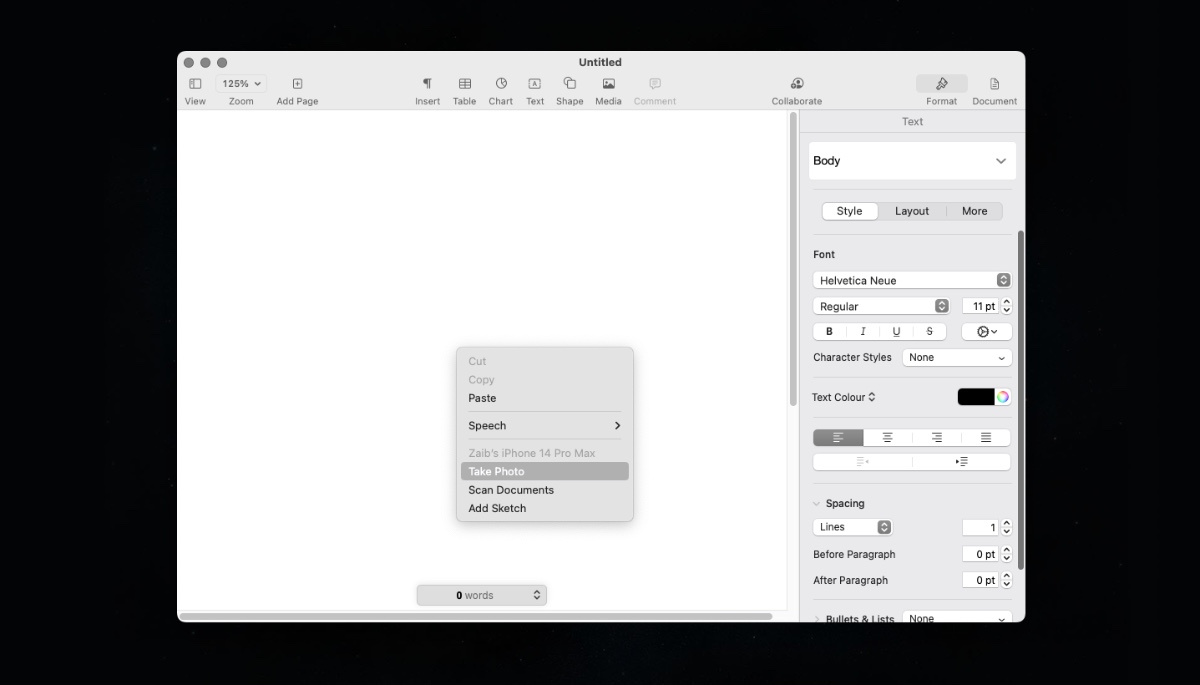
- Click on the app window where you want to insert the photo. You can take a photo from the shortcut menu that appears by selecting Insert from iPhone or iPad > Take Photo. You can do this in the Finder window as well as on the desktop.
- Choose Insert from iPhone or iPad from the File menu (or Insert menu, if applicable) > Take Photo.
Step 3. The Camera app will be opened on your iOS device. Take a photo by tapping the shutter button, then tap Use Photo. On your Mac, your photo appears in a window.
Scan Documents with iPad Camera on Mac
Step 1. On your Mac, open a supported app.
Step 2. Depending on your preference, you can either:
- In the app window, control-click the location where you want to insert the photo. Choose Insert from iPhone or iPad from the shortcut menu that appears > Scan Documents. It can be done in a Finder window or on the desktop.
- Choose Insert from iPhone or iPad > Scan Documents from the File menu (or Insert menu, if applicable).
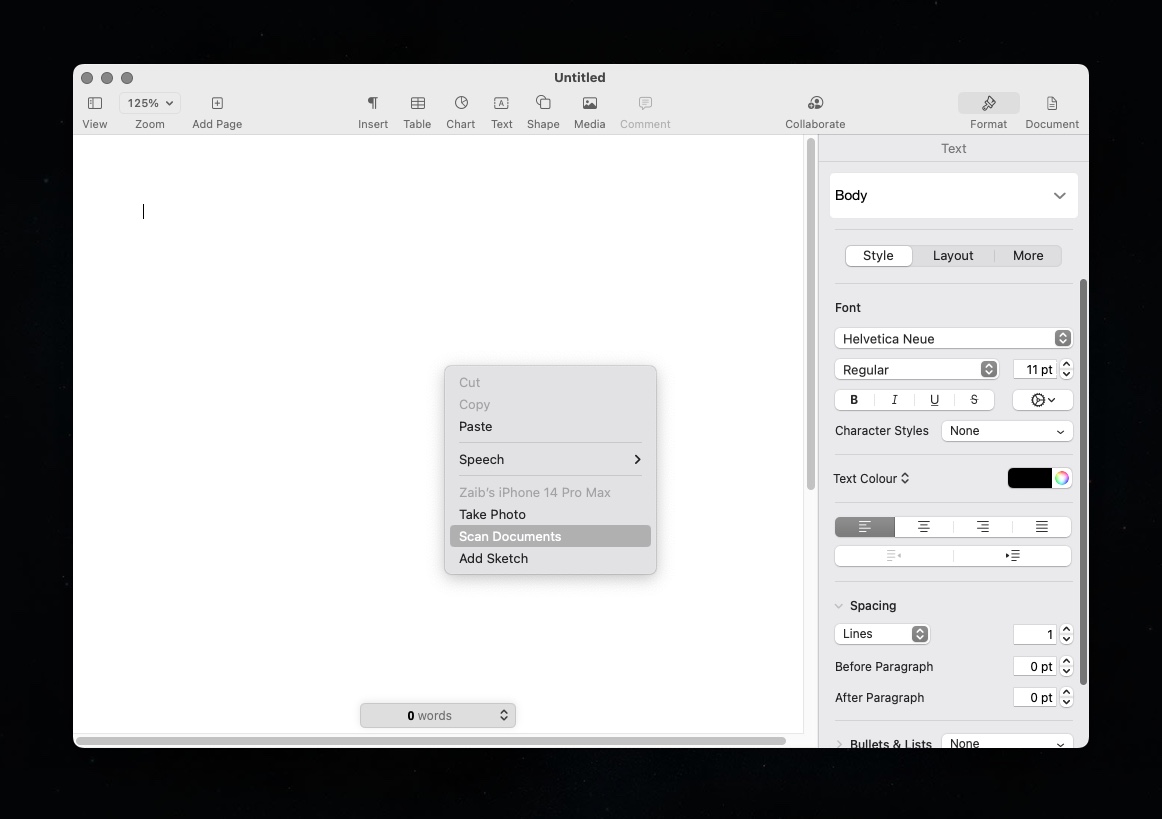
Step 3. The Camera app will be opened on your iPhone or iPad. Put your document in front of the camera and wait for the scan to finish. Manually capture a scan by tapping the Shutter or Volume buttons, dragging the corners to fit the page, and then tapping Keep Scan.

Step 4. If you need to add more scans to the document, do so or click Save when you’re done. Your scans will appear as a PDF in the window on your Mac.
Use an App that Supports Continuity Camera
With Continuity Camera, you can use a variety of apps, but they are all first-party Apple solutions. While it’s not clear whether this is a limitation or something that will change in the future, at the time of writing the following apps support Continuity Camera:
- Finder
- Keynote 8.2 or later
- Messages
- Notes
- Numbers 5.2 or later
- Pages 7.2 or later
- TextEdit
To Conclude
On your Mac, this is an efficient way to attach documents to emails and notes. You won’t have to go through the hassle of taking pictures of every document manually and cropping them separately. There is no doubt that many professionals will find this guide useful.
Was this guide helpful? Let us know in the comments section.

