Are you looking for an easy way to unlock your iPhone without passcode? Then look no further as that is exactly what we are going to share with you in this guide.
Forgetting an iPhone’s passcode is a common occurrence. When this happens you are left with no choice but to spend hours figuring out how to get into your iPhone or iPad.
Good news is in this article we have shared ways that will let you bypass iPhone passcode and gain access to your device in no time.
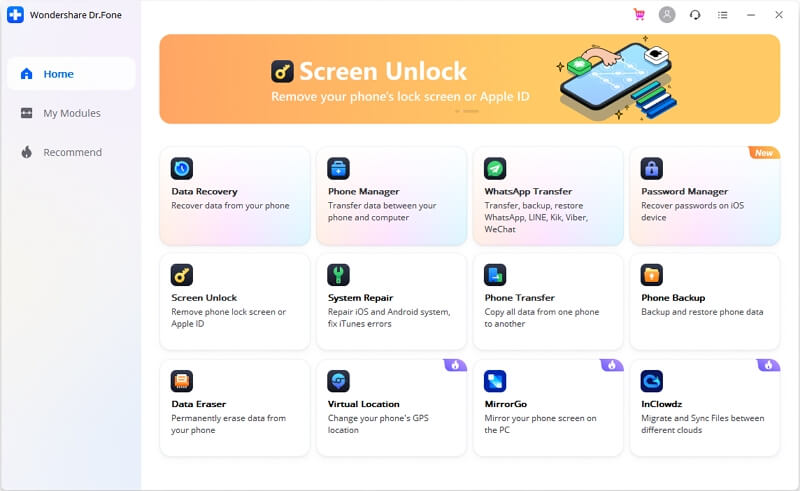
Here we have featured two different ways to unlock iPhone without passcode. The first way involves a third-party tool called Dr.Fone – Screen Unlock. This makes it possible for iOS users to unlock iPhone without passcode and recover an iPhone that is stuck in disabled state due to excessive wrong passcode entries.
Dr.Fone – Screen Unlock works with all models of iPhone, iPad and iPod touch and is fully compatible with all versions of iOS including iOS 15.5.
The second method that we are sharing here involves Finder or iTunes in case you are a Windows user. This is the first party solution to unlocking an iPhone whose passcode is unknown.
Method 1: Unlock iPhone Without Passcode With Dr.Fone – Screen Unlock
Here are the detailed instructions on how to unlock iPhone without passcode with Dr.Fone – Screen Unlock for Windows and Mac in order to unlock your iPhone, iPad or iPod touch without its passcode.
Step 1. First of all make sure you download the Dr.Fone – Screen Unlock tool from the official website. Run the tool after downloading it.
Step 2. Now connect your iPhone to the computer using its Lightning cable.
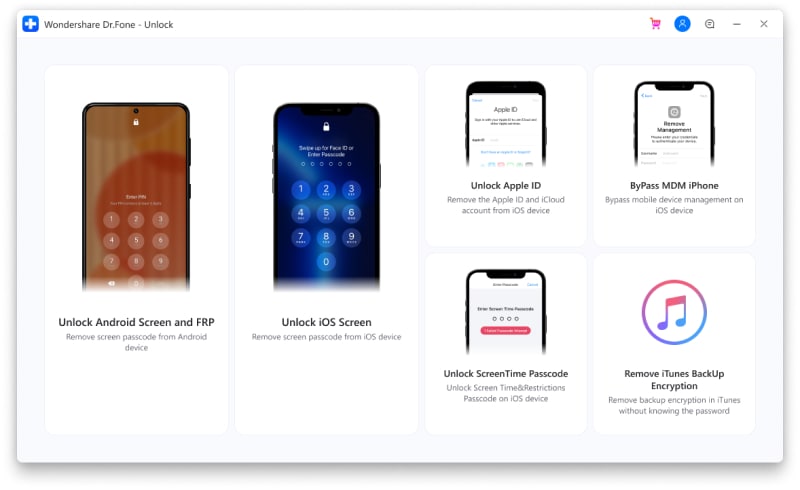
Step 3. Once your iPhone is detected you will get a bunch of options on the tool’s window. Click on ‘Unlock iOS Screen’ to start the unlock process.
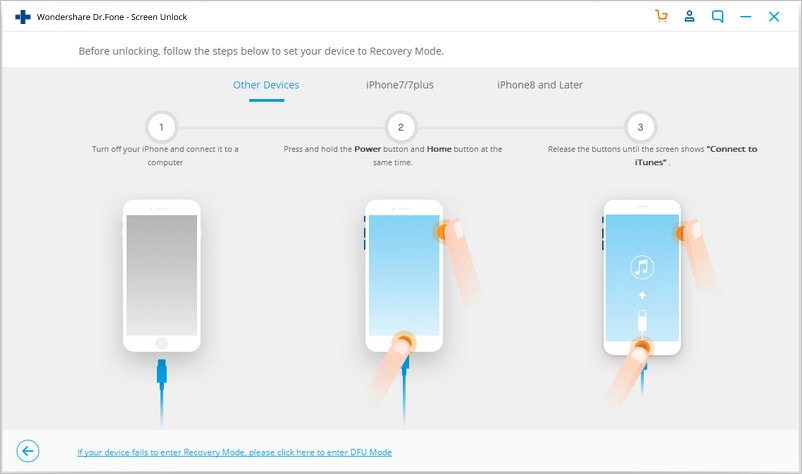
Step 4. Next you will have to put your iPhone in DFU mode. Follow the on screen instructions or use our guide here to put your iPhone into DFU mode.
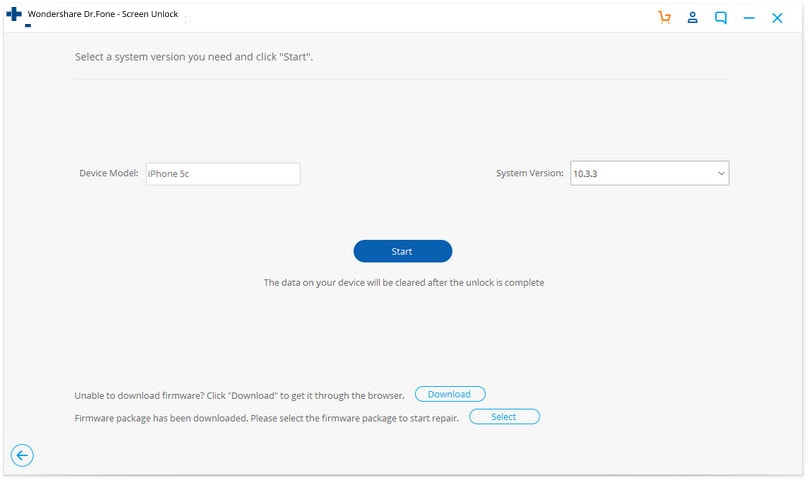
Step 5. As your iPhone enters DFU mode Dr.Fone – Screen Unlock will detect your device’s model and iOS version. Confirm the information is correct and click on the ‘Start’ button to proceed.
Step 6. The tool will now download the appropriate version of iOS from the web. Make sure your computer remains connected to the Internet and you let it complete the iOS download process.
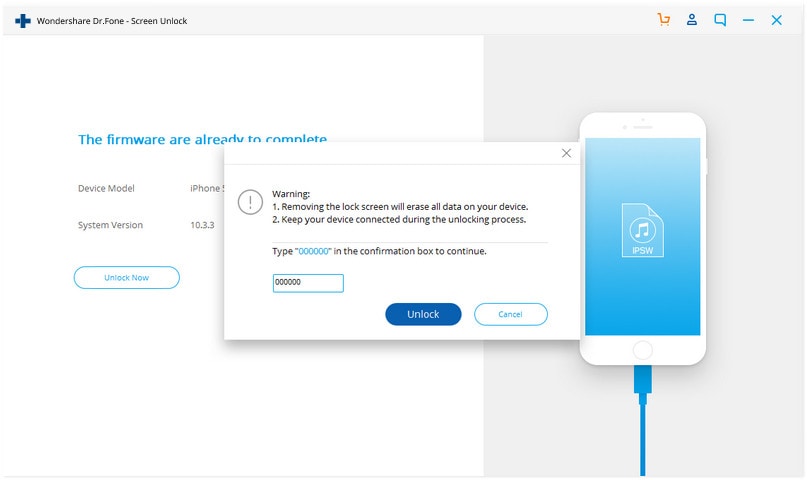
Step 7. Once the iOS firmware has been downloaded Dr.Fone – Screen Unlock will proceed to erase your device’s passcode. When prompted type the on-screen code and hit the Unlock button.
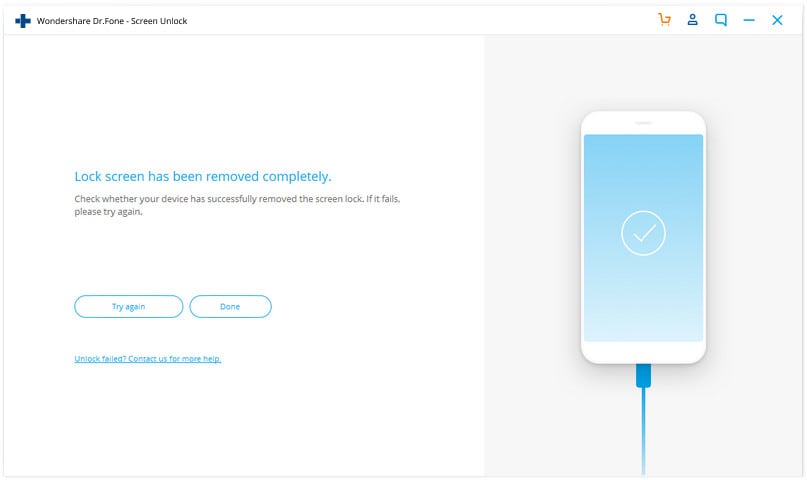
Step 8. Now Dr.Fone will start the unlocking process on your device, which could take a few minutes to complete. After the process is complete your device will reboot and you will be able to use it like normal.
You can download the free trial of Dr.Fone and try out its feature. The tool is available with a $69.95 yearly license while you can also opt for a perpetual license that costs $79.95.
Method 2: Unlock iPhone without passcode using Finder or iTunes
In the section of this guide we will show you how you can unlock iPhone without passcode with the help of Finder (Mac) and iTunes (Windows).
Step 1. Turn off your iPhone and make sure your iPhone is disconnected from the computer.
Step 2. Now press and hold the power button on your iPhone. If you have iPhone 7 or iPhone 7 Plus, then press the Volume Down button. iPhone SE 1, iPhone 6s or older iPhone users can press and hold their device’s home button.
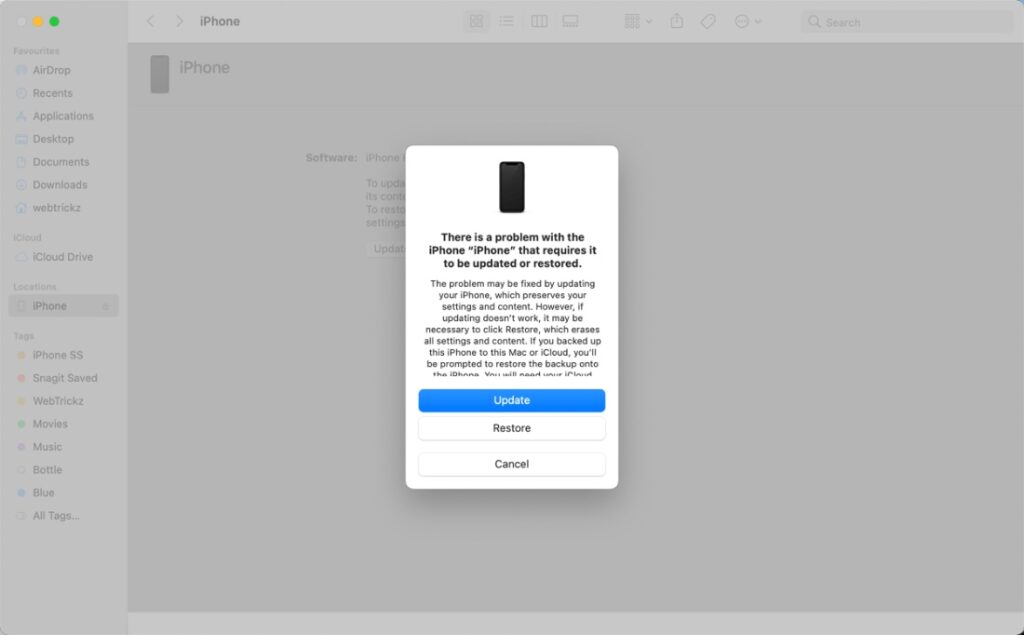
Step 3. Now connect your iPhone to the computer using the USB cable. When prompted by iTunes or Finder click on the Restore button.
Step 4. Now iTunes/Finder will start downloading the appropriate iOS version for your device and begin the restore process.
Once the restore is complete you will be able to use your iPhone or iPad.
There you have it folks, you can use these two methods to bypass passcode unlock on your iPhone and regain access to it without having to go to the Apple Store or a third-party repair service for help.
If you have any questions regarding this guide, then feel free to let us know in the comments below.


