


In this guide, we have shared multiple ways through which you can schedule a text message on an iPhone. Text message scheduling gives you the flexibility of sending a delayed text message at a later time of your choosing.
Scheduling a text is useful in situations where you want to send an important message or information to someone at a specific time in the future. Users can benefit from scheduled messages when it comes to Wishing for birthdays, sending reminders, and more.
On iOS 17 or earlier, users can take advantage of the Shortcuts app to schedule a text on iPhone. We have shared steps on how to achieve this in this guide.
Starting iOS 18 or later the stock Messages app will also allow users to schedule text messages through iMessage. Detailed instructions for this are also shared below.
Schedule Text on iOS 17 or earlier (Shortcuts)
Step 1. Open Shortcuts and go to the Automation tab.
Step 2. Tap on the ‘+’ button from the top right corner of the Create Personal Automation option.
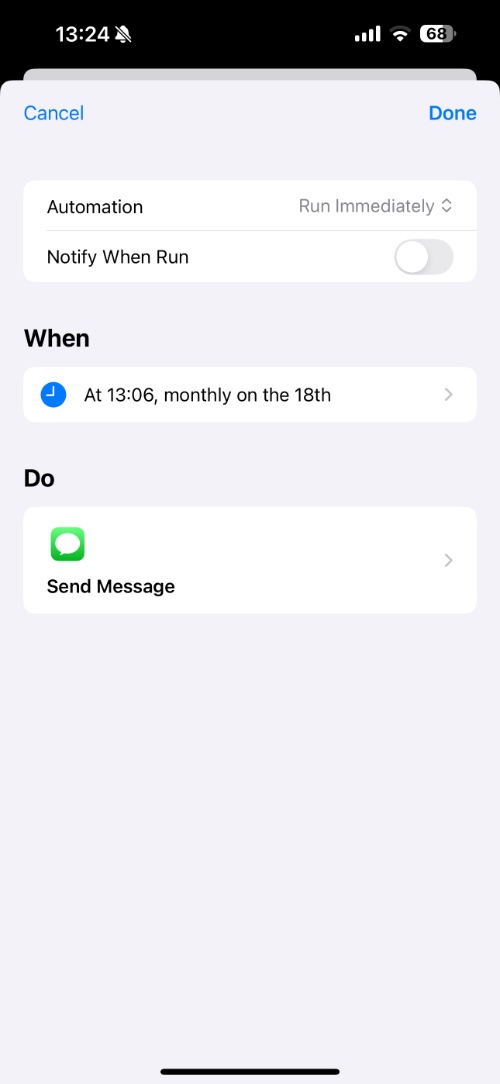
Step 3. On the New Automation menu tap on the Time of Day option. Then choose the time of the day you want to send the text message.
Step 4. Under Repeat choose the Monthly option and select the date you want the message to be sent on and tap on Next.
Step 5. On the next screen search for Send Message and add this action to your automation.
Step 6. When the action has been added tap on where it says ‘Recipients’ and type the name of the contact you want to send the scheduled message to.
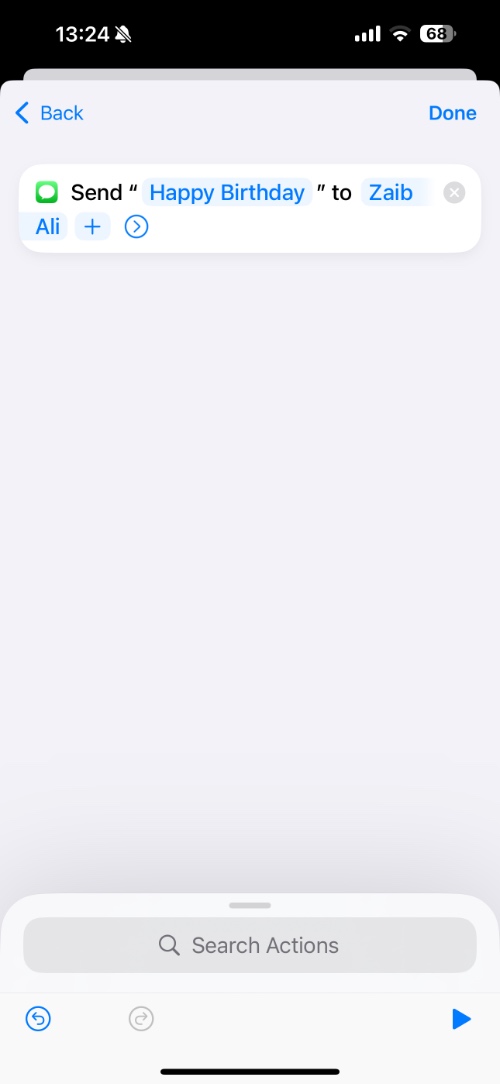
Step 7. Then tap on where it says ‘Message’ and type your desired message. When you are done tap on the Done button to save the automation.
Step 8. Now tap on your newly created automation from the Automation tab and make sure the toggle for ‘Ask Before Running’ is disabled, so that your messages are sent automatically.
Now that your scheduled text message automation has been created, you will need to remember to delete the automation after the text message has been sent, otherwise, Shortcuts will continue to send the message automatically every month.
Schedule Text on iOS 18 or later
For those running iOS 18 or later on their iPhone or iPad, sending a scheduled text message via iMessage is easier than ever. Just follow the steps below.
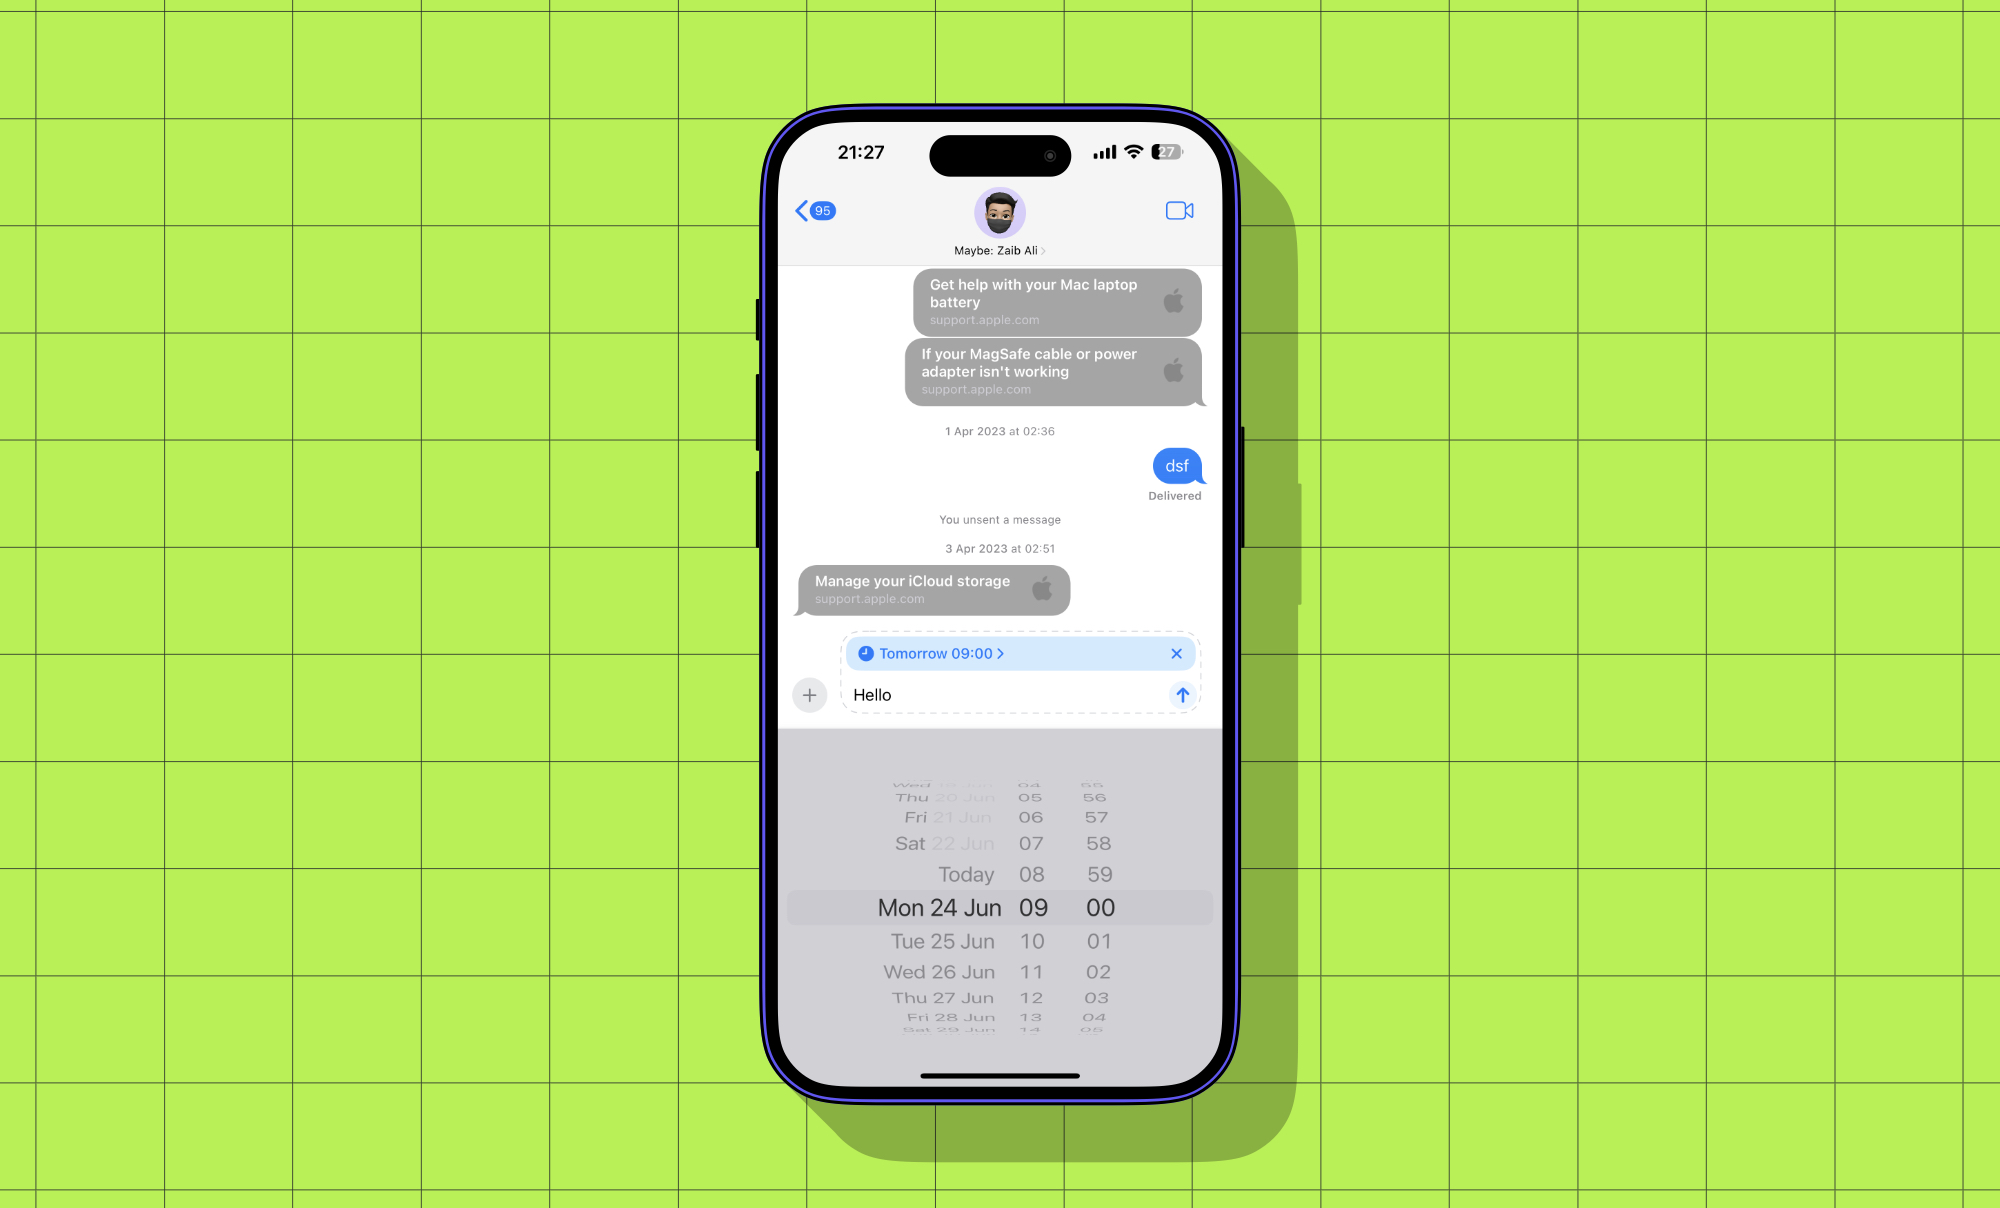
Step 1. Launch the Messages app and open the conversation thread for the person you want to send the scheduled text to.
Step 2. Tap on the ‘+’ button next to the text field.
Step 3. Tap on the Send Later option. (You may have to tap on the ‘More’ option to reveal Send Later).
Step 4. Type the message for your scheduled text and then tap on where it shows the date and time.
Step 5. Select your desired date and time for the scheduled text and tap on the Send button.

