


In this guide you will learn how to add AppleCare to iPhone after you have purchased it. Recently Apple has changed its policy on AppleCare, and now it allows users to add AppleCare to their device anytime until 1 year of purchase.
If you have just bought a new iPhone or iPad, probably the first thing you should think about is to secure your device. Pretty important, right, but how? This is the question many new iPhone users ask. And the answer is simple, add AppleCare.
As we mentioned earlier the time limit to add AppleCare to an iPhone is not restricted to 60 days after purchase, because Apple has increased this limit and now you can add it within one year of your purchase.
Moreover, regardless of the fact that you got your iPhone from the Apple Store or any other store, you can increase the warranty of your iPhone to 2 years. You can also add damage protection, including theft and loss, within one year from the day you bought your device.
Speaking of adding AppleCare+, make sure your device is in good working condition and is not damaged. And then follow the steps below given your preferred way of adding i.e. by phone, online, or via App Store.
Also read: How To Check iPhone Or iPad Warranty Right On The Device
Add AppleCare+ to iPhone After Buying:
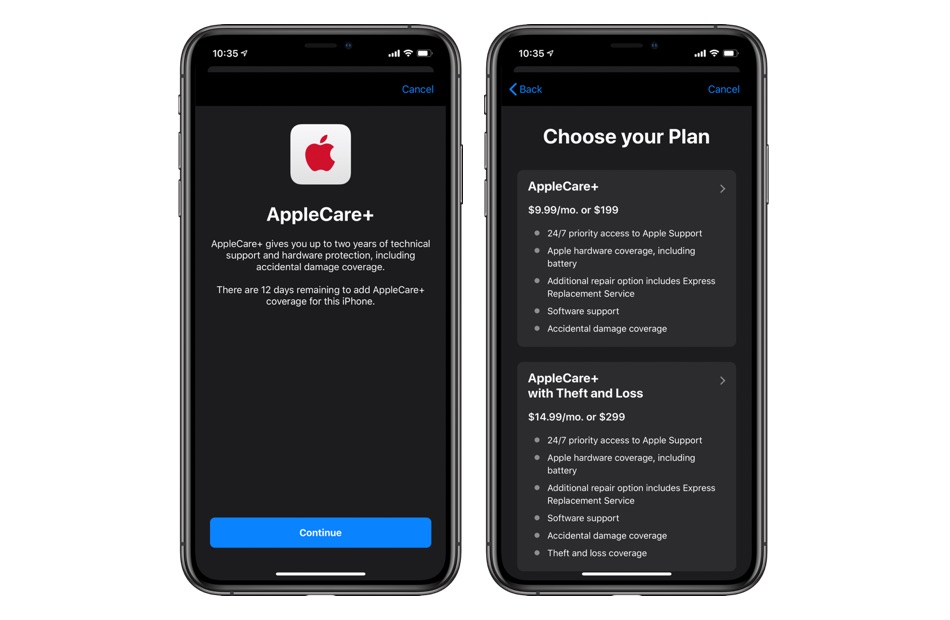
- Add on iPhone:
For this option:
- Go to ‘Settings’ and then ‘General’
- Tap ‘About’
- Tap ‘AppleCare+ Coverage Available’
- Add Online through the website:
In order to add AppleCare online:
- Got to AppleCare website
- Select iPhone, log in with your Apple ID, or enter your serial number
- Now, follow the instructions on the screen to buy AppleCare
- Add AppleCare by calling Apple:
Now for this method, you need to:
- Keep proof of purchase
- Contact Apple Support at 800.275.2273 (800.APL.CARE)
- And ask them to add AppleCare to your new iPhone.
- For In-Store Purchase:
- Go to ‘Apple Store’ on your iPhone
- Finish visual inspection and keep proof of your purchase.
Was it helpful? Share with us in the comments below. Don’t forget to share with your friends and family.
For more posts and how-to guides, stay tuned to iOSHacker.com.

