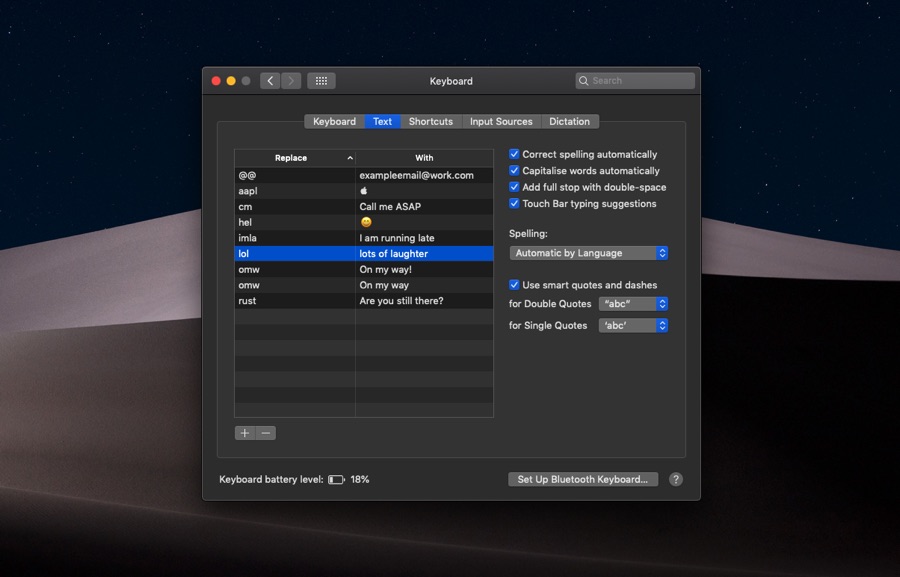
We have already showed you how you can add text replacement shortcuts on your iPhone and use them to make typing commonly used phrases more convenient. A lot of users don’t realize that they can take advantage of the same feature on their Mac as well. In this step by step tutorial we will show you how you can add text shortcuts on your Mac and use them to make typing commonly used phrases much more easier.
Once you have added a text replacement shortcut on your Mac and assigned a shortcut trigger for it, you will be able to enter its corresponding phrase by simply typing the shortcut. For example you can add a shortcut to replace ‘hw’ with ‘How are you?’. Then every time you type ‘hw’ you will be able to instantly replace it with the phrase ‘How are you?’.
The text replacements you add on your Mac will be automatically synced to your iOS devices and vice versa over iCloud.
How To Add Text Replacement Shortcut on macOS
- To add a text replacement shortcut open System Preferences.
- Now click to ‘Keyboard‘ icon.
- Next click on ‘Text‘ option from the top tab bar.
- Make sure option for ‘Correct Spelling Automatically‘ is checked.
- Now click on the ‘+‘ button and type the trigger word that you want to replace.
- Then hit the tab key from the keyboard and enter the word or phrase you want to replace it with.
Add as many shortcuts as you like and that’s it.
Now that the text replacement has been added you will be able to type the entered phrase by typing the trigger word.


