If you are looking for a way to add text to a photo on an iPhone or iPad without a third-party app, then you are in the right place. Using the built-in markup features of the Photos app you can quickly add text to a picture on iPhone or iPad.
In this guide, we will share steps for adding text to images that are saved in the Photos app as well as iPhone screenshots.
Adding text to an image on an iPhone or adding text to an iPhone screenshot can be very useful when you want to point out and explain something to another user using an image. The good thing is iPhone features tools that enable users to do this with ease.
Adding text to Photos with PicMerger Edit Pics & Collages app
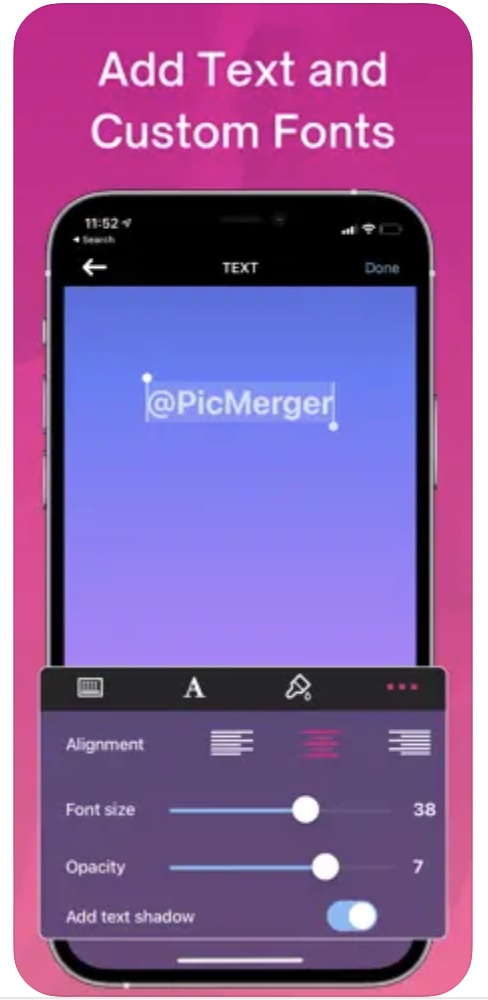
One of the easiest ways of adding text to images on iPhone is through the PicMerger Edit Pics & Collages app, which you can download from the App Store for free.
With this app, you can add overlay text and emojis over an image. With PicMerger, you get to choose the font and color of the text that will be overlayed on the images. Along with plain text, you also have the ability to add emoji over the images, which is cool.
When adding text over images you can change the alignment of the text, increase or decrease font size, add shadow to the text, change its color, and change the opacity of the text. The ability to change Opacity is helpful for those who are trying to add watermarks to their images.
In addition to adding text you can use this app to create really cool collages of photos, which is pretty cool.
You can download the PicMerger Edit Pics & Collages app from the App Store for free here.
Adding text to photos in iPhone’s Photos app
The stock Photos app lets you add text to pictures on iPhone and iPad. After adding text to an image you can share it with anyone via AirDrop, Messages, Mail, or other apps.
Step 1. Open the Photos app and find the image you want to add text to.
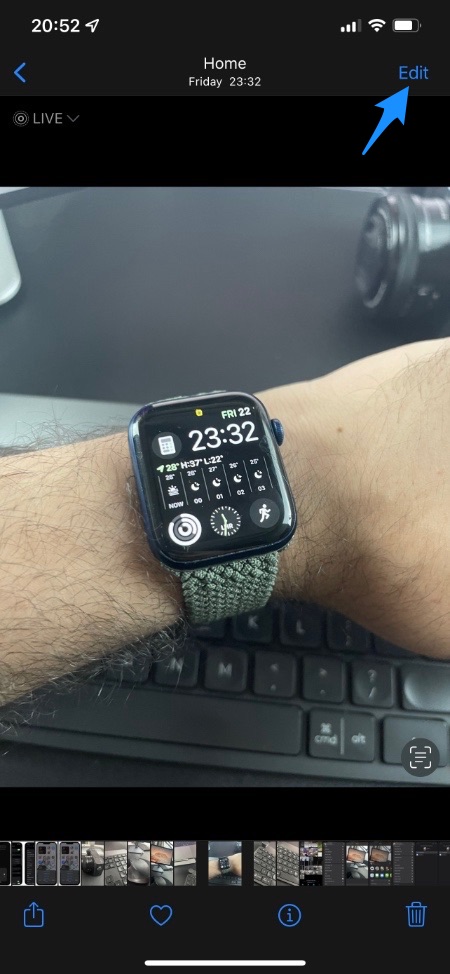
Step 2. After opening the image tap on the ‘Edit’ button located on the top right corner of the screen.
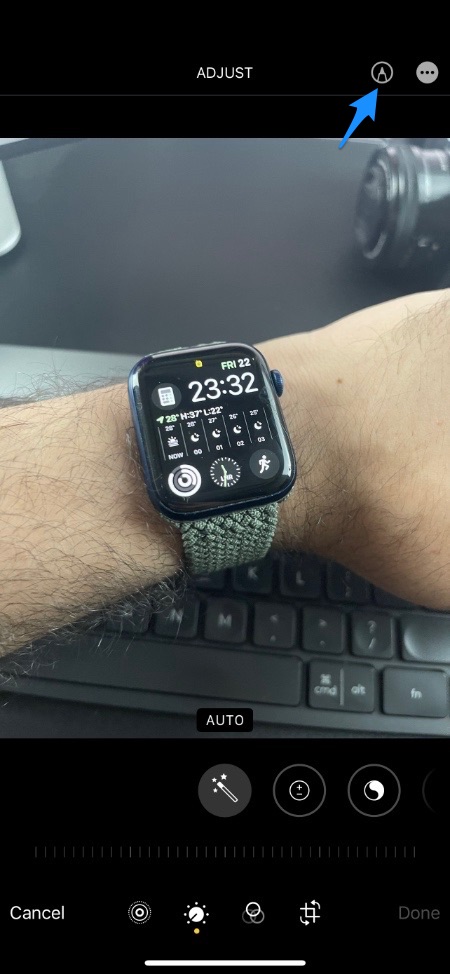
Step 3. Next tap on the Markup button from the top right corner of the screen.
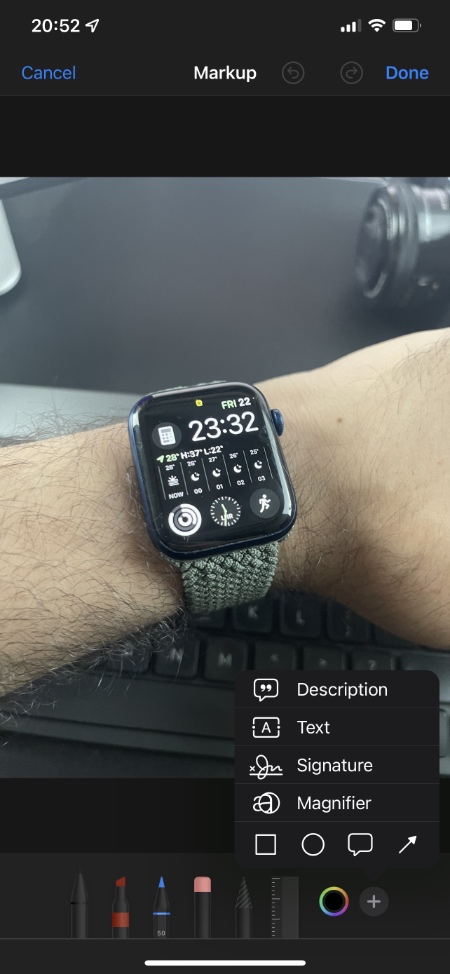
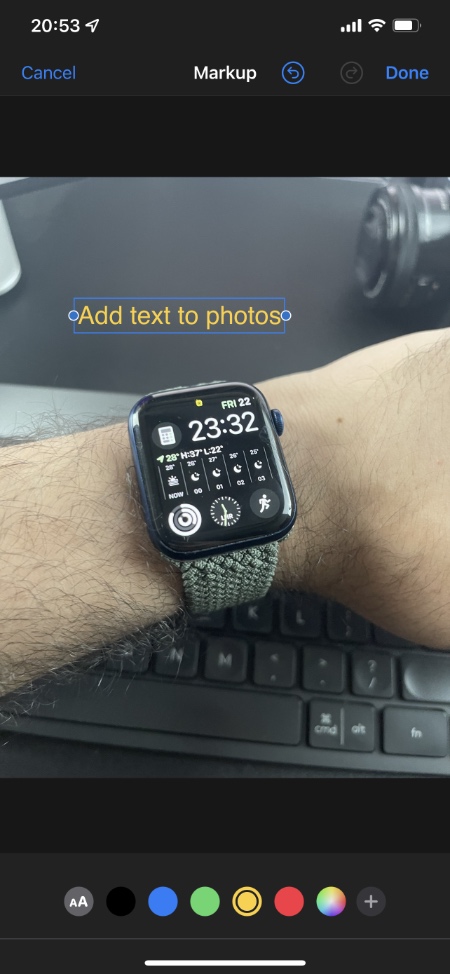
Step 4. Now tap on the ‘+’ button from the bottom bar and then tap on the Text option.
Step 5. Double tap on the ‘Text’ that appears on the screen and using the on-screen keyboard type the text of your choice.
Step 6. Optionally change the color and size of the text using the bottom bar.
Step 7. After you are done tap on the ‘Done’ button to save the image with the added text. Finally, exit the editing mode by tapping on Done again.
Remove Text From Images on iPhone or iPad
In case you want to remove text from images that you have previously added, you can follow the steps below.
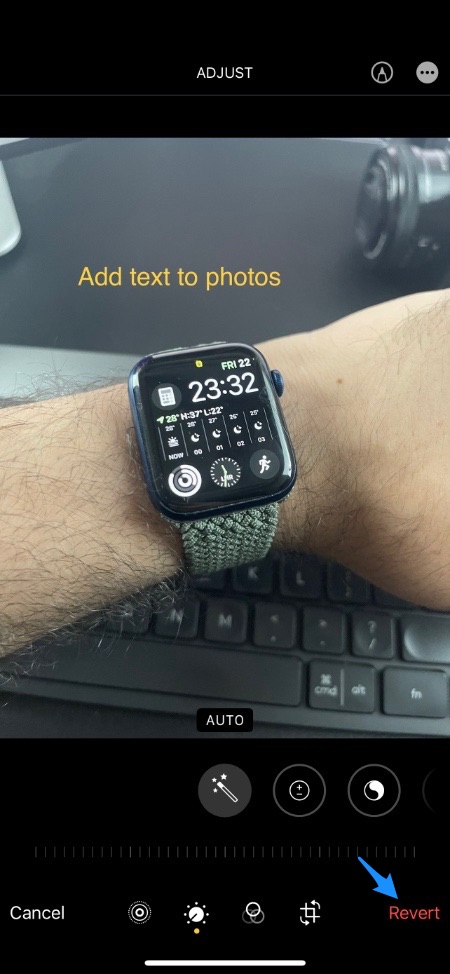
Step 1. Open the image you want to remove text from on iPhone.
Step 2. Tap on the ‘Edit’ button.
Step 3. Finally, tap on the ‘Revert’ button and then tap on ‘Revert to Original’.
By following these steps you can revert the image to its original state and remove text from photos.
Add text to a screenshot on iPhone or iPad
You can quickly add text to a screenshot on iPhone or iPad right after taking it, here’s how.
Step 1. Take a screenshot on your iPhone or iPad.
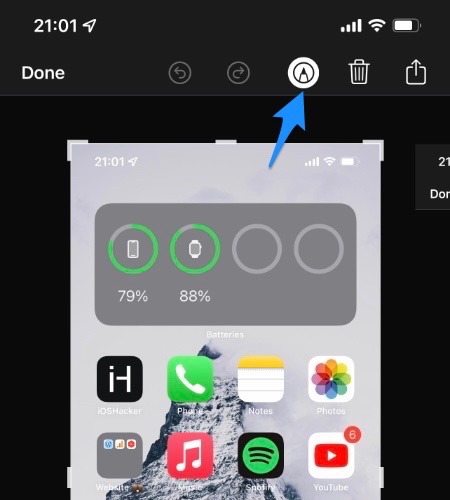
Step 2. Now tap on the screenshot preview that appears on the bottom left side of the screen.
Step 3. Make sure the markup tool is selected from the top menu. This is the button that features a circle with a pen inside it.
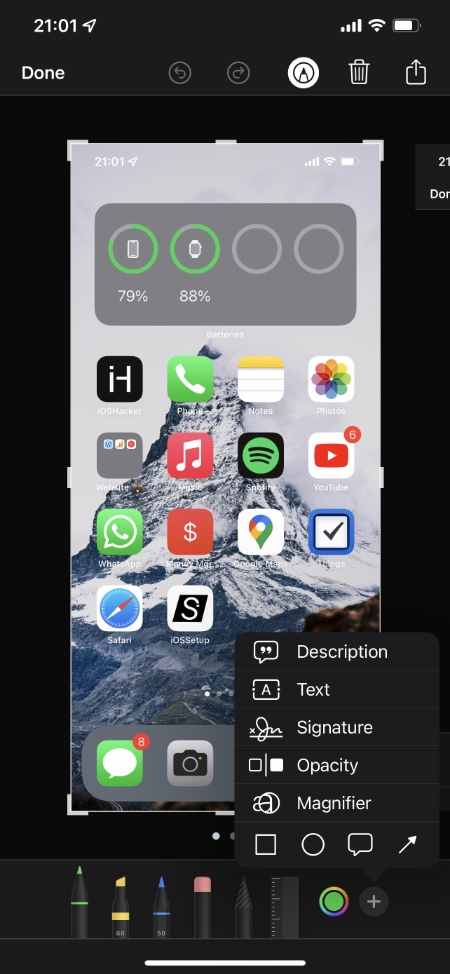
Step 4. On the Markup screen tap on the ‘+’ button located on the bottom right side.
Step 5. From the popup menu tap on the ‘Text’ option. Now ‘Text’ will appear on the screen. Tap on it to bring up the keyboard and start typing. You can also change the color of the text and resize it using the tool available at the bottom.
Step 6. Once you are done tap on the ‘Done’ button to save the screenshot with text on it. You can also tap on the share button in order to quickly share the screenshot.
There you have it folks, this is how you can easily add text to the photo on an iPhone or iPad using the built-in markup features.
We also showed you how you can quickly add text to screenshots on your iPhone and share them to save time.




Really helpful, thank you.