


If you are running macOS Mojave or later, then you would know that macOS displays an iOS-like floating screenshot thumbnail for a few seconds right after you take a screenshot. This thumbnail enables users to access a handy editing tool, which lets them to make edits to their screenshots. Users can use the screenshot editing tool in order to markup on them, rotate them, crop them, add text to them and more.
While the screenshot editing tool is great, the thumbnail that appears right after you take a screenshot can be annoying for those who don’t want to edit their macOS screenshots right away. I know a lot of people including myself who have never used the screenshot editing tool, making the screenshot thumbnail pointless.
Another issue with the floating screenshot thumbnail is that it also appears in subsequent screenshots, forcing the user to wait for it to disappear or manually hide it before taking the second screenshot.
Disable The Floating Screenshot Thumbnail On Mac
Good news is you can disable the screenshot editing thumbnail, and completely stop it from appearing on your screen. You can do so by following the simple steps below.
1. On your Mac access Spotlight search by pressing Command-Space keys and type ‘Screenshot’. Alternatively you can press Command-Shift-5 keys to access the Screenshot app.
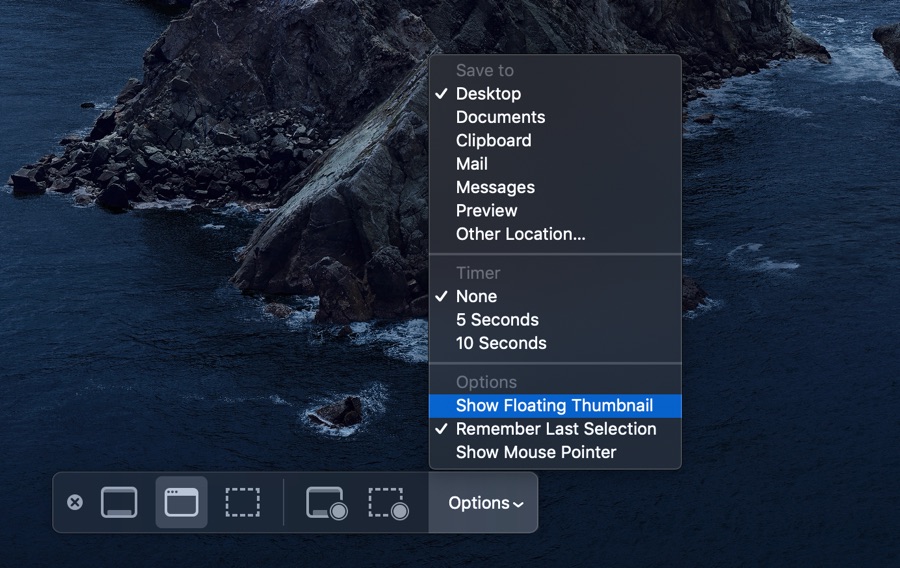
2. Once the Screenshot app launches it will let you take screenshot of the app by clicking anywhere on the screen. Instead of taking a screenshot look for the Screenshot app’s tool bar and click on ‘Options’.
3. Then click on ‘Show Floating Thumbnail’ to make sure the tick mark next to it disappears.
That’s it. Once you have followed the simple instructions above, your Mac will no longer display the floating screenshot thumbnail every time you take a screenshot.
Using the same Options menu shown in step 2, you can also perform several other changes to how screenshot feature works on the Mac. For example, you can choose a different location for where the screenshots are saved on your computer, add a timer after which screenshots are taken, show mouse pointer in screenshots etc. The screenshot toolbar accessible with Command-Shift-5 key combination also gives users easy access to multiple screenshot modes.

