


iOS has many quirks and one of them is that you cannot create contact groups on an iPhone, iPad or iPod touch. Even though the operating system allows users to make use of Contact Groups it doesn’t actually have any way that would allow you to create them. Luckily, the process of creating groups is quite simple and only requires you to follow a few easy steps. In this post we will show you how you can quickly create Contact groups for your iPhone, iPad or iPod touch and use them.
Since you cannot create groups on the fly you have to use a computer to do so, and that is exactly what we have detailed in this article. Creating groups can make your life a lot easier as you can use them to filter contacts from a specific category such as family or work. You can also use them with features like Do Not Disturb and exempt groups from being silenced.
Also read: How to add and manage Favorites in iPhone or iPad’s Phone app
How to create a contact group and add contacts to it
1. The first step is you have to connect your iPhone, iPad or iPod touch to the computer and launch iTunes. Then sync your device. This will create a backup of your contacts.
2. Next open iCloud.com from your computer and sign into your account. Once inside click on the Contacts button.
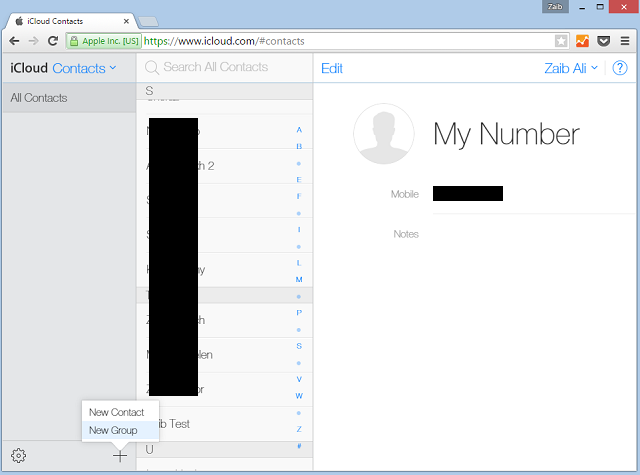
3. Now on the bottom left side of your screen you will see a ‘+’ button, click on it and then on ‘New Group’.
4. Type in the name of your new Contact group. For our example, we will name it ‘Work’. You can always rename it by double clicking on it from the sidebar.
5. Once the group has been created click on the ‘All Contacts’ tab from the sidebar and then drag and drop the contact entries you want to include in your group. You can add as many contacts as you like.
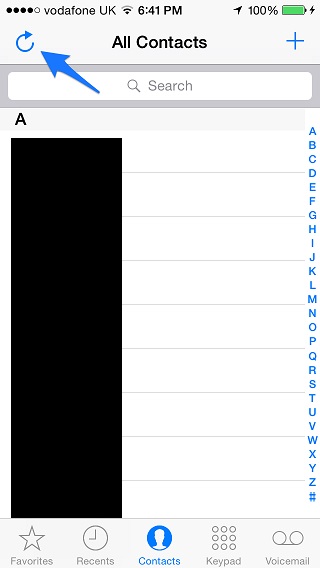
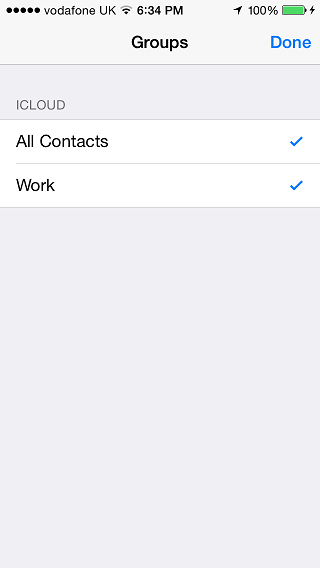
6. After you have completed adding contacts to your new group, launch the Contacts app on your iOS device and tap on the ‘Refresh’ icon found on top left side of the app. If you see ‘Groups’ instead of ‘+’ then tap on it and then pull to refresh on the next screen. The groups you have created will be automatically synced to all of your Apple devices, provided they are all connected to the same Apple ID.
Deleting a contact group
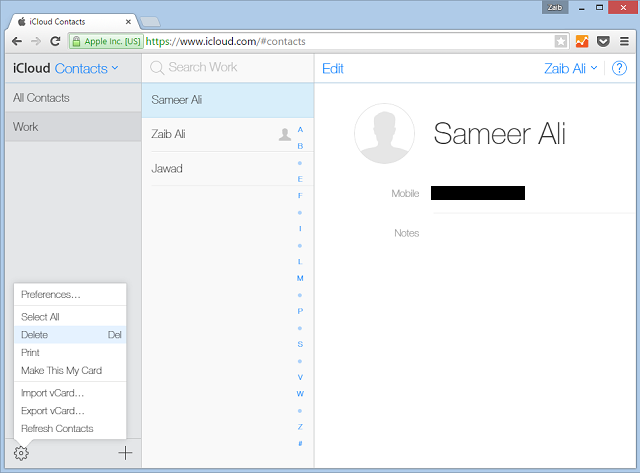
If you want to delete a group you can do so by opening the iCloud.com. Once inside your account click on the Contacts app icon and then select the said group from the sidebar. When it is highlighted click on the settings button and then on ‘Delete’ option as shown in the screenshot above.
