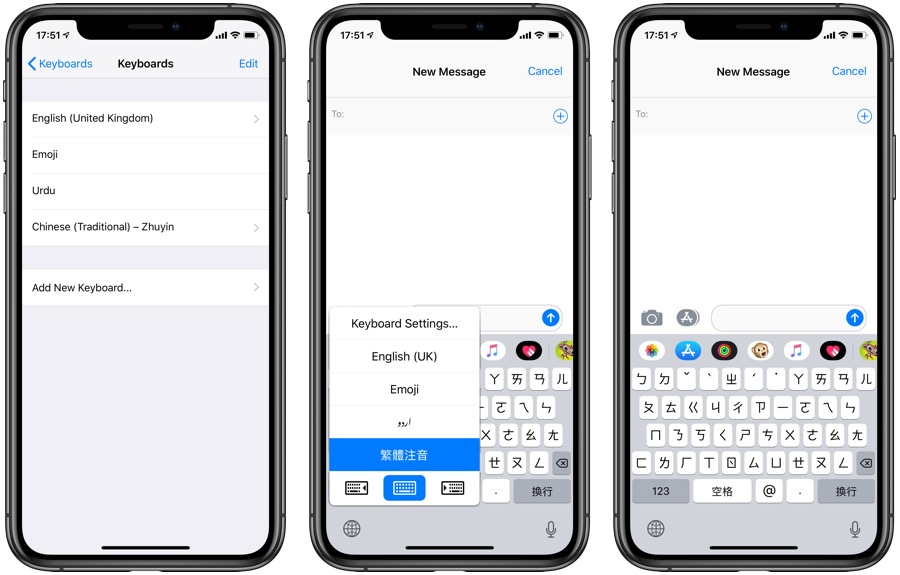
If you speak languages other than English, then you might want to add a local language keyboard to your iOS keyboard. Once you have added an international language keyboard to your iPhone or iPad, you will be able to quickly switch between that and English keyboards depending on your needs. iOS’s international keyboards are not limited to Asian languages or languages that are written from right to left, but you can also add some fun keyboards like Emoji or Japanese Kana keyboard with emoticons.
In this tutorial we will show you how you can add and use international keyboard to iPhone or iPad, so without any further ado let’s get started.
Add an international keyboard to iPhone’s keyboard
1. On your iOS device open Settings > General > Keyboard > Keyboards.
2. Tap on the ‘Add New Keyboard…’ button.
3. On the next page you will get a list of keyboards you can add to your device, tap on the one you want to add.
That’s it, the keyboard will now be added to your iOS keyboard.
Switch to another keyboard
Once you have added different keyboards to your iPhone or iPad, you can switch to them by tapping on the ‘Globe’ button on your keyboard. You can access the quick switch menu by tapping and holding on the globe button.
Rearrange keyboard on the list
You can also rearrange the way keyboard appears in the selection menu. Go to Settings > General > Keyboard > Keyboards and tap on ‘Edit’ button. Then drag the button with three lines in order to change the position of the keyboard on the list.
Delete keyboard from your iPhone or iPad
You can easily remove a keyboard from your list of available keyboards. All you need to do is Settings > General > Keyboard > Keyboards and tap on ‘Edit’ button. Then tap the red ‘-‘ button and then tap on the Delete button. Finally hit the ‘Done’ button.


