


With the release of macOS Ventura Apple has redesigned the System Preferences to System Settings. The new Mac settings app comes with more than a name change, as it features a completely redesigned user-interface that is more similar to the iPad Settings app.
Along with many other changes the new System Settings app also changes the way you install macOS updates, check current Mac software version and configure automatic updates for the Mac.
In this post we will show you how you can update macOS software on Macs running macOS Ventura. Here you will also learn how to check current macOS version for a Mac.
Lastly, we will show you how you can change macOS’s automatic updates settings. So without any further ado, lets get started.
How to update Mac software
In the first part of this tutorial we will show you steps on how to update Mac software on your machine that is running macOS Ventura or later. Here’s how to do it.
Step 1. On your Mac launch System Settings. You can launch it by clicking on the Apple logo from the menu bar and clicking on ‘System Settings‘ option.
Step 2. Next from the side pane click on ‘General‘ option.
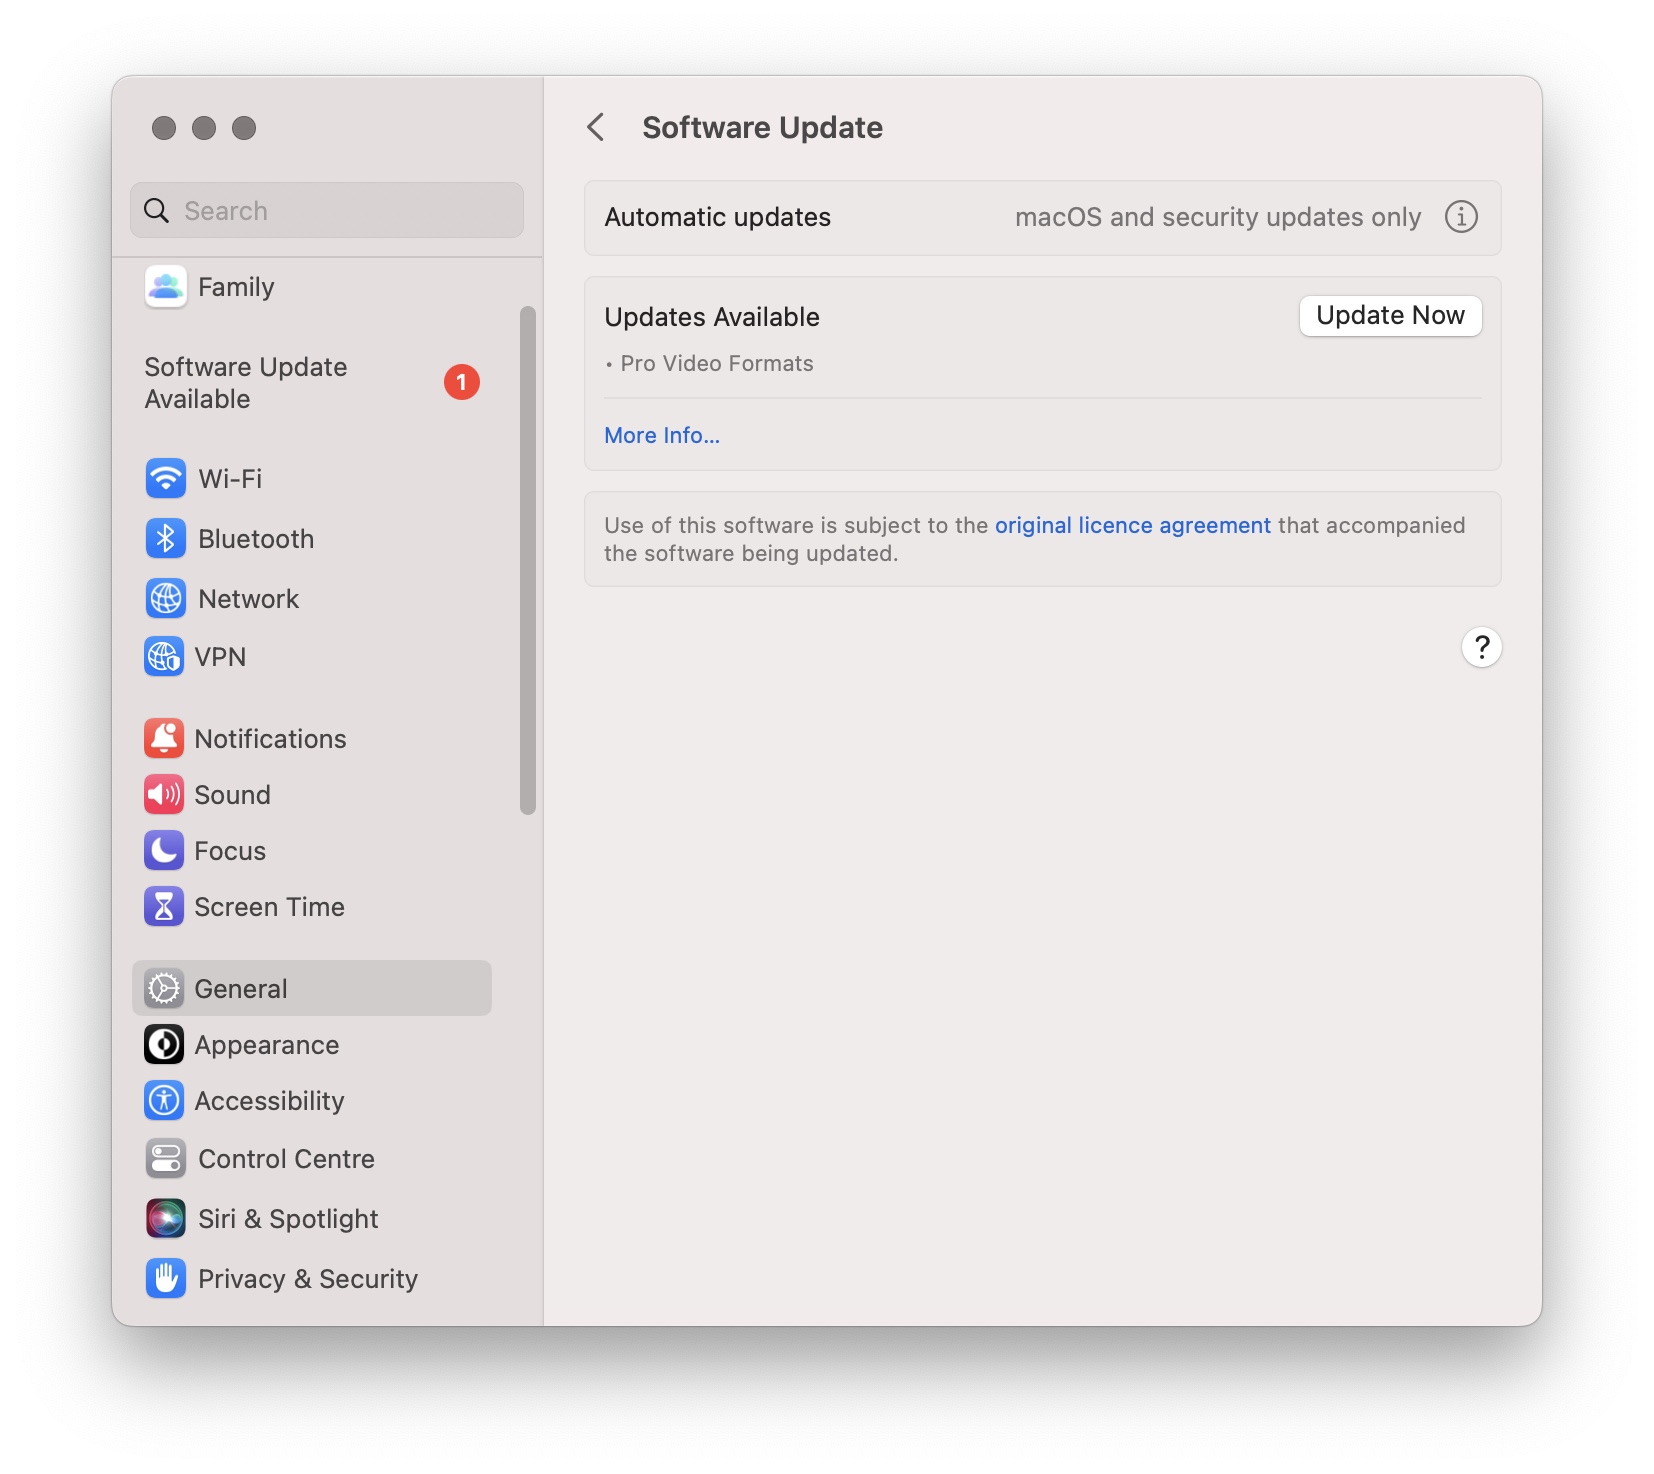
Step 3. On ‘General‘ page click on Software Update.
Now macOS will check if any software updates are available for your machine. If there are new updates you will get a list on the Software Update page. Just click on ‘Update Now’ button in order to start the update.
This is how you can easily update macOS on Macs running macOS Ventura.
How to check current software version

If you want to check which macOS version your Mac is currently running, then you can easily do so by following the steps below.
Step 1. Click on Apple logo from the top menu and click on System Settings to launch it.
Step 2. Now click on ‘General‘ option.
Step 3. Next click on ‘About‘ option.
Step 4. Finally look under ‘macOS‘ heading. This should tell you the name of the currently install macOS version in addition to the exact version number that your Mac is running.
By following the steps outlined above you can quickly check which macOS version your Mac is running.
How to change Automatic Updates settings in macOS Ventura

macOS offers a wide range of Automatic Updates options that you can configure according to your personal preferences.
From settings you can change if macOS should check for updates, download new updates when available, install macOS updates automatically, install application updates from the App Store automatically and install security responses and system files automatically.
You can change all of the settings by following the steps below.
Step 1. Open System Settings by clicking on the Apple logo from the top menu bar.
Step 2. Next click on ‘General‘ option and then on ‘Software Update‘ option.
Step 3. When you are on the Software Update page click on ‘i‘ button.
Step 4. From the popup menu that appears turn on the toggles for the settings you want to enable. You can turn off the toggles for settings that you want to disable.
With these steps you can change automatic updates settings on Macs running macOS Ventura or later.
There you have it folks, in this post you learnt about macOS software update. Here we covered the following topics…
- How to update software on macOS Ventura
- How to check current macOS version on Mac
- How to change macOS Automatic Updates settings
If you have any questions related to this guide, then do let us know in the comments below.

