


In this article, we will guide you through understanding what causes the infamous iPhone unavailable error and how to fix it with ease.
By the end of this guide, you will be able to solve the iPhone Unavailable error on your iPhone and regain access to your iOS device.
Owning an iPhone sure does come with a sense of security. However, sometimes, that very security feature can become a double-edged sword. I mean, it can get annoying when your iPhone is trying to protect your data from your own self. Make it make sense!
If you’ve ever found yourself locked out of your iPhone because you kept entering the wrong password or maybe there’s a network issue? Sometimes it can be a mysterious reason that you can’t seem to figure out but you’re locked out anyway. Whatever reason it may be, if you’ve come across the dreaded “iPhone Unavailable” error, you know the panic it brings along.
But, hey, listen, there’s an easy fix and some tips to avoid this message of doom in the future too. So, stick around as we make our way through understanding the iPhone unavailable message first and then give you some tried-and-tested solutions.
What Does “iPhone Unavailable” Mean?
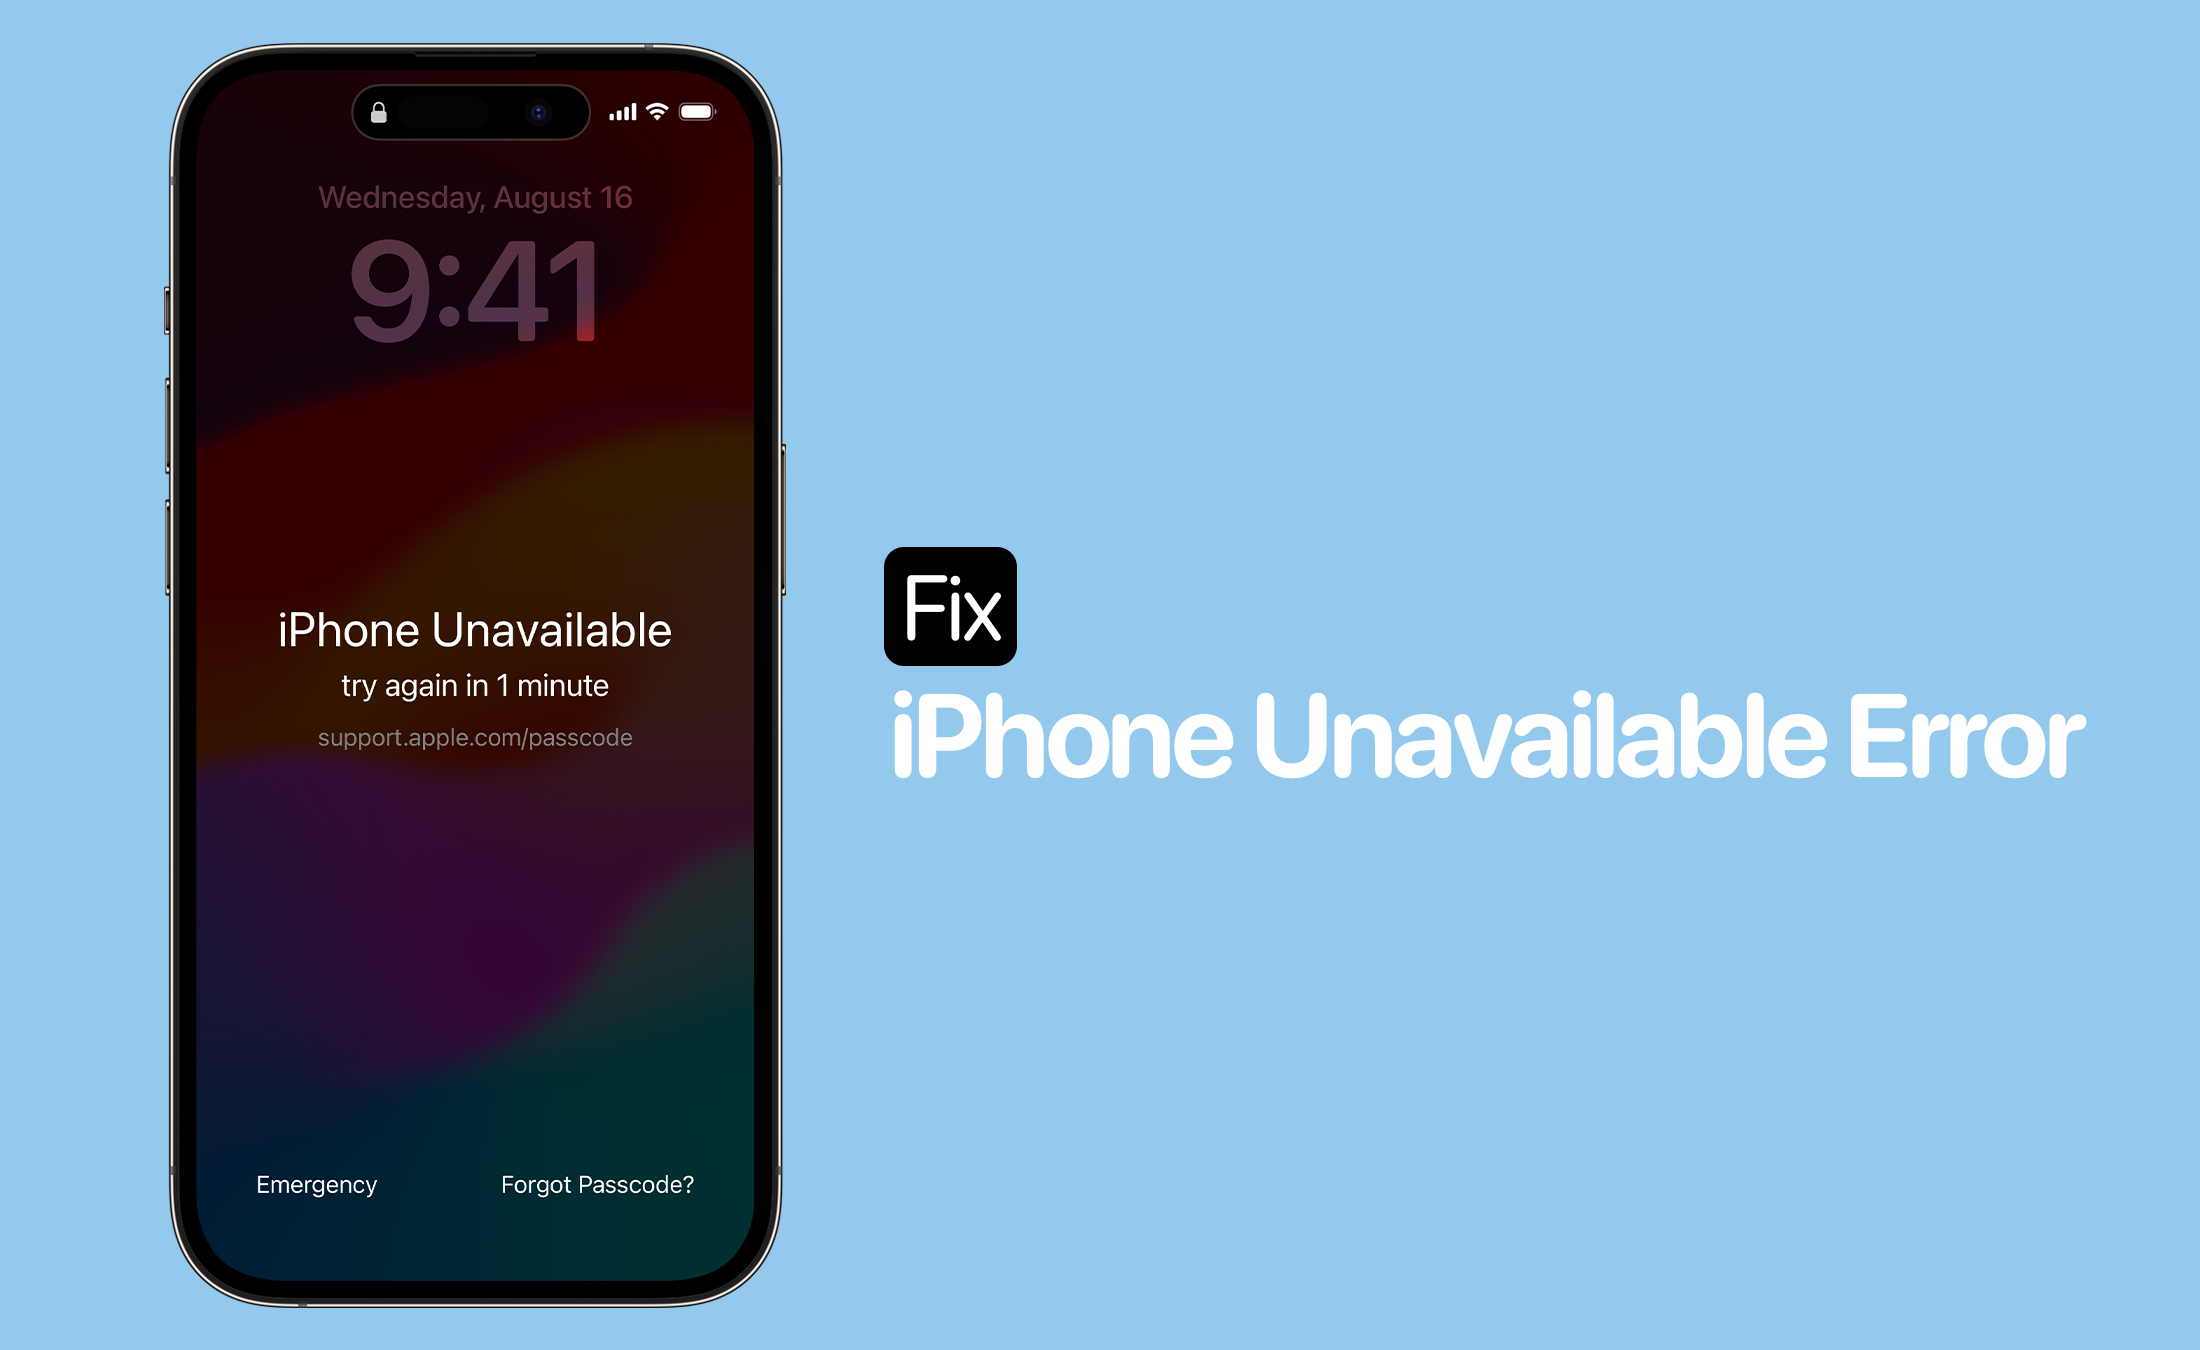
The “iPhone Unavailable” error pops up on your login screen after entering the wrong passcode multiple times consecutively. Initially, it starts as a temporary measure with a single purpose in mind: to deter unauthorized access attempts. Sure, mistakes happen and that is why it allows you another crack at entering the correct passcode. However, if you keep insisting on the wrong one, your phone might decide to slap on a permanent security lockout, showing the “iPhone unavailable try again.”
Now, what is Security Lockout on iPhone? Security Lockout system kicks in automatically when incorrect passcodes are entered multiple times to shield your sensitive data from prying eyes. The “iPhone Unavailable” screen serves as a barrier against brute force attacks, where malicious individuals attempt to crack your passcode through trial and error. So the next time you face the iPhone unavailable error on iPhone 15, 14, or 13, know that it’s only happening as a protective measure.
However, if you’re wondering “Can I disable the Security Lock feature?” let us tell you, it’s not recommended as it compromises your device’s security. But, if you choose to do so, you can turn off the passcode requirement in your iPhone settings.
How to Fix iPhone Unavailable Error
When faced with an iPhone unavailable error, you’ll typically see a timer indicating a waiting period before your iPhone becomes available again. Initially set at a minute, the delay increases with each subsequent incorrect attempt, ranging from five to 60 minutes. However, after 10 failed passcode attempts, your iPhone will be permanently locked, with no timer displayed.
Now, let’s address how to fix the iPhone unavailable. The good news is you can get rid of iPhone unavailable error, the bad news is that it can only happen by erasing your data and resetting your iPhone. However, there’s still hope as long as a timer is showing on your lock screen which brings us to our first solution:
Wait it Out
If your screen displays a timer indicating a delay period, the simplest solution is to wait until the timer expires. Afterward, you can unlock your iPhone with the correct passcode. Be cautious, as entering the wrong passcode again will increase the timer. Oh and here’s a tip, reset passcode on iPhone for a simpler one that you can easily remember.
If waiting does not help, then you have to reset your iPhone or iPad before you can gain access to it after forgetting its passcode and getting an iPhone Unavailable error.
Reset Your Device (iOS 17)
After ten unsuccessful passcode attempts, your device will either initiate the Erase Data security measure or display the Security Lockout screen, depending on your device’s setup. If you find yourself in a security lockout, follow the steps below to learn how to reset iPhone (iOS 17).
But before we move along, a word of caution. Remember, you can only access the Security Lockout screen if you have an active mobile or Wi-Fi connection and have previously enabled Find My on your device.
- Try entering your passcode on the Lock Screen until you see the “iPhone Unavailable” screen asking you to try again later.
- Locate and tap the “Forgot Passcode?” option tucked away in the bottom corner of the iPhone Unavailable screen.
- On the Security Lockout screen, you’ll find the option to “Start [Device] Reset.” Give it a tap to confirm your decision.
- Now, you’ll need to prove your identity by entering your Apple ID password.
- You’ll be presented with the choice to “Erase [Device]”. If you’re using an eSIM with iOS 17 or later, you also have the option to retain or delete your eSIM along with your data.
If you’re using an eSIM, ask your provider for a QR code to set up your eSIM again once the reset is complete.
Once the dust settles, your device will restart, and you’ll be guided through the setup process. This includes restoring your data and settings from a backup and, of course, setting a shiny new passcode.
Resetting Passcode (iOS 17)
If you’ve recently changed your passcode and find yourself locked out, there’s a Passcode Reset feature that allows you to use your old passcode temporarily to regain access. However, you’re granted a 72-hour window where your old passcode can still be used to sign in. Moreover, it’s important to note that signing in using your old passcode requires an immediate passcode change once you gain access.
Now, let’s learn how to reset passcode to fix the iPhone unavailable error:
- Try entering your passcode until the “[Device] Unavailable” screen appears.
- Once the “Forgot Passcode?” option appears on the bottom corner of the screen, tap it.
- Select “Try Passcode Reset” to initiate the process.
- Enter your previous passcode when prompted.
- Once your old passcode is accepted, follow the prompts to set a new passcode immediately.
By following these steps, you should be able to regain access to your iPhone, allowing you to set a new passcode and continue using your device without any further hassle.
Reset Your iPhone (iOS 15.2 or later)
If you’re greeted with the “iPhone Unavailable” message on a device running iOS 15 or later but not iOS 17 without a timer, waiting won’t do the trick. This indicates a more serious issue, and your iPhone needs to be erased and restored from scratch. Follow these steps:
- Look for the “Forgot Passcode?” button on the lock screen. Tap it.
- Check the ‘Erase All Content & Settings’ screen and choose ‘Erase iPhone’ again to confirm.
- Enter your Apple ID and password when prompted and wait for your iPhone to be restored.
- Follow the on-screen instructions to set up your iPhone, which may include restoring your data from iCloud.
Alternatively, you can connect your iPhone to a macOS or iTunes for Windows for restoration. Just follow the on-screen instructions, and keep your Apple ID password handy as it will be needed to to proceed with restoration.
Using Find My iPhone
The ‘Find My’ feature, originally intended for locating lost or stolen devices, can also be used to erase the data from your phone and reset it. However, remember that this method only works if you’ve previously set up ‘Find My’ on your device and enabled remote access. Here’s how you can do it:
- Open your computer or tablet and navigate to iCloud.
- Sign in using your Apple ID and password.
- Once logged in, find and click on the ‘Find My’ app.
- From the drop-down menu, select your iPhone.
- Next, choose the option to ‘Erase iPhone’.
- Confirm your decision by selecting ‘Erase again’. This will initiate the process of erasing all data and settings on your iPhone.
- Once the erasing is done, follow the on-screen instructions to set up your iPhone again.
During the setup process, you’ll have the option to restore your data from iCloud. Follow the prompts to restore your important data.
How to Avoid iPhone Unavailable Message
Never want to see the iPhone 13 iPhone unavailable or iPhone 14 unavailable error? Well, after going through hell, it makes sense that you’re hell-bent on avoiding the iPhone unavailable error. My friend, with a few simple steps, you can keep your iPhone safe and avoid this headache in the future.
1. Remember Your Passcode
It sounds obvious, but don’t underestimate the importance of your passcode. If you’re thinking Face ID and Touch ID exist so why should I care about passcode, then sure, that’s true. But, there are times when you’ll need to enter your passcode so it’s better to choose one that’s easy to remember than forgetting it and then causing trouble, no?
2. Be Careful When Typing
Take your time when typing your passcode, and ensure Face ID or Touch ID is set up and functioning properly. This way, you can minimize the need to enter your passcode manually, reducing the chances of mistakes and facing the iPhone unavailable error.
3. Keep Your iPhone With You
Your iPhone is your device, so keep it close as leaving it unattended invites the risk of someone (kids, usually) trying to guess your passcode repeatedly.
4. No Need to Rush
We’ve all been there, rushing to unlock our phones and making a typo in the passcode. Remember, you have up to five attempts before encountering the iPhone Unavailable error screen. If you make a mistake then stop and try again carefully.
5. Backup Regularly
Prepare for the unexpected by ensuring you have iCloud backup enabled or regularly backing up your iPhone with macOS or iTunes for Windows. This way, even if the worst happens and you forget your passcode, your data is safe and recoverable.
Navigating iPhone Unavailable Error Safely
Maintaining the security and functionality of our iPhones is important to us all. By following the steps outlined in this guide with patience and diligence, you can get rid of the iPhone unavailable error and ensure your device is back up and running smoothly.
However, it’s important to exercise caution when seeking solutions. While third-party apps may promise quick fixes for a fee, their effectiveness is uncertain, and they may even compromise the security of your device. Therefore, it’s always safer to rely on official methods provided by Apple and seek assistance from authorized sources if needed.

