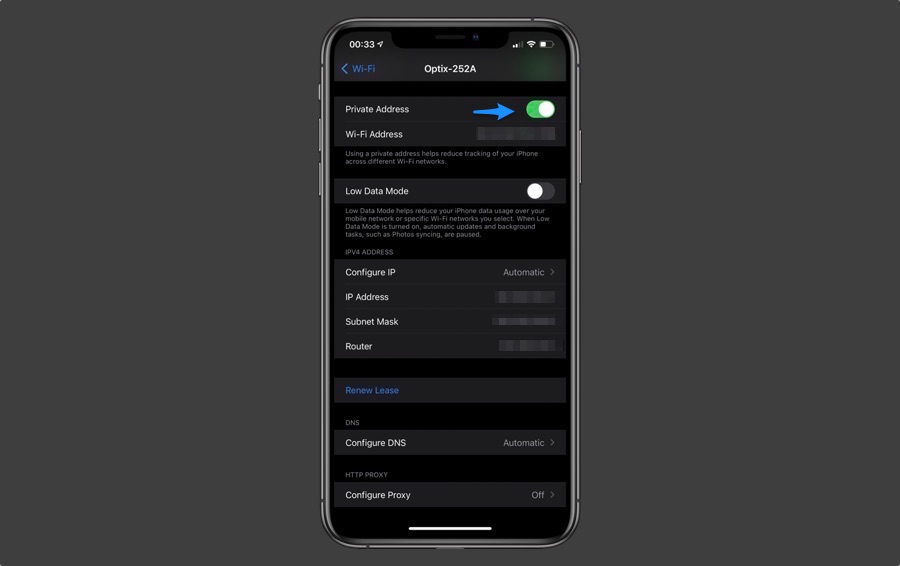
In this tutorial we will show you how you can use iOS 14’s new Private Wi-Fi Mac Address feature in order to make it harder for websites to track your online activity.
Those who have been using iPhone and iPad must know that the iOS 14 and iPadOS 14 have a new feature for hiding your Apple device’s Wi-Fi address. Many users don’t know how to use private Wi-Fi Mac address on the iPhone and iPad. If you also don’t know to use it, stop worrying. Because I have got your covered today.
But before that, let me explain to you that any device that connects to the internet contains media access control or MAC address. Apple has made some changes in iOS 14 and now it is easy to use a private Wi-Fi MAC address on the iPhone or iPad.
The benefit? It makes it harder to track your device and activity when you use wireless networks.
How to use Private Wi-Fi Mac Address on iPhone or iPad
Now, let’s learn how to use private Wi-Fi MAC address on iPhone or iPad:
- Go to the ‘Settings’ on iPhone or iPad
- Go to ‘Wi-Fi’
- Next to a network, tap the blue ‘i’
- Now next to ‘Private Address’, enable the toggle to hide your iPhone or iPad’s Mac address
- In case you are already connected to a network during the process, tap ‘Disconnect’ to finish it. Your device will automatically be connected to the Wi-Fi network.
Congratulations! Now you can the new private address instead of the actual Wi-Fi Mac address.
Share with us in the comments below if this post was useful. Also, don’t forget to share this with your friends and family.
For more interesting posts for your iPhone, stay tuned to iOSHacker.com.


