


With iOS 11 or later Apple has proved that the company still listens to its users by adding many features that users have been requesting for years. One such feature, that will surely make the lives of many users easier is the addition of screen recording feature in iOS 11 and iOS 13. While previously users were required to either use QuickTime on a Mac to record the screen of their iPhone or iPad, or had to rely on other methods. With iOS 13 the operating system offers a built-in screen recording capability that allows users to record screen with or without microphone audio.
How to record screen on iPhone or iPad running iOS 12 or iOS 13
In this article we will share with you how you can use the built-in screen record feature to record the screen of your iPhone, iPad or iPod touch.
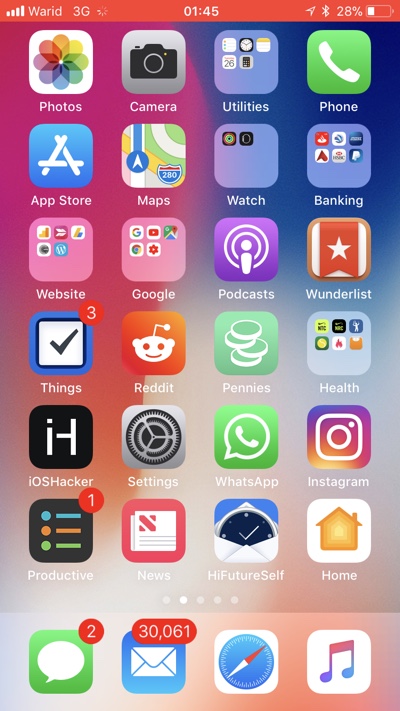
1. First of all make sure you have the Screen Record button in the Control Center by going to Settings > Control Center.
2. Pull up the Control Center and force tap (or long press) on the Screen Record button. (You can also just tap on the button to start recording)
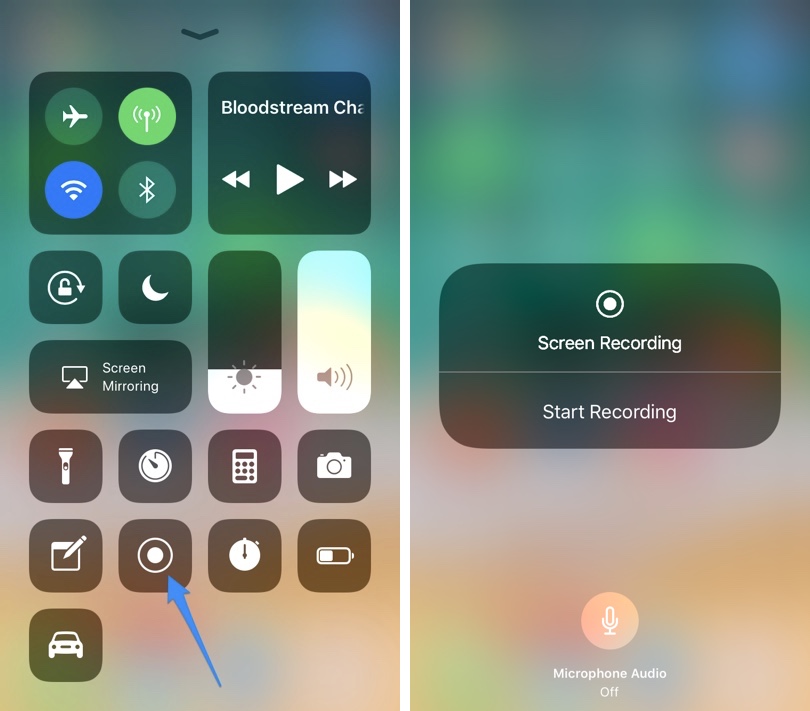
3. You will now see ‘Start Recording‘ option. Before you tap on it look at the ‘Microphone Audio’ button to make sure you have the right mode selected. If the button is red, then mic audio will be recorded. To stop mic audio from being recorded tap on this button.
4. Once the Screen Recording has started you will see a blue ‘Recording’ on the top that will also show the recording time of the video.
5. To stop video recording you have to tap on the blue bar.
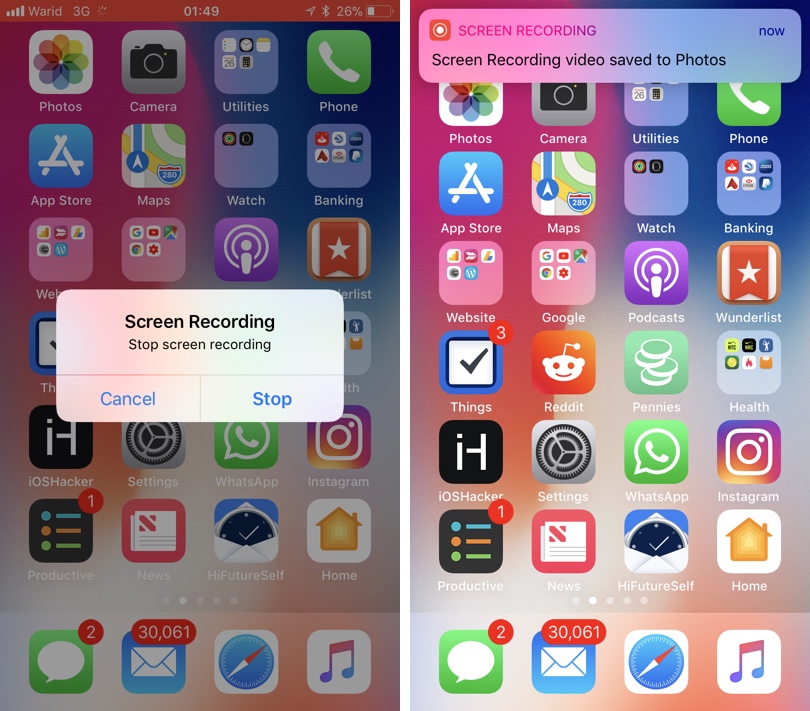
Once a video has been recorded it will be stored in your iPhone or iPad’s Photos app. From there you can edit, share or delete the recording.
There you go folks, that is how record screen on an iOS 13 powered iPhone, iPad and iPod touch. Will you be using this feature? Let us know in the comments section below.


Will app developers be able to turn off screen recording in particular apps? Many screen recording apps today like educreations only allow saving to camera roll if you have the paid version.
This feature is definitely really important for many iOS users, especially Snapchat or Instagram users to record live videos. It’s one of the best additions on iOS 11. Currently, I’m using a desktop app call Acethinker iPhone screen recorder that mirrors my iPhone screen to the computer and use its screen recording function to make videos. It’s not that direct, but it works.
Although when you uploaded a video to YouTube the sound/audio doesn’t carry over. You know a solution?
It normally would. In the video (and the sample that was recorded during the video) I turned off microphone, watch 1:25 onwards where I turn off microphone. You can turn it back on by long pressing or force tapping on the record button and then tapping on the microphone button.
Yes, I seen that. I had the mic on in the video I did. It recorded just fine and is in my camera roll with audio. But when I uploaded it to YouTube or anywhere else it doesn’t not have audio