Do you want to stop a Mac app from accessing your camera? On a Mac, you can manage and control which applications have access to the front-facing camera manually.
Having the option to control which apps have access to the Mac camera can be useful for security and privacy reasons. Many power users rely on tape over their Mac cameras for privacy. Perhaps you will be inspired to remove the tape.
This article will show you how to control access to Camera on Mac.
How to Prevent an App from Accessing front camera on Mac
Follow these steps from prevent certain applications from accessing your Mac’s front-facing camera.
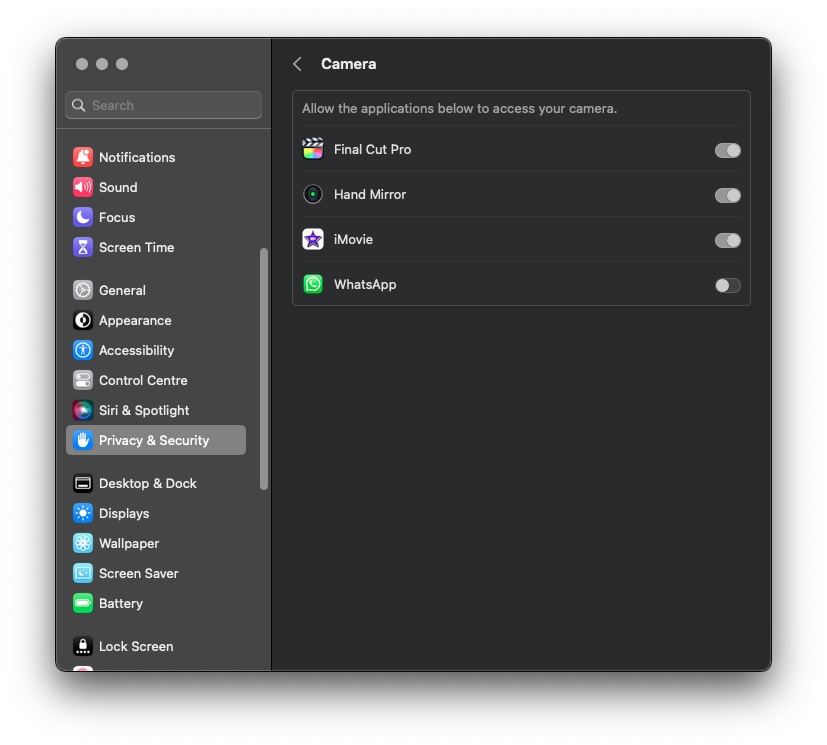
Step 1. Go to the Apple menu -> System Settings, then select Privacy & Security. (This may require scrolling down.)
Step 2. Then click Camera.
Note: Upgrade to macOS Mojave or later if you don’t see Camera to change front camera privacy settings on Mac.
Step 3. The camera access can be turned on or off for each app listed.
Apps that have requested camera access appear in the list. You need to turn it back on again the next time an app attempts to use the camera after you disable access.
If no apps appear in the list, you haven’t installed any apps that use the camera. Apps that come with your Mac, such as FaceTime and Photo Booth, have access automatically – you do not need to grant them access.
Note: The camera automatically activates when you launch an app that uses the camera. To indicate that the camera is on, a green light glows beside it. If you close or quit all apps that can use the camera, the camera (and green light) will turn off.
Final Note
If you revoke the Mac app’s access to the camera while using the same application. You will need to restart the app or services after that.
You should now be able to adjust the settings according to your preferences, hopefully. If you have any questions, please let us know in the comments section.


