Looking for a way to change Mac’s IP address? Then you have come to the right place as that is exactly what we are going to show you in this step by step tutorial.
Any device that is connected to the Internet has an IP address and Macs are no different. In today’s world your IP address is as important as your physical home address. There are times when you want to know what your device’s IP address is and for a number of reasons you might want to hide it. While you can hide your IP address by using a VPN, in this article we will show you how you can view and change Mac IP address.
Renewing your Mac’s IP Address can also help you in resolving connection issues, as IP conflicts do occur when more than 1 computer on the network are assigned the same IP address. If that happens you will face connectivity issues.
Following the steps below to change Mac IP address can help in resolving the IP conflict issues and bring back the internet connectivity.
How To Change Mac’s IP Address
Follow the simple steps below in order to renew your IP address on macOS.
1. Click on the Apple logo from the menu bar and then go to System Preferences.
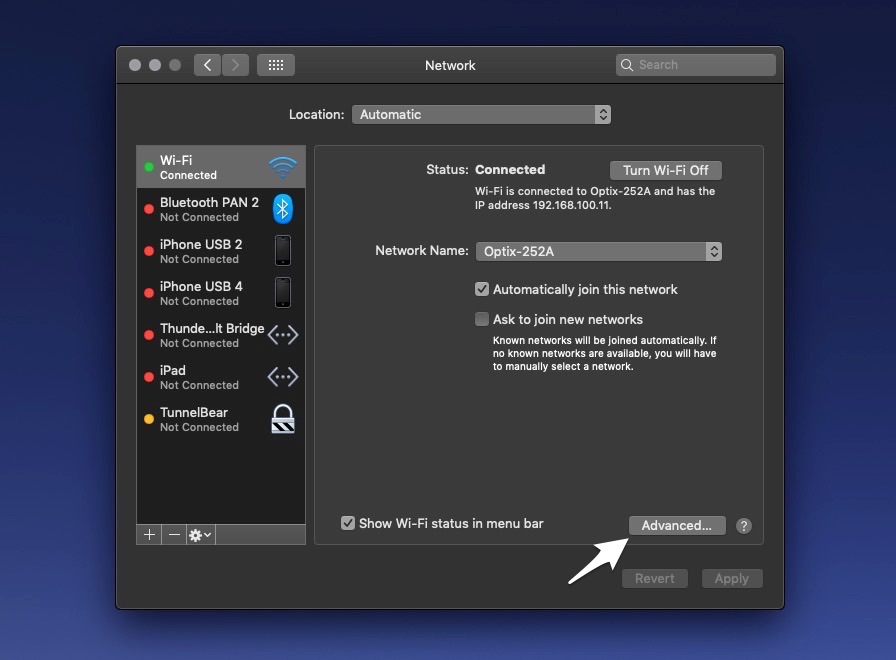
2. From System Preferences click on ‘Network’ option.
3. After making sure your Wi-Fi or Ethernet network is selected from the left side pane, then click on ‘Advanced’ option.

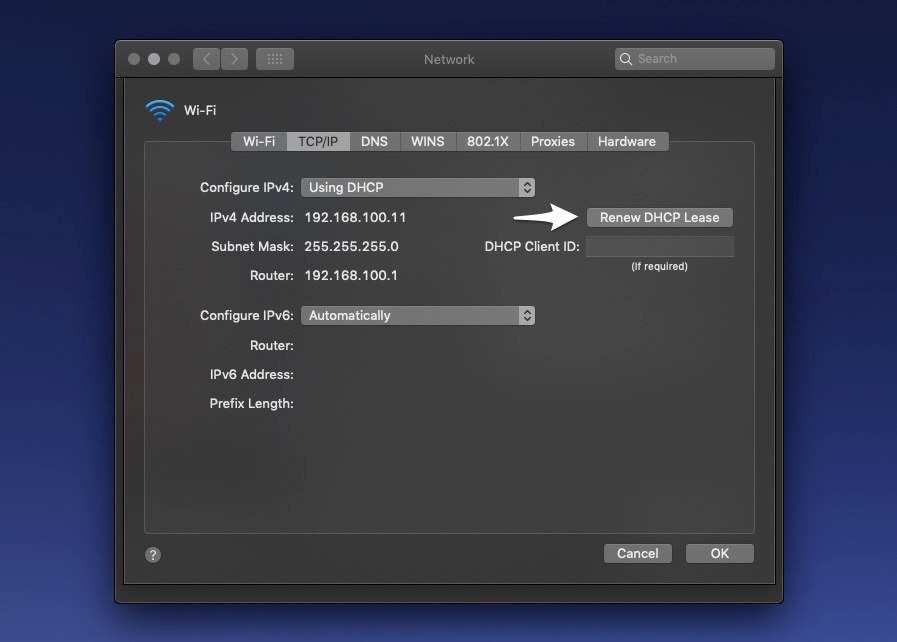
4. From the top select TCP/IP tab and then click on ‘Renew DHCP Lease’ button.

Alternatively you can also check the IP address by visiting this website.
At this point your IP address will get renewed. If you are on Windows, you can find the ways to change your IP here.
Also as you can see in the screenshot above, you can also use these steps to find out your public IP address. When you are on the TCP/IP page of the System Preferences your IP address will be listed next to IPv4 Address.
If you are have any questions regarding this article, then let us know in the comments section below.


