


In this guide we will tell you what iPhone Lockdown Mode is, how you can enable or disable lockdown mode on iPhone, iPad and Mac as well as what Lockdown mode does.
Table of Contents
- What Does Lockdown Mode Do On iPhone, iPad or Mac?
- Enable Lockdown Mode in iOS 16 and iPadOS 16
- How To Turn Off Lockdown Mode on iPhone or iPad
- How to Enable Lockdown Mode in macOS Ventura
- Disable Lockdown Mode on Mac
- What Features Get Disabled with Lockdown Mode Enabled?
- Frequently Asked Questions
- To Conclude
For Apple, security and privacy have been an utmost priority. The company has now taken this security to the next level by introducing a new lockdown mode feature.
Apple has announced lockdown mode and it is available on devices running iOS 16 or later, iPadOS 16 or later and macOS Ventura or later.
Wondering what does lockdown mode do? Well, the feature makes it harder for hackers to compromise your iOS device or Mac through highly targeted attacks. However, you will have to turn on the feature to actually enable it because it doesn’t set by default.
Here is what you might want to know about Lockdown Mode but before diving into details let’s find out what is iPhone lockdown mode.
What Does Lockdown Mode Do On iPhone, iPad or Mac?
As per Apple’s statement, Lockdown Mode is a digital privacy option that offers an ‘extreme’ level of protection for a small number of users facing grave, targeted threats.
There are various viruses and spyware that general people face however, most people don’t get targeted by mercenary spyware and cyberattacks.
However, a small percentage of the population faces complex digital threats or cyber-attacks due to their personality or profession. The Lockdown Mode protects such people from mercenary spyware and cyberattacks.
Though the feature is not restricted to a certain group, so you can also take advantage of the Lockdown mode.
Moving forward, let us find out how you can turn on lockdown mode on iPhone.
Along with Lockdown Mode in iOS 16, Apple has also introduced another safety enhancing feature called Safety Check for iPhone, which enables users to quickly revoke access to their personal data and information from people and apps when they are in danger.
Enable Lockdown Mode in iOS 16 and iPadOS 16
As mentioned earlier, the Lockdown Mode only works on devices running iOS 16, iPadOS 16, and macOS Ventura. Here’s a comprehensive guide on enabling Lockdown Mode on your iPhone or iPad
Step 1. Go to Settings app.
Step 2. Tap on to Privacy & Security.
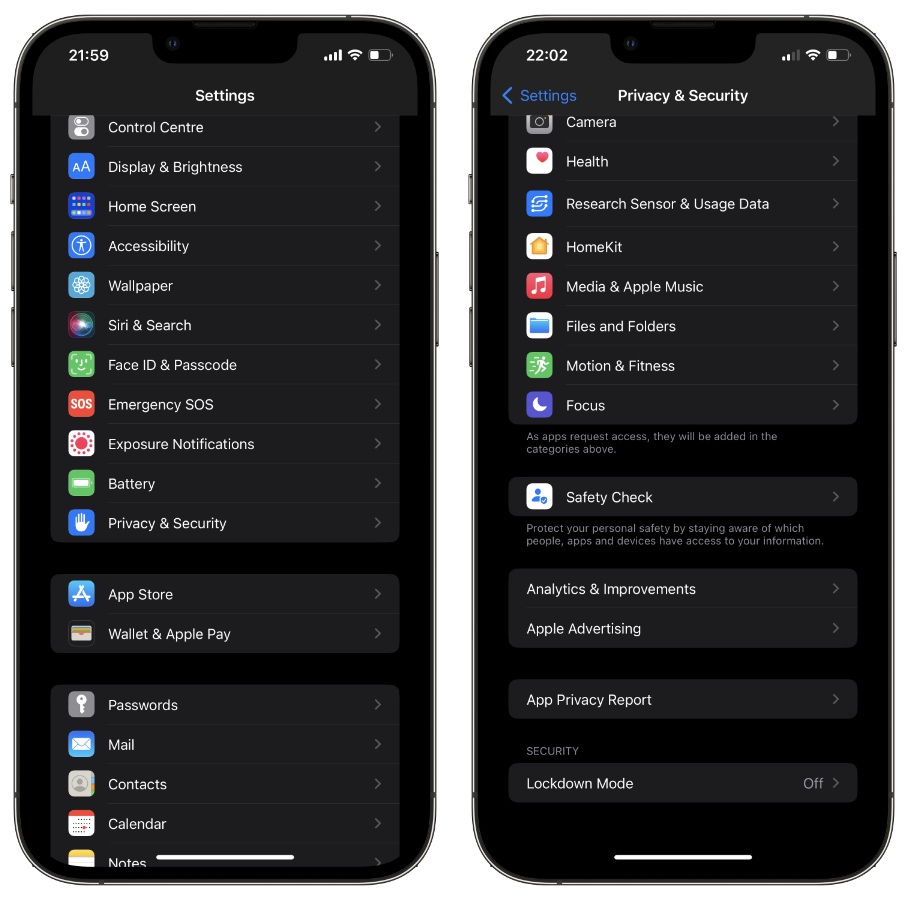
Step 3. Scroll down and tap on Lockdown Mode.
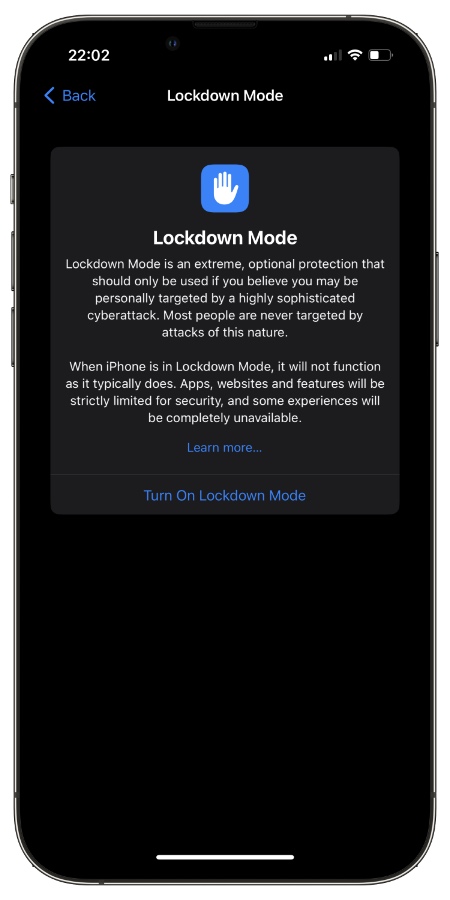
Step 4. Next tap on Turn On Lockdown Mode.
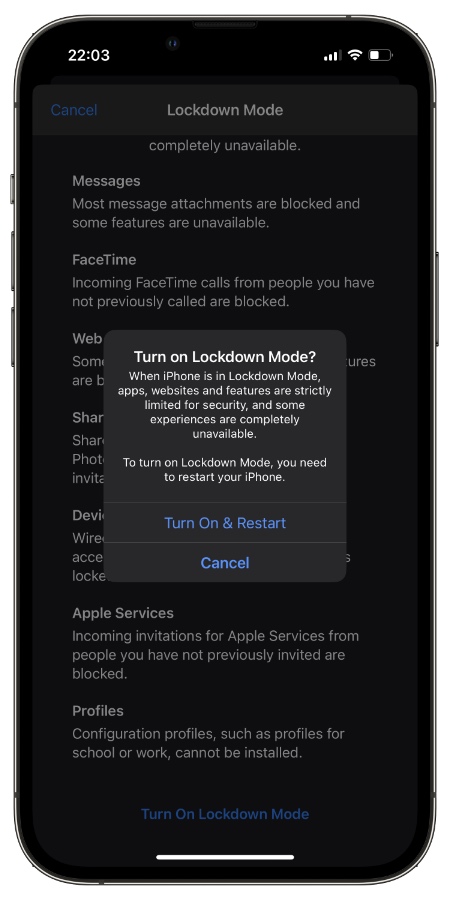
Step 5. On the next page scroll all the way down and tap on ‘Turn On Lockdown Mode’ option once again.
Step 6. Once done, tap Turn On & Restart.
Step 7. Enter your iPhone’s passcode and wait for your iPhone to restart.
Once your device restarts, it will enter the Lockdown Mode. You can follow the same steps to deactivate Lockdown Mode.
How To Turn Off Lockdown Mode on iPhone or iPad
You can follow these steps in order to turn off Lockdown Mode on your iPhone.
Step 1. Open Settings and go to Privacy & Security.
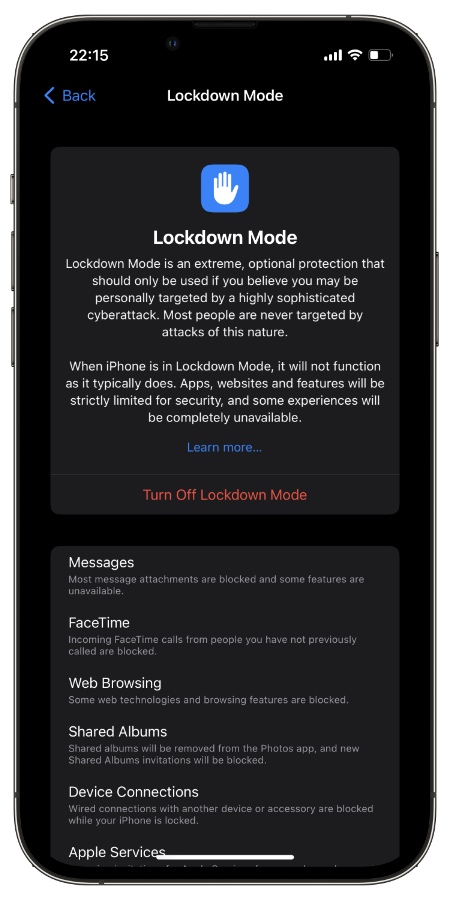
Step 2. On Privacy & Secuirty page scroll all the way down and tap on Lockdown mode.
Step 3. Next tap on ‘Turn Off Lockdown Mode‘ option.
Step 4. Confirm by tapping on ‘Turn Off & Restart‘.
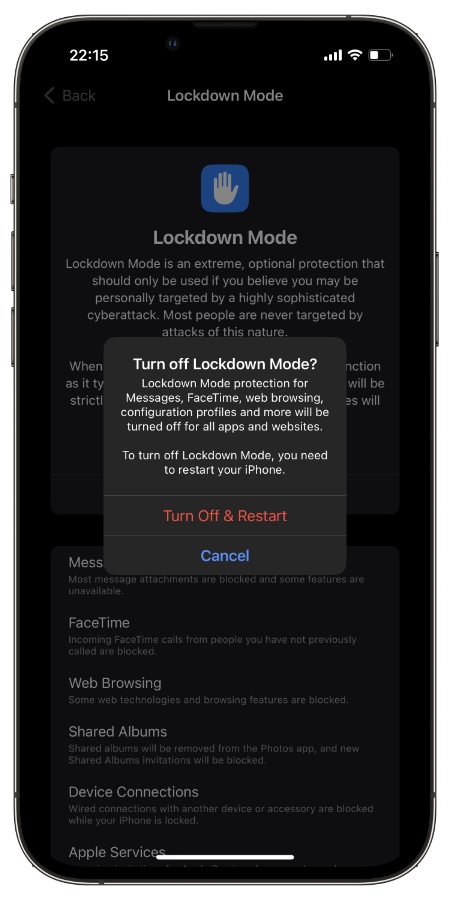
Step 5. Enter your iPhone’s passcode to proceed.
This is how you can turn off Lockdown mode on iPhone or iPad and disable this security feature.
How to Enable Lockdown Mode in macOS Ventura
You can follow these steps to enable Lockdown Mode on Mac.
Step 1. From the top menu click on System Settings.
Step 2. Then go to Privacy & Security.
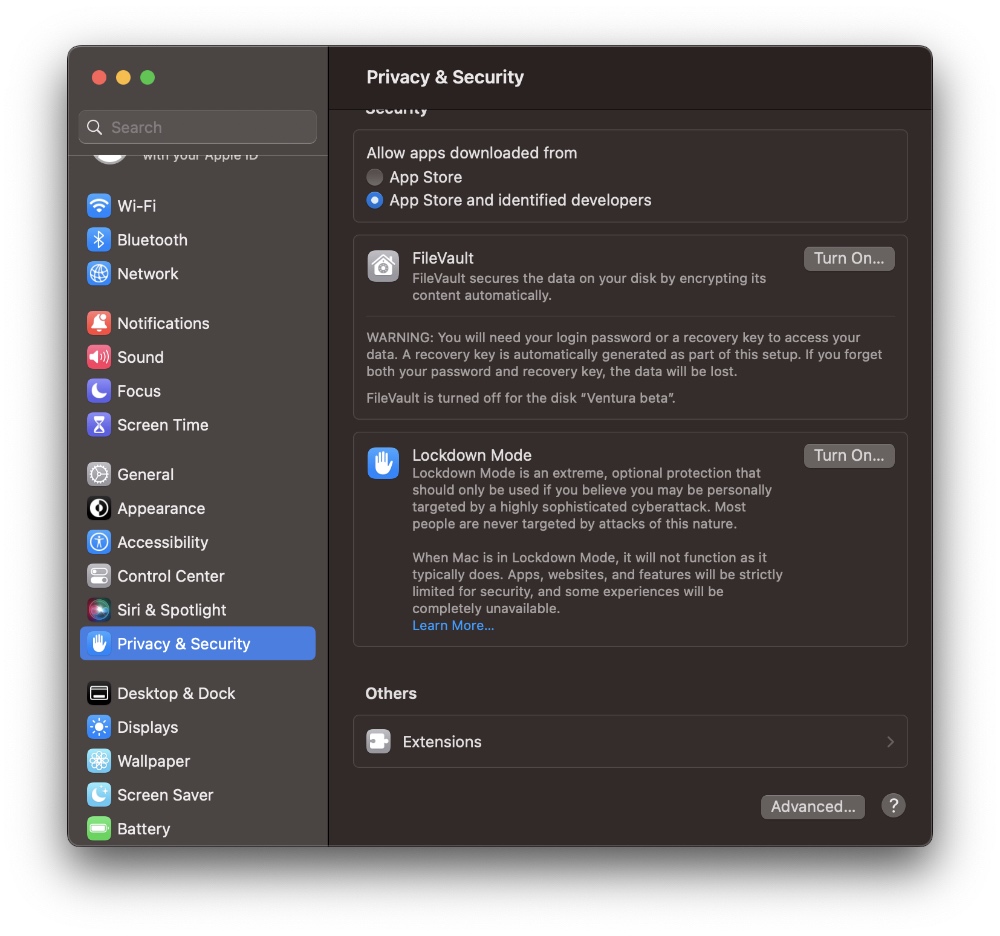
Step 3. Scroll down and click on Lockdown Mode.
Step 4. Now click on ‘Turn On…‘ button located next to Lockdown Mode.
Step 5. Once done, click Turn On & Restart.
Disable Lockdown Mode on Mac
You can easily disable Lockdown mode on your Mac with these steps.
Step 1. Open System Settings and click on Privacy & Security from sidepane.
Step 2. Next click on the Turn Off button located next to Lockdown mode.
Step 3. Confirm and restart your Mac.
What Features Get Disabled with Lockdown Mode Enabled?
Lockdown mode disables various features to protect the device to an extent that otherwise wouldn’t be compulsory.
We have listed down some of the features that get disabled when you enable the Lockdown mode:
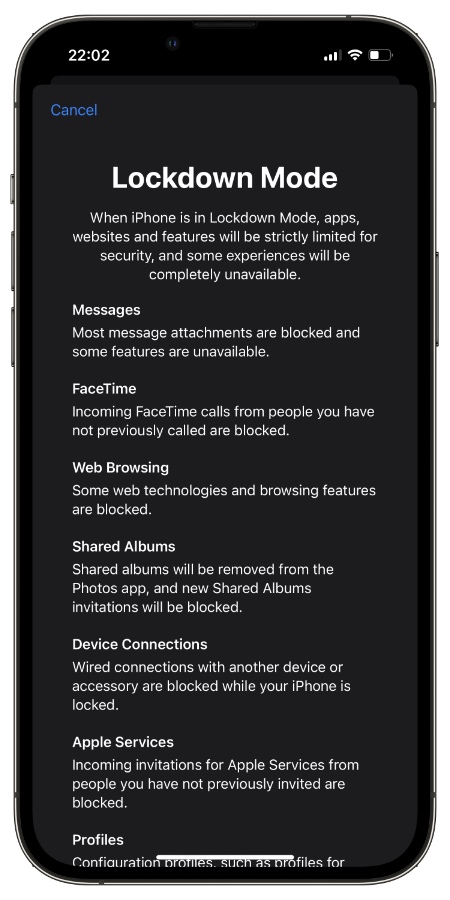
- Messages: Message attachments except for images are blocked. Link previews within the Messages app are disabled by default.
- FaceTime: FaceTime calls from people you haven’t called before are automatically blocked.
- Web browsing: Complex web technologies are disabled unless an exception is made by the user.
- Shared Albums: After enabling Lockdown mode all Shared Albums will be removed from the Photos app and iOS will block any new shared albums invitations.
- Device Connections: When the iPhone is locked, no wired connections are allowed with computers or accessories.
- Apple Services: Invitations from individuals who haven’t invited you formerly to Apple Services are blocked.
- Profiles: One is unable to install Configuration Profiles from Work or School when Lockdown mode is enabled. Also, the device cannot enrol itself in MDM (Mobile Device Management) mode when in Lockdown Mode.
Frequently Asked Questions
Question: Can I turn off Lockdown Mode on iPhone or iPad after turning it on?
Answer: Yes, you can disable the Lockdown Mode after you have enabled it by going to Settings -> Privacy & Security -> Lockdown Mode. There you will find option to turn this feature off.
Question: Is iPhone Lockdown mode available in my country?
Answer: iPhone’s Lockdown mode is available in all regions, so no matter which country you are in you can enable Lockdown mode on iPhone by following the instructions given above.
Question: Should I use Lockdown mode to stop my iPhone from getting hacked?
Answer: Even though the purpose of Lockdown mode on iPhone is to protect user devices from spyware and cyberattacks, the feature offers ‘extreme’ level of protection not required by everyday users. The feature is specifically designed for high risk individuals whose profession make them target of targeted attacks.
To Conclude
That’s everything that you needed to know about the lockdown mode. If you think that your device can face a digital threat, enable lockdown mode immediately following the above-mentioned steps.
If you have any queries, let us know in the comments below.

